You might have accidentally deleted images on the iPhone and later realized there was no backup. This situation can be stressful, and you may think you can retrieve them from the Recently Deleted folder. In most cases, photos seem recoverable to you, but the time limit is the real constraint.
Thus, this guide explains iPhone data recovery options for images and uncovers the Recently Deleted limit. Whether you have no backup or lost images on your iPhone permanently, learn how tools like Dr.Fone – Data Recovery (iOS) can save the day.
Part 1. Common Scenarios: Deleted By Mistake, Update Issues
Before you learn how to recover deleted photos from iPhone, it’s important to understand how you lost them. According to the Apple Discussion, about 24% of users lose images due to accidental deletion, and 28% due to cloud sync issues. When you try to free up space, a single accidental tap can move media files to the “Recently Deleted” folder.
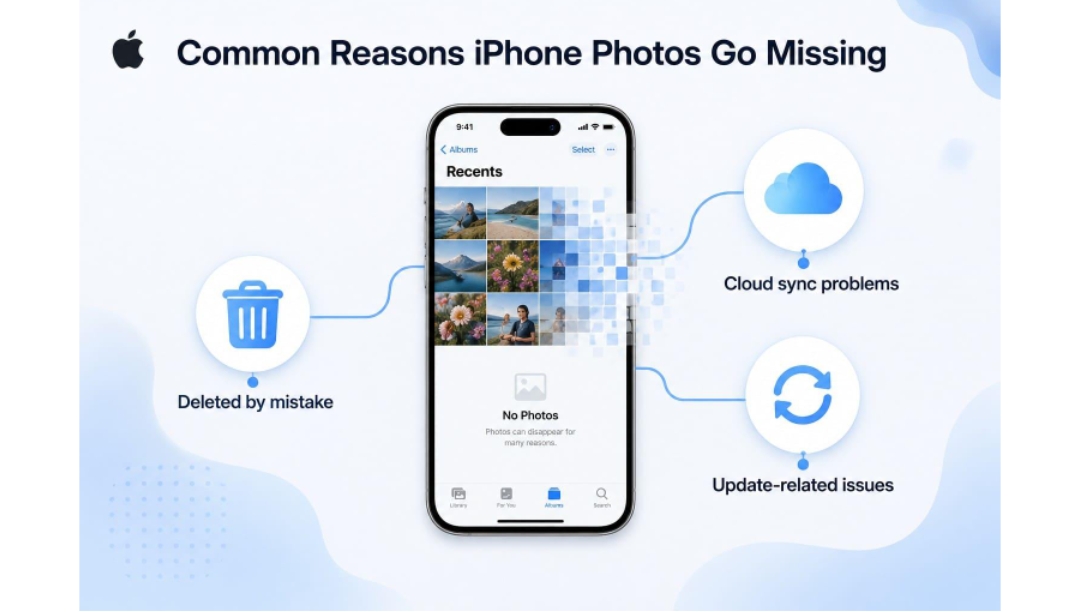
In most cases, an iOS update can also trigger glitches and lead to data loss. Reports indicate that about 18% of iOS users face this issue, and it seems to occur mainly after the iOS 27 Developer Beta update.
Part 2. What Happens When You Delete a Photo on an iPhone?
If you want to understand iPhone data recovery, let’s look at what happens when your images are deleted. When you tap the Delete button, your image is moved from the Photo Library to the Recently Deleted folder for 30 days. If you don’t restore the media within this time, iOS permanently removes them from the device.
How to Restore Images Within 30 Days [Recently Deleted Folder]
So, for those who notice that the images are gone within 30 days, here is how they can recover them from their iPhone:
Step 1. Go to the “Collections” tab in the Photos app and choose the “Utilities” folder. Tap on the “Recently Deleted” folder and pick the “View Album” option on the new interface.
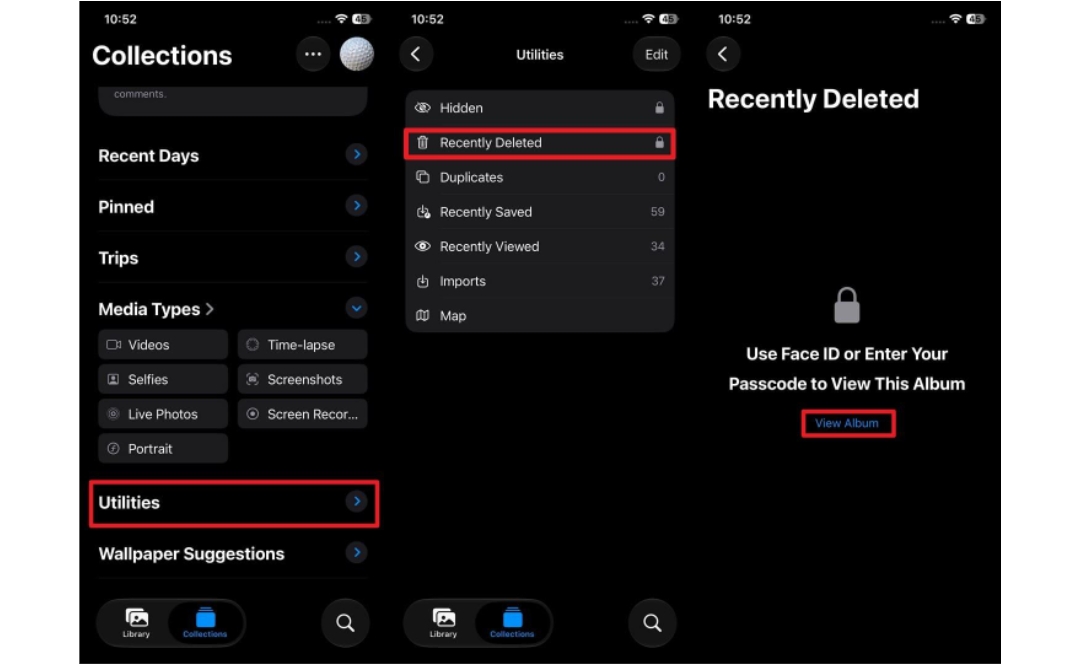
Step 2. Enter the device passcode or Face ID, then choose the “Select” option at the top to pick the images you want to restore. Press the “Three Dots” icon at the top, then choose the “Recover” option to restore media within 30 days.

Part 3. Why Use the Best iPhone Data Recovery Software?
If you have surpassed the 30-day limit and have no backup, the best iPhone data recovery software can help. This is because these tools can detect the leftover image data from the device before it is overwritten. Most of all, they let you preview the image you want to restore and save it to your phone or PC.
What is the Best iPhone Data Recovery Software?
With 22+ years of expertise, Dr.Fone – Data Recovery (iOS) is considered the best option to recover data from your device, iCloud, iTunes, or local backups. With its 8 overall recovery modes, you can restore 35+ data types and save them to both phone and PC. As for the images and other data types, it uses a read-only scan to save the existing phone data, and the scan is free.
In addition, users can preview the images they want to export to the device and pick the desired location. Unlike other tools, it does not limit export options and is compatible with the latest iOS versions and models, like iPhone 17 series and iOS 27. Most of all, you get a clear, complete guide and weekly updates on all upcoming iOS models.
Part 4. Step-by-Step: How to Recover Deleted Photos from iPhone Using Dr.Fone
To know how to recover deleted photos from iPhone without backup via Dr.Fone, this section is for you. Here, all the tool’s claims are tested in detail to help you decide if it’s the ideal data recovery solution:
Step 1. Choose to Recover Data from an iOS Device
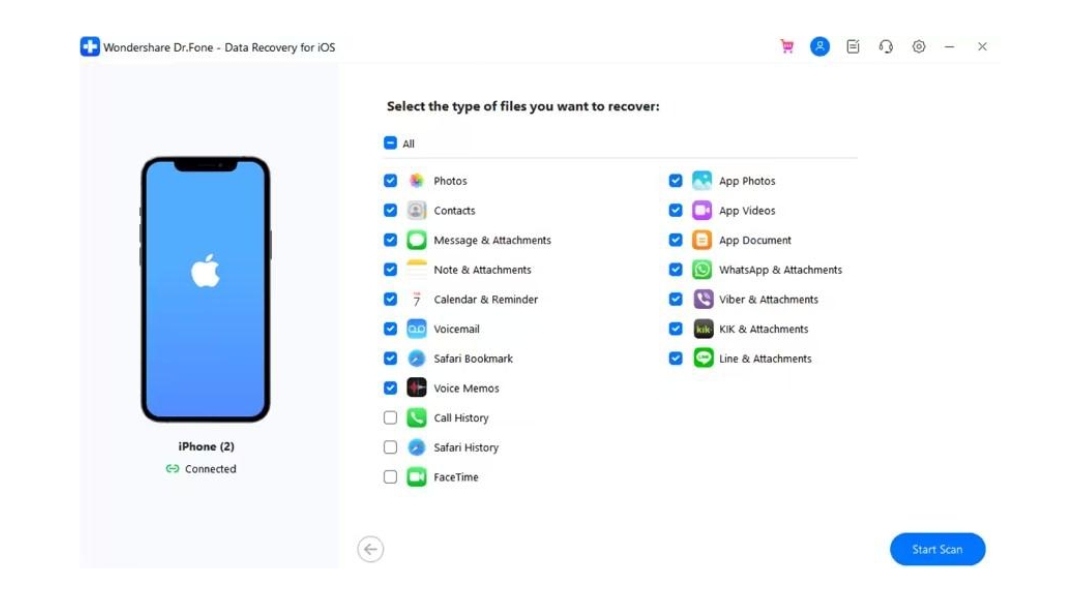
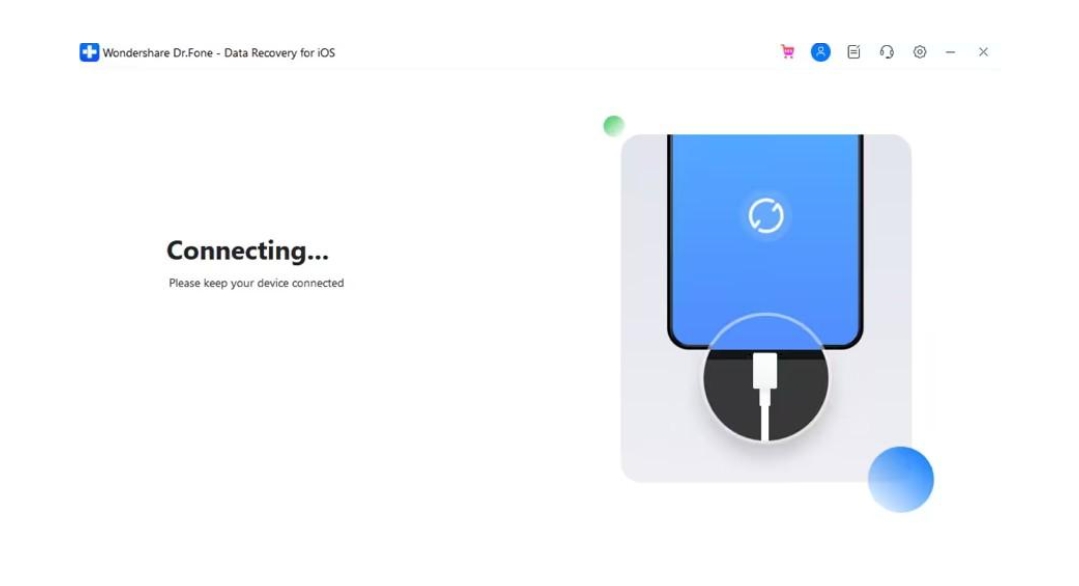
In the iPhone Data Recovery tool, choose the “Recover Data from an iOS Device” option, then connect the device when prompted.
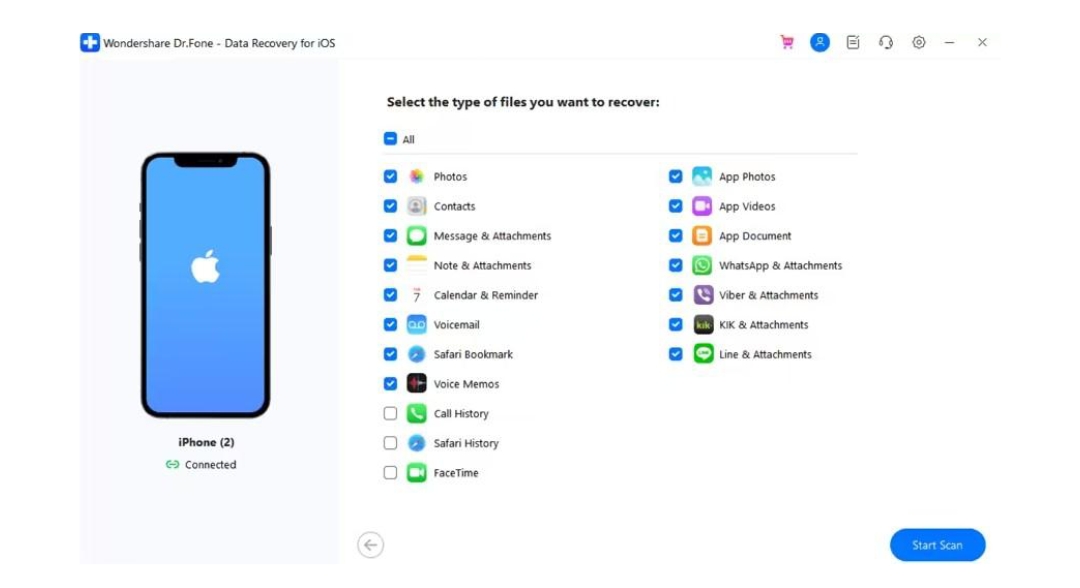
Step 2. Select Photos to Start Read-Only Scan for iOS
When it displays the available data types, select “Photos” from the list, then tap the “Start Scan” button to continue.
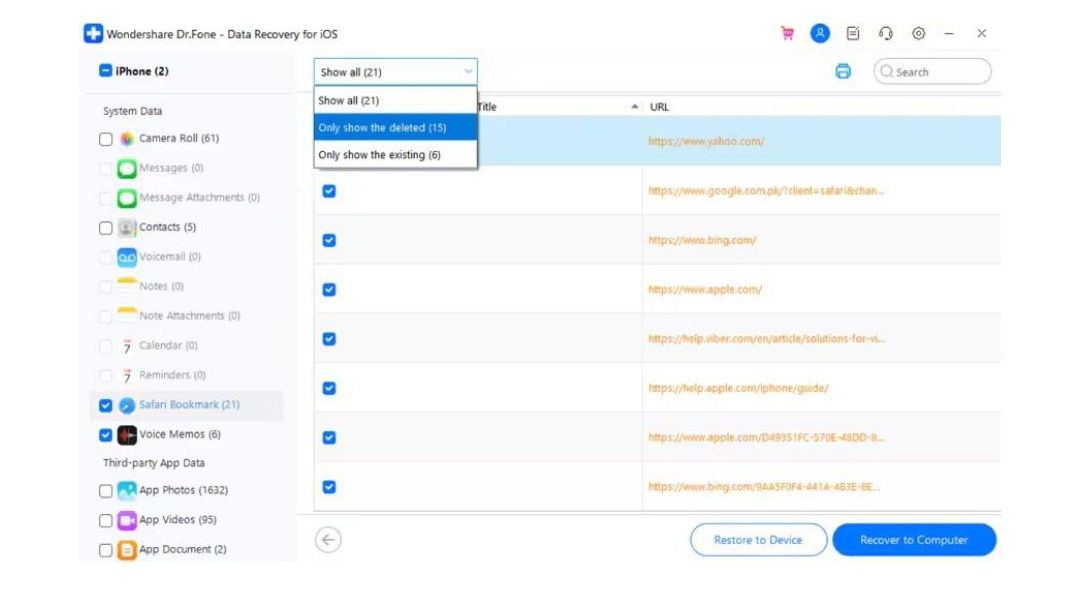
Step 3. Choose to Restore Data to an iOS Device or PC
As the read-only scan concludes, expand the “Show All” menu to preview and filter the images, then select the export options provided.
Part 5. Tips to Avoid Future Photo Loss on iPhone
Now that you know about the iPhone data recovery without backup, you might want to avoid image loss in the future. In this case, glance at the 5 mentioned tips and learn how effective they can be in 2026:
| Tip | Action / Steps | Benefit |
| Turn on iCloud Photos | Go to Settings > Apple ID > iCloud > Photos, then enable “Sync This iPhone.” | Automatically syncs and stores photos across Apple devices. |
| Enable iCloud Backup (If You Don’t Want to Use iCloud Photos) | Open Settings > Apple ID > iCloud > iCloud Backup and turn it on. | Creates regular backups that can help restore lost photos. |
| Use Regular Backups (iTunes/Finder) | Connect your iPhone to a computer and create a backup using Finder or iTunes. | Keep a local copy of your photos and data. |
| Check Before Deleting | Review selected photos and albums carefully before tapping Delete. | Helps prevent accidental photo loss. |
| Use Extra Cloud Storage | Install apps like Google Photos or Microsoft OneDrive and enable photo backup. | Provides another photo backup option alongside iCloud. |
Final Thoughts
To sum up, iPhone data recovery without a backup is possible with the best iPhone data recovery software. Hence, Dr.Fone – Data Recovery (iOS) is the suggested choice to retrieve 35+ data types from iDevice, iCloud (Backup, Sync, Drive), or iTunes.