Removing an old bathroom vanity and installing a stylish new one has the potential to totally remake your bathroom. Not only is this a great idea if you’re going to be putting your home on the market soon, but it’s also a nice way to create more visual interest and enjoyment in your personal oasis for years to come.
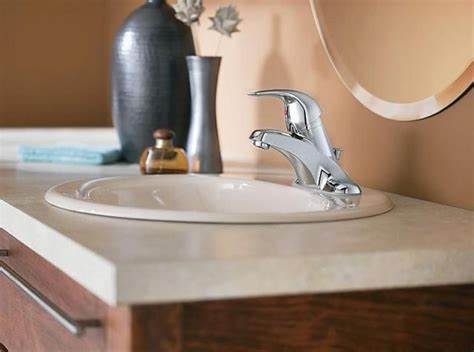
As part of installing a new vanity, you will also be installing a new faucet. The single handle cartridge shower faucet are a popular choice for office and baths and come in a seemingly endless variety of styles, so while you should always follow the instructions that come with your faucet, this guide should give you enough information to proceed confidently.
Installing the faucet takes patience and diligence to fit all the pieces together, but most homeowners can do it entirely on their own (and save money in the process).
What You’ll Need
Equipment / Tools
- Plumber’s putty or silicone caulk
- Rubbing alcohol
- Phillips-head screwdriver
- 2 Adjustable wrenches
- Basin wrench (if installing the faucet with vanity top already in place)
Materials
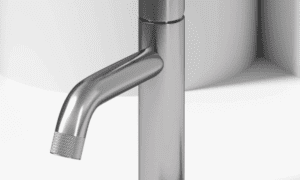
- 4-inch centerset single-handle cartridge faucet
- Water supply lines
Instructions
Insert the Faucet Into the Vanity Top
Start by attaching the mounting brackets to threaded rods on each side of the faucet. Fasten the retaining nuts, leaving a few threads exposed. Place the plastic gasket on top of the vanity top and over the sink holes, making sure to correctly orient the gasket.
Carefully insert the commercial water faucet body and threaded rods into the faucet holes by angling the mounting brackets so they can fit through the mounting holes. Ensure flush and proper alignment of the faucet onto the plastic gasket.
Fasten the Faucet to the Vanity Top
Secure the faucet to the vanity top by tightening the mounting brackets flush against the underside of the top, making sure the bracket spans the faucet hole completely. You can use an adjustable or closed-end wrench or a basin wrench if space is limited.
Attach the Water Supply Lines
Once the faucet is attached to the top, attach the hot and cold water supply lines to the faucet. The supply lines will have a rubber washer on one end. That is the end that attaches to the faucet hot/cold water lines. Snug the connection but do not over-tighten.
If you are executing this project with the countertop off, be sure the water lines come up through the middle of the vanity cabinet.
Attach and Tighten the Sink Drain Flange
Attach the sink drain flange to the vanity sink by sealing the underside of the drain flange with a waterproofing sealant. You can use plumber’s putty. An alternative to plumber’s putty is to use clear silicone caulk around the perimeter of the drain.
Fasten the drain flange to the sink by securely tightening the large retaining nut to the drain flange tailpiece on the underside of the counter.
Clean Up Any Residual Sealant
Flip the top over (if you’re working with an unattached counter) and clean any putty or caulk residue which has oozed out from under the drain flange with rubbing alcohol.
Attach the O-Ring and Pop-Up Drain Tailpiece
Place the rubber O-ring onto the drain flange tailpiece. It will seal the connection to the pop-up tailpiece.
Tighten the pop-up tailpiece with the pop-up opening facing the rear.
Insert the Pop-Up Ball/Pivot Rod
Insert the pop-up ball and pivot rod into the pop-up tailpiece. Make sure the pivot rod is inserted into the little hole at the bottom of the pop-up drain piece. Replace the pivot rod retaining nut and finger tighten.
Install the Drain Lift Rod
A clevis bolt secures the lift rod bracket to the lift rod, which controls the pop-up drain.
During the final adjustment of the pop-up drain, the final location of the clevis bolt attachment will be determined by the placement of the lift rod through the hole on top of the faucet.
Assemble the pop-up drain by attaching the lift rod to the pivot rod, then the lift rod to the pivot rod.
Adjust the Pop-Up to 1/2-Inch Action
Adjust the height of the pop-up drain so it is raised 1/2 inch when the lift rod is fully depressed and is sealed against the sink drain flange when the lift rod is raised. You may have to alter the location of the clevis bolt and/or the lift rod clip to get the proper action for the pop-up drain.
Install the Assembled Sink/Faucet Into Vanity
With the faucet installed into the sink, install the vanity top onto the bathroom vanity.