There is a specific kind of dread that creeps in when a client or a boss says, “Can you just make a quick visual for this?” For anyone whose expertise lies in code, spreadsheets, or strategy rather than in kerning and color theory, that question is a professional hazard. You know the result will be mediocre at best. You know you will spend hours wrestling with software that was not built for you. And you know that, in the end, you will probably still have to ask someone else for help. That was my reality until I started using Image 2 as a practical workaround. It did not turn me into a designer. It just made my visual output good enough to ship.
The turning point came during a branding project for a small coffee roaster. The client handed me a ballpoint-pen sketch on a napkin—a lopsided oval with two curved lines that barely resembled a coffee bean—and said, “This is the vibe.” No mood board, no color palette, just a crumpled piece of paper and a voice note about “morning mist” and “handmade feel.” A professional designer would have taken that brief and run with it. I took that brief and panicked. But I had heard enough chatter about a new AI image tool to give it a shot. The goal was not to win a design award. The goal was to deliver something credible within a day. What followed changed how I think about AI in creative workflows.
A Developer’s Framework for Evaluating an Image Tool
My background is in backend architecture, not visual aesthetics. I judge tools by reliability, repeatability, and how much friction they introduce into a process. When I approached this platform, I applied the same criteria I would use for any piece of infrastructure. Can I get a consistent result from a given input? Does the output degrade unpredictably? How much manual intervention is required to turn a rough output into a usable asset? These are not the questions a designer would ask, but they are the questions that matter when you are trying to integrate a tool into a production workflow.
The Input Preparation Test
Garbage in, garbage out. That rule applies to AI just as much as it applies to databases. The platform accepts JPG and PNG uploads, with a recommended minimum resolution of 1024 pixels on the short side. In my testing, I found that feeding it a clean, well-preprocessed image made a dramatic difference in the final output. A napkin sketch, scanned at 300 dpi and cleaned up with a simple threshold filter, produced a much more coherent generation than a raw phone photo of the same sketch.
This is not a flaw in the tool. It is a reflection of reality. AI image generation is not magic. It is pattern recognition applied to visual data. If the input is noisy or ambiguous, the output will be noisy and ambiguous. The platform handles this honestly. It does not promise to polish a turd. It gives you the tools to work with your source material, but it expects you to bring something worth working with.
The Prompt Translation Test
The next challenge was translating vague, human language into something the AI could act on. The client’s brief— “morning mist, handmade feel, not too polished”—is not a prompt. It is a feeling. I had to break it down into concrete visual dimensions: color temperature, texture density, edge softness, and composition. The platform responded well to natural language prompts, which meant I did not have to learn a specialized syntax. I could describe what I wanted in plain English and iterate from there.
This is where the tool really distinguished itself from earlier AI image generators. The prompt engineering overhead was significantly lower. I did not need to memorize a library of style keywords or camera settings. I just described the scene, the lighting, and the mood, and the platform produced a reasonable first draft. From that draft, I could refine with additional natural-language instructions.
A Four-Step Workflow That Actually Makes Sense
The platform’s operational logic is straightforward. It does not require a manual. It does not hide essential functions behind nested menus. The workflow follows a logical progression that mirrors how a non-designer would actually approach a visual task.
Step 1: Start with What You Have
Text, Image, or Multiple References
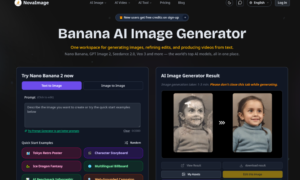
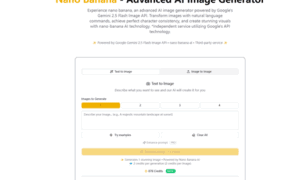
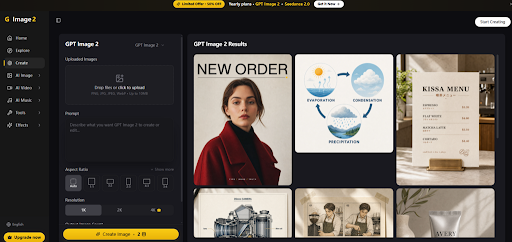
The entry point is flexible. You can type a prompt, upload a single image, or upload multiple reference images. For the coffee brand project, I started with the scanned napkin sketch as a compositional reference and added a text prompt to define the style. The platform accepted both inputs simultaneously and generated results that balanced the sketch’s layout with the described aesthetic.
This flexibility is important for non-designers because our starting materials are rarely clean. We have rough sketches, low-res photos, and half-formed ideas. A tool that requires a pristine input is a tool we cannot use. This one accepts the mess and works with it.
Step 2: Describe the Change You Want
Natural-Language Editing Without Layers
Once the initial image was generated, I could edit it by simply describing what I wanted to change. The platform supports natural-language instructions for tasks like background removal, color adjustment, and element replacement. I did not need to learn masking or layering. I just typed “make the background warmer” or “move the logo to the top right” and the tool applied the edit.
This is not a replacement for professional editing software. It is a different category of tool altogether. It is for people who need to make changes quickly without investing hours in learning a complex interface. For the coffee brand, I used this feature to adjust the positioning of the logo across multiple variations. Each change took seconds.
Step 3: Generate and Export
From Image to Video Without Switching Tabs
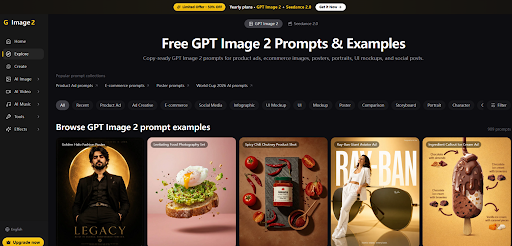
The platform also supports image-to-video generation. If you need a short animated clip based on a still image, you can generate it directly without exporting and re-importing into a separate video tool. For social media content, this is a significant time-saver. I tested it with a product shot and generated a three-second rotation loop that looked polished enough for an Instagram story.
Step 4: Refine Until It Works
Iteration Without Starting Over
The final step is iteration. The platform allows you to build on previous generations rather than starting from scratch each time. If a detail is wrong, you can fix it with a new instruction rather than regenerating the entire image. This iterative capability is what makes the tool practical for real-world use. You do not have to get it right on the first try. You just have to get closer with each pass.
Where This Workflow Fits Different Creative Needs
Based on my experience, the platform is best suited for specific scenarios rather than being a universal solution.
For developers and product managers who need to create wireframes, mockups, or presentation visuals without a design team, the tool provides a fast path from concept to asset. The learning curve is shallow enough that you can produce usable results in your first session.
For small business owners and e-commerce sellers who need product photos, social media graphics, and ad creatives, the platform reduces the need to hire freelancers for every visual task. The quality is sufficient for most commercial applications, and the speed is dramatically faster than traditional workflows.
For content creators and marketers who produce large volumes of visual material, the platform’s efficiency gains are substantial. You can generate multiple variations of an image, edit them in place, and export them without ever leaving the interface.
A Practical Comparison
| Aspect | Image 2 | Traditional Design Tools |
| Learning Curve | Shallow; plain language works | Steep; requires training |
| Input Flexibility | Text, single image, or multiple references | Often limited to specific file types |
| Editing Method | Natural-language instructions | Menu-driven or layer-based |
| Iteration Speed | Fast; changes apply incrementally | Slow; often requires full regeneration |
| Output Quality | Good for most commercial use | Excellent with expert skill |
This comparison is not about declaring one approach superior. It is about recognizing that different tools serve different workflows. If you have the time and skill to master professional design software, you will get better results. If you need to produce good-enough visuals quickly and consistently, the integrated approach has clear advantages.
What the Platform Does Not Promise
Honest evaluation requires acknowledging the limitations. The platform is not a substitute for professional design expertise. Complex compositions with multiple subjects or fine details may require several attempts. The output quality depends heavily on the quality of the input and the clarity of the prompt. Vague instructions produce vague results. There is no way around that.
The video generation feature is best understood as a rapid prototyping tool rather than a production-grade solution. For users who need batch processing or API access, the current web-based workflow may feel limiting. And while the platform offers free credits on signup, heavier usage will require a paid plan.
These are not fatal flaws. They are boundaries that help set realistic expectations. A tool that claims to do everything perfectly is usually a tool that does nothing well. This one is honest about its scope, and that honesty is part of what makes it reliable.
When the Tool Stops Being the Excuse
The most valuable outcome of using this platform was not the final images themselves. It was the shift in how I approached visual tasks. Instead of dreading them, I started seeing them as solvable problems. I had a tool that could take my rough inputs and turn them into something presentable. I had a workflow that did not punish me for being a non-designer.
That is the real measure of a practical tool. It does not make you an expert in a new field. It makes you competent enough to handle the tasks that come your way. For anyone who has ever felt paralyzed by a blank canvas or a vague visual brief, GPT Image 2 offers a way forward. It is not the end of the design journey. It is the beginning of a more productive one.