When you’re working with your camera, there are a few things as important as lighting. You can have the most expensive camera in the world, but if it’s not being used in the right way, you won’t achieve the best results possible.
If you want to use lighting to your advantage, consider using two LED lights to achieve some beautiful effects on your photographs and video. Here’s how!
The Importance Of Quality Lighting
Quality lighting is important in photography because it can help set the mood of a photo and make the subject stand out. Good lighting can make a big difference in the overall look and feel of your photos. It will be difficult to achieve good lighting with just one light source, but by using two lights you can take full control over how the light falls on your subject.
You will need one light as the main or key light, which shines from one side of the camera, and another as a fill light that fills in any shadows created by this key light. If you are photographing someone standing straight onto the camera, then use a smaller softbox or reflector on the opposite side of them.
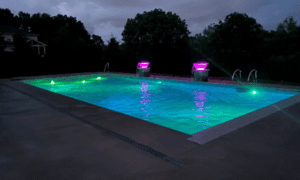
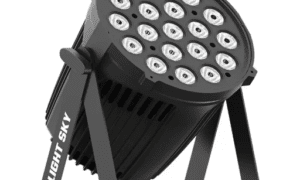
If they are turned at an angle then place both lights off-camera and adjust their height until they illuminate all sides of their face equally. For example, if they are facing away from you then put both lights above them shining down onto their backside. For quality lighting purchases, head towards Darkless LED, as they are leading suppliers in this field.
Light #1 – The Key Light
The key light is the main light that illuminates your subject. It’s usually placed at a 45-degree angle from the camera, on the same side as the subject’s dominant eye. For a moody portrait, we recommend using a softbox or octabox to diffuse the light and create a softer, more flattering look. But if you’re looking for an edgier look, you can use a bare bulb.
Light #2 – The Fill Light
The fill light is placed on the opposite side of the key light and is used to fill in the shadows on your subject’s face. By using fill light, you can create a more balanced image with less contrast. To set up your fill light, simply place it at a 45-degree angle from your subject and aim it towards their face.
Be sure not to overexpose your subject’s skin by adding too much light. You can adjust the distance between the fill light and your subject so that it will be closer or farther away depending on how much fill you want.
For example, if there are dark circles under your subject’s eyes, move the fill light closer. If there are specks of dirt on their face, move the fill light farther away. Make sure to have your camera’s settings ready to capture those moody images!
Use A Dark Background
A dark background will make your subject pop and help create a moody atmosphere. To get started, set up two LED lights on either side of your subject, pointing them towards the camera. Then, adjust the intensity and distance of the lights until you’re happy with the effect.
Remember, less is often more when it comes to moody portraits, so don’t go overboard with the lighting. You want just enough light to create some shadows and make your subject stand out from the background. For most situations, this would be at least one or two LED lights.
Position Your Lights For Contrast
When it comes to lighting a portrait, contrast is key. The interplay of light and shadow can create depth, dimension and drama in your image. To achieve this with LED lights, position one light on either side of your subject, pointing in towards their face.
This will create a sense of light and dark, making your subject pop against the background. You might want to move the lights farther away from your subject if you want more fill light – but be careful not to overexpose your images! As always, experiment with different positions and angles before shooting so you get a feel for what works best.
For example, I often like to turn the lights sideways or backwards for an edgier look. Experimenting with positioning will also help you decide which of your two lights needs to have its brightness adjusted up or down as well.
You’ll find that as long as both lights are set at the same power level, they should remain balanced no matter where they’re pointed in relation to each other.
Putting It All Together
Now that you know the basics of using two LED lights for your portraits, it’s time to put it all together. First, decide on the mood you want to create. Do you want a light and airy feel or a dark and moody look? Once you’ve decided on the overall mood, it’s time to start playing with light.
Purchasing the wrong type of light can make all the difference when it comes to your productivity and well-being. Darkless LED is a leading LED lights supplier committed to providing its customers with a wide range of products for any application including residential, commercial and industrial settings.