Stay Safe with Glitter
Hey there crafters! If you’re like me, you love using glitter to add a touch of magic to your projects. But before you start sprinkling it everywhere, it’s important to keep safety in mind. First and foremost, be sure to choose a non-toxic glitter product. Also, avoid inhaling or getting glitter in your eyes, and be sure to wash your hands thoroughly after working with it to remove any leftover particles.
Glitter Recycling: Yes, It’s a Thing!
Now, what about recycling glitter? While curbside recycling programs typically don’t accept glitter, there are specialized companies that offer glitter recycling services. If you’re interested in reducing waste and recycling glitter, do some research to find out what options are available in your area.
Mix Colors Like a Pro
Mixing paint colors is a crucial skill for artists and crafters alike. To get started, remember to begin with a small amount of paint and add more as needed. Use a color chart or wheel to help you mix colors accurately, and take your time when mixing to avoid undesired results. Experiment with different color ratios to achieve your desired shade, and don’t forget to add white or black paint to lighten or darken colors.
Get Creative with Glazing
Have you heard of glazing in painting? It’s a technique where a transparent layer of paint is applied over a dried layer of paint to create a luminous effect or shift in color. To achieve this, use a glaze medium to thin the paint and make it more transparent. This technique is commonly used in oil painting, but it can also be used in acrylic and watercolor painting.
In summary, be sure to stay safe when working with glitter, research glitter recycling options, experiment with mixing paint colors, and consider trying out glazing in your artwork. With these tips and tricks, your crafting projects are sure to sparkle and shine!
Click to follow galglitter cosmetic glitter manufacturer to know more about: https://www.galglitter.com.
Glitter can be a great way to add some sparkle to your art projects and crafts. But there are a few things you need to know about glitter so you can be sure that it’s safe to use on your project and won’t damage your work.
Paint or Glue
Tip: Always read the instructions before applying any paint or glue to your project, especially if you’re using glitter. If you follow the wrong instructions, the paint or glue may not bond to your project properly and you might end up with a bad finish.
Easiest Ways to Make a Wood Project Shiny & Sparkly
One of the easiest ways to make a wood project shiny and sparkly is to spray it with glitter. It works well on wooden projects like tables, chairs, trays and more that you want to keep shiny and sparkling for a long time.
To do this, you’ll need some white glue and a little bit of glitter. You can either use a simple white glue stick or you can also get some basic white glue that’s meant for wood projects.
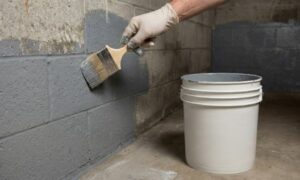
Depending on your project, you can either add a thin layer of glue or paint it and then spray the glitter on top before the paint dries. You can also use an inexpensive paintbrush to apply the glitter, or you can try a foam wedge to make sure that you don’t get any glitter stuck on your project.
Variety of Surfaces
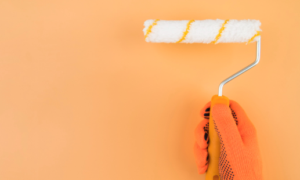
This is the most common and easiest way to get your glitter project done. It can be used on a variety of surfaces, including painted walls and ceilings. Just be aware that glitter paint requires more coats than standard emulsion or acrylic paint. The more coats you apply, the thicker your project will be.
For example, you might need four coats of the glitter paint to cover a small wall, so be sure to plan ahead if you’re going for a full coverage look.
Glitter Paint Application
You should also be aware that glitter can be quite messy, so you’ll probably have to spend some time cleaning up after you’re finished. It’s best to use a smooth surface for the glitter paint application and to set up a workspace that you can easily clean up after your work is complete.
Another thing to be aware of is the amount of time it will take for your glitter wall paint to dry and cure completely. This will depend on the type of paint you’re using, but it should be a couple of hours or more.
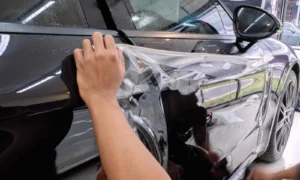
Lastly, you’ll need to clear coat the project after it’s finished to protect it from future wear and tear. This will give your project a nice finish and make it easier to maintain and store.
Final Thoughts:
Glitter can be a great addition to many different types of projects, from a simple DIY wall mural to a fancy party dress. It can add a fun and festive flair to any project, and can make the entire room feel more lively and upbeat.