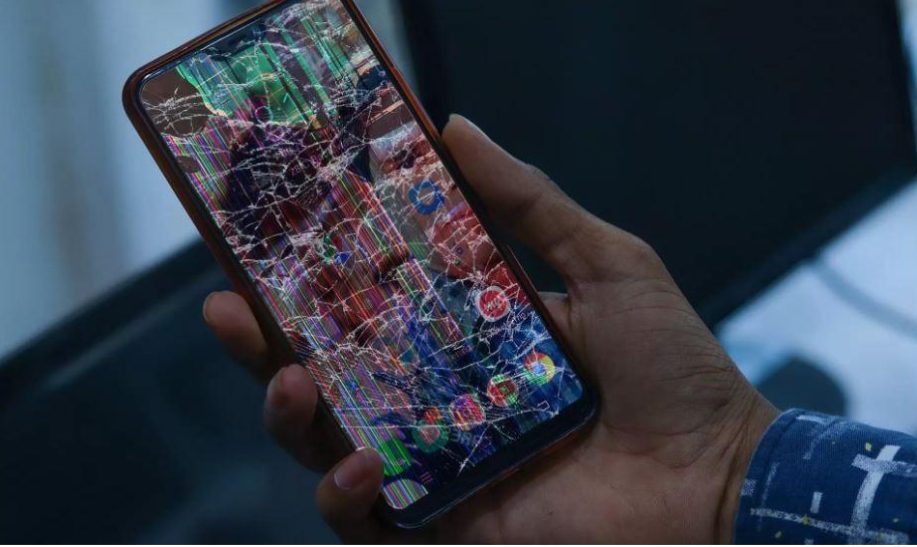
Dealing with a cracked-screen Android phone can be quite a hassle, but fear not, as there’s a way to view and manage your phone’s content through your computer.
A cracked screen can render your Android phone’s display unusable, making accessing your important files, messages, and data difficult.
However, by connecting your phone to your computer, you can gain control and visibility of your device, even with a damaged screen.
In this article, we will cover the essential steps to achieve this, from enabling USB debugging on your Android phone to installing the essential drivers on your computer.
By the end of this process, you’ll be able to easily access your screen-cracked Android phone through your computer, allowing you to retrieve your valuable information.
Part 1. Steps to Connect the Cracked Android Phone to a Computer
Here are the detailed steps to connect a screen-broken Android to a computer:
Enable USB Debugging on the Android Phone
Here’s how you can enable debugging on the Android phone.
- Go to your phone’s settings.
- Scroll down and tap on ‘About Phone’.
- Tap on ‘Software Information.’
- Press on ‘Build Number’ 7 times to enable developer options.
- Returning to settings, you will see a new option, ‘Developer Options’.
- Open ‘Developer Options’ and enable ‘USB Debugging.’
Install the Necessary Drivers on the Computer
- Visit the website of your phone’s manufacturer.
- Look for the section where they provide drivers for their devices.
- Download the appropriate driver for your device model and operating system.
- Run the downloaded file and follow the guidelines to install the driver.
Connect the Cracked Android Phone to the Computer Using a USB Cable
- Plug one end of the cable into your phone and the other into a USB port on your Computer.
- A notification showed on your device asking if you want to allow USB debugging with this Computer. Check ‘Always permit from this computer’ and tap ‘OK.’
- Your phone should now be connected to your PC.
Part 2. Using Android SDK and Adb to Mirror, the Cracked Android Screen on the Computer
Here’s a step-by-step guide on how to mirror a cracked Android screen on a computer using the Android SDK and ADB:
Before you begin, enable USB debugging on your Android phone. If your phone’s screen is cracked, you may need a USB OTG (On-The-Go) adapter and a USB mouse to navigate the phone’s settings.
Sure, here are the detailed steps to connect a cracked Android phone to a computer and mirror the screen onto the Computer:
Download and Install the Android SDK on the Computer
- Go to [Android Developers website] and download the latest version of Android Studio.
- Run the downloaded file and follow the guidelines to install Android Studio with its SDK.
- Launch Android Studio and select ‘Configure’ > ‘SDK Manager’.
- Check the boxes for ‘Android SDK Platform-Tools’ and ‘Android SDK Tools’ under the ‘SDK Tools’ tab.
- Press ‘OK’ to download and install the selected components.
Enable ADB on the Android Phone
- Ensure you have enabled USB debugging on your phone, as described in Part 1.
- Go to your phone’s settings > developer options > enable ‘USB Debugging (Security Settings)’.
- A pop-up will appear enquiring if you wish to allow ADB access from this Computer. Check ‘Always allow from this PC’ and tap ‘OK’.
Connect the Cracked Android Phone to the Computer and Open the Command Prompt/Terminal
- Attach your phone to your PC using a cable as described in Part 1.
- Open the command prompt on your Computer.
- Navigate to the folder where you installed the Android SDK platform tools. For example, on Windows, it may be `C:\Users\username\AppData\Local\Android\Sdk\platform-tools`.
- Type `adb devices` and press enter. You should see a list of connected devices with their serial numbers.
Use Adb Commands to Mirror the Screen Onto the Computer
- Type `adb shell screenrecord –output-format=h264 – | ffplay -` and press enter. This will use ADB to record your phone’s screen and play it on your Computer using FFmpeg.
- You should see your phone’s screen mirrored on your Computer in a new window.
- To stop mirroring, press Ctrl+C on your keyboard.
Part 3. Using Data Retrieve Third-Party Apps to View the Cracked Android Screen on the Computer
Here’s how to view screen-broken Android with the best third-party app-Wondershare Dr.Fone, on the Computer.
Dr.Fone is a comprehensive tool developed by Wondershare that offers various services, including data recovery, screen unlocking, system repair, data erasure, and more. It’s known for its high data recovery success rate in the industry.
How to Use Screen Mirroring on Android with Dr.Fone
Screen mirroring has become essential for various professions, such as students and office workers, as it allows you to easily share important information. Here’s how to do it:
Step 1: Install Dr.Fone Link
Begin by installing Dr.Fone Link to establish the connection.
Step 2: Access the Screen Mirroring Function on Dr.Fone
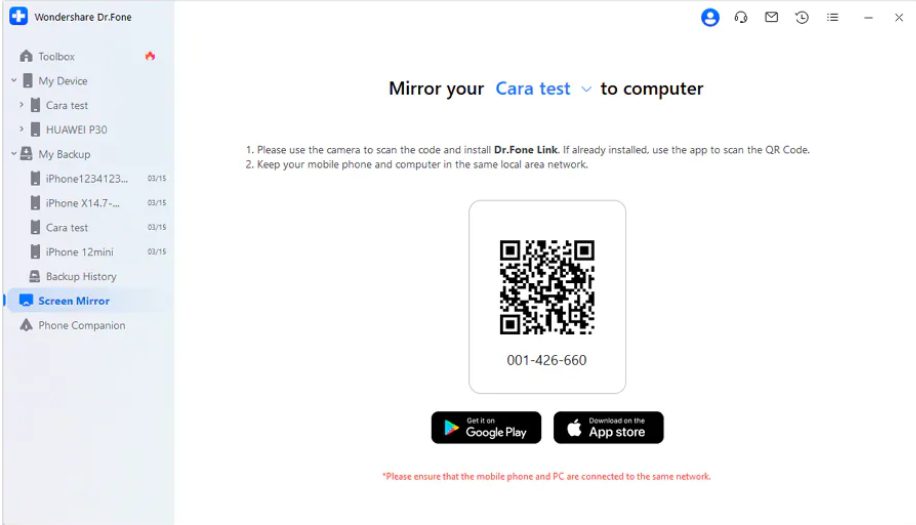
Launch Wondershare Dr.Fone and navigate to “My Device” > “Wireless.” Ensure your Android device is connected to Wi-Fi by scanning the QR code provided. This QR code will install Dr.Fone Link on your Android or establish a connection.
Once connected, go to the “Screen Mirror” section on the left panel. You’ll be driven to scan a QR code to mirror your Android to the Computer. Both devices should be on the same network for successful mirroring.
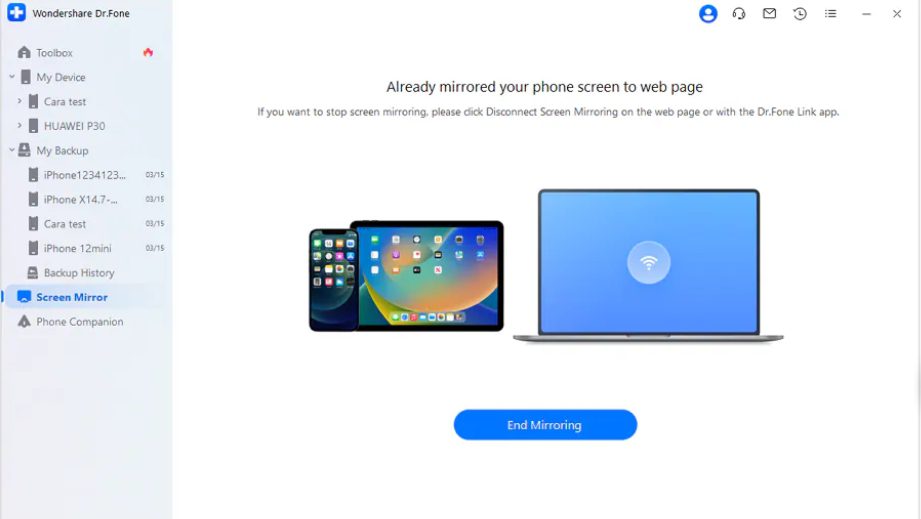
Step 3: Successfully Mirror Android to PC
Once your device is mirrored on the platform, you can disconnect the mirroring process by clicking the “End Mirroring” button in Dr.Fone.
Step 4: Now scan the QR Code on the Phone for a Wireless Connection
When establishing a screen mirroring connection on your Android device, tap the “Scan QR code” button at the top right. Scan the QR code displayed to establish a successful connection.
Step 5: Receive Prompt on Android for Connection
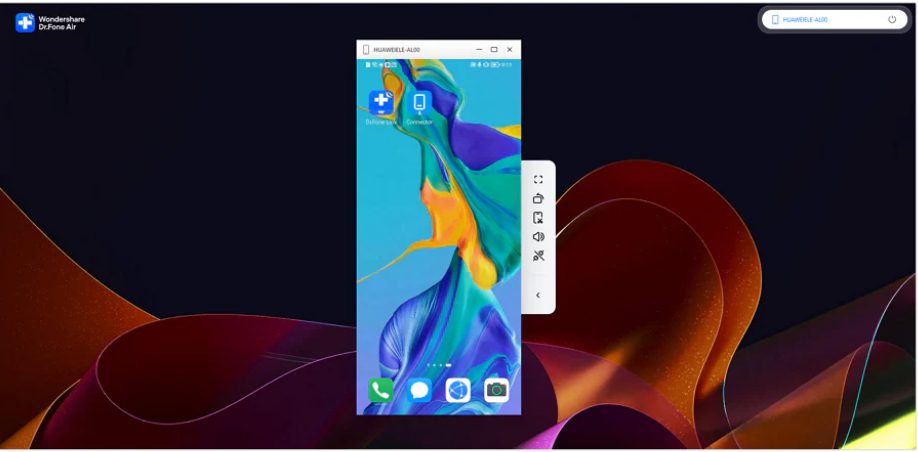
After successfully mirroring your device, you’ll see a dedicated wireless mirroring service associated with Dr.Fone. A button indicating that “Screen Mirroring is in progress” will appear on your Android screen.
Step 6: Use the Mirrored Android Screen on Dr.Fone
On your computer screen, you’ll find the mirrored display of your Android. Here, you can enable the speaker, change the screen orientation with the “Rotate” button, capture a screenshot with the “Screenshot” button, and end the entire mirroring process using the “Disconnect” button. Maximize the utility of your Android screen by mirroring it through these convenient features.
How to Recover Data With Dr.Fone
Step 1: Launch Dr.Fone and select ‘Data Recovery.’
Step 2: Connect your Android Device to the PC using a USB cable.
Step 3: Now, choose the files you wish to retrieve and start to scan the device.
Step 4: Preview the found files and recover them successfully.
Conclusion
In conclusion, when faced with a cracked Android phone screen, you have multiple avenues to access and view your device’s content on a computer.
The steps outlined in this guide offer a range of options, from the technical use of Android SDK and ADB for screen mirroring to the user-friendly approach of employing third-party apps like Dr.Fone, which not only mirrors your screen but also aids in data recovery.
The choice ultimately depends on your level of technical expertise and specific needs. Following these methods, you can regain control of your device and potentially retrieve valuable data from your screen-broken Android.


