We live in an age where we produce more digital content than ever. For many of us, a great deal of this content is in the form of photos: precious moments and memories snapped on an iPhone.
It is because of this that we must protect the information on the iPhone and backup your device regularly. This is so that if anything should happen to your iPhone, or if you accidentally delete some photos, your information is stored safely, allowing you to restore it to a new device.
The problem is that to restore data from a backup means to completely replace what data you have stored on the device currently – this could result in even more data lost. You may also just not wish to restore a complete backup to your new phone.
Here are 3 ways which are guaranteed to get you access to your lost or deleted iPhone photos, if the photos are stored in a backup.
- The first 2 methods detail how to perform a full restore of your backup from either iTunes or Finder on your computer, or from iCloud. As mentioned, your iPhone will be erased, and its data will be replaced with what is stored in the backup.
- The final method uses third-party software “iBackup Extractor”, which allows you to access a backup of your iPhone on your computer, and extract photos and other files. This is great because you will not need to perform a full restore or erase your iPhone to gain access to your photos.
How to restore an iPhone from a backup made to iCloud?
If you back up your iPhone to iCloud, you can restore a backup over your Wi-Fi network. Before you begin, you’ll need to make sure that you erase your iPhone’s content before you can restore from your backup (you can do this in Settings > General > Reset).
- Turn on your iPhone. If you have already erased your device, or you are setting up a new phone, you’ll be greeted with the iPhone setup process.
- Follow the setup until you reach the “Apps and Data” step. Here, choose “Restore from iCloud backup”.
- Enter your Apple ID details to sign into iCloud.
- Choose the backup which contains your lost/deleted photos.
- You may be asked to sign in with your Apple ID again to restore purchased apps. Make sure that your iPhone stays on and connected to Wi-Fi while the restore is in progress.
- Complete your iPhone setup.
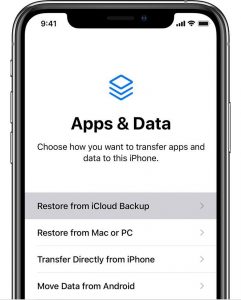
Image Credit: Apple
You can now open your Photos app on your iPhone and see all the photos that you have restored from your backup. The restore may continue in the background for a while, depending on the size of your backup, so make sure you remain connected to Wi-Fi as much as you can, and more photos may appear.
How to restore an iPhone from a backup made to your computer?
If you back up your iPhone to your computer itself, you can connect your iPhone to your computer to restore a backup.
- Open iTunes on your computer (or open Finder instead if you are using macOS Catalina).
- Connect your iPhone to your computer using your USB cable and select the device when it appears in iTunes/Finder.
- Click the “Restore Backup” button and choose the backup which contains your desired photos.
- Click Restore and wait for the process to complete.
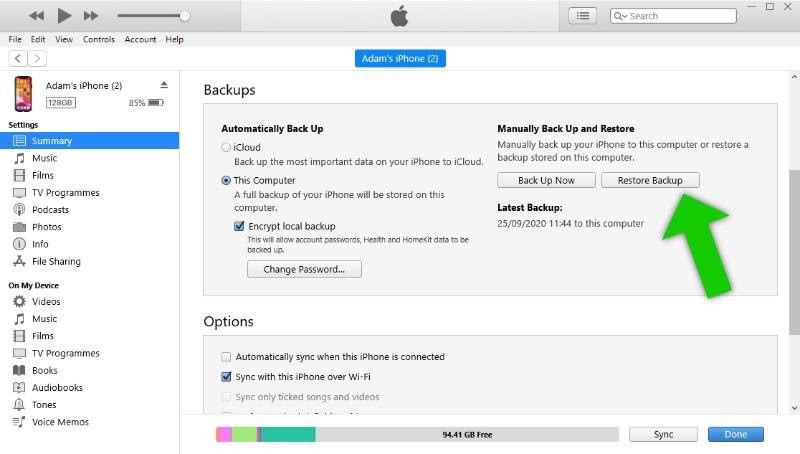
Once the restore is finished, you can open your Photos app on your iPhone and see all the photos that you’ve restored from your backup.
How to recover photos from an iPhone backup without a full restore?
The above methods each require a full erase of your iPhone to replace the existing data with your chosen backup’s data. Of course, this means that any photos, messages, contacts etc. that you have gained since your backup will be lost during the restore. To avoid this problem, you can use iBackup Extractor.
iBackup Extractor is a clever app, available for both Windows and Mac. It allows you to access your iPhone and iPad backups on your computer. This alone is useful, because you cannot ordinarily access and extract files from these backups without the help of this software.
You can browse all the files contained in your iPhone backups (photos, messages, contacts and more), select individual or multiple files, and extract them in readable, usable formats to your computer.
So, if you have lost your phone, or have deleted some important photos by mistake, iBackup Extractor can recover them from backup. Here’s how it works:
- Download and install iBackup Extractor on your PC or Mac.
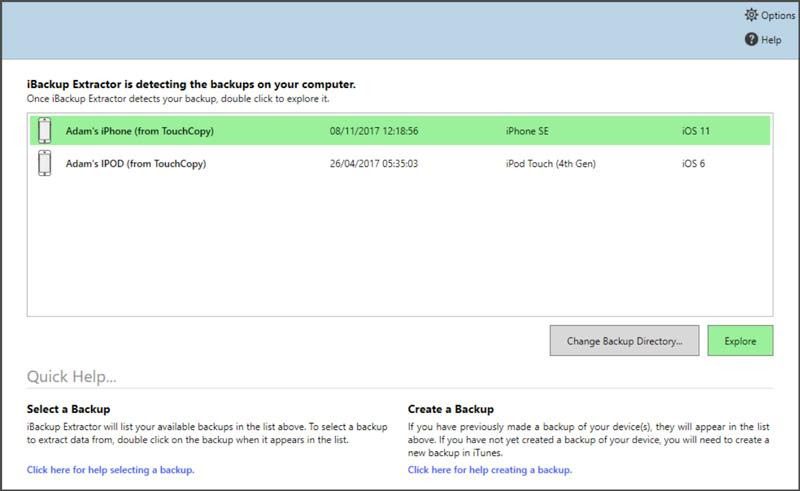
- Launch the program and select the backup that you wish to explore.
iBackup Extractor can access any device backup which is stored on your computer. iOS device backups are created by iTunes (or Finder if you are using macOS Catalina).
iBackup Extractor is not able to access backups which are stored in iCloud.
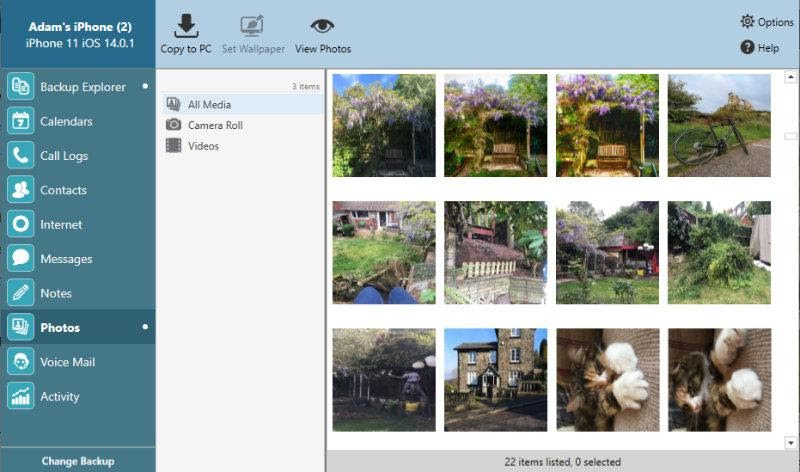
- Open the Photos section to view all the photos and videos in your backup.
- Select all the images and videos you wish to extract, then click either “Copy to PC” if you are using Windows, or “Copy Photos” if you are on a Mac.

- You will be prompted to choose a destination on your computer to save the files to. Select your desired location to start the extraction!.
Many of the photos in the screenshot above had been deleted from the iPhone. iBackup Extractor was able to access a backup of the iPhone which was created before the photos were deleted. Therefore, we were able to recover the deleted photos and save them safely to your computer.
What else can iBackup Extractor do?
You may have noticed that “photos” is not the only section available in iBackup Extractor. That’s because it can extract all manners of files from a backup:
- Save SMS, iMessage and WhatsApp conversations. You can extract your messages in HTML, PDF and Plain Text formats, or even print them out.
- Retrieve contacts from your backups and save them to your computer or to your contacts manager like Windows Contacts or Outlook.
- Recover important notes and save them safely to your computer.
- Extract your iPhone call logs and lots more..
If you like the sound of iBackup Extractor, you can download the free trial of the software on your PC or Mac and extract up to 20 items completely free.
To access the full unrestricted version, allowing you to extract as much information as you want from your backups, you will need an iBackup Extractor licence available for a one-time payment of $25. The licence can be used on 2 computers with free updates.
Key takeaways
If you have a backup of your iPhone which contains your lost photos, either on your computer or in iCloud, you can restore it to your iPhone. It is important to note that the backup will completely replace the data currently stored on your iPhone – so be sure that you are sure before performing a full restore.
Otherwise, for more control over your backups, and the ability to extract your lost/deleted photos, use the iBackup Extractor software. You’ll be able to get your desired photos back without having to modify your iPhone or erase your data.

