A sticker printer is a great way to print your stickers at home. However, it’s important to choose the right printer for the job. In this article, we’ll look at some of the best sticker printers and how to use them at home.
Regular Printer and Sticker Printer are Different Things. In fact, most inkjet printers can be used to print stickers. Inkjet sticker paper is designed specifically for printing stickers and is available at most office supply stores.
To print stickers at home, follow these simple steps:
- Choose the design you want to print and open it in a graphics program such as Photoshop, Inkscape, or GIMP.
- Print the design out on inkjet sticker paper.
- Cut out the stickers using scissors or a cutting tool.
- Peel off the backing and stick them to your desired surface.
That’s all there is to it! With a little bit of planning, you can have custom stickers printed at home for a fraction of the cost of buying them from a store.
Tips for Printing Great Stickers From Home
If you want to print your own stickers at home, there are a few things you need to know in order to make the process go smoothly. Some Important tips to help you to Printer a best Sticker
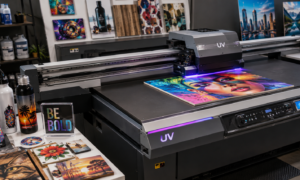
- Choose the right sticker printer. Not all printers are created equal when it comes to printing stickers. In order to get good results, you’ll need a printer that is specifically designed for this purpose. Look for a printer that has a sticker or banner mode, which will give you better quality prints.
- Use the correct type of paper. You’ll also need to use the correct type of paper if you want your stickers to look their best.
- Adjust your printer settings. Before you start printing, be sure to adjust your printer settings to ensure the best results. The Quality of the Printer and Paper is High to get the Best Results. If you want to adjust the brightness and contrast levels to get the desired Color Combination
- Plan ahead. When printing stickers at home, it’s important to plan ahead and make sure you have enough paper and ink to complete the job. If you need several hundred stickers, you’ll likely need more than one cartridge of ink.
- Test first. It’s always a good idea to test out a few stickers before printing large quantities. This will help you to adjust the printer settings if necessary and ensure that you’re happy with the results.
Read Also, Best Sublimation Printer for T-Shirts
You can use your favorite photos, images, or designs to create custom stickers that represent you or your brand. There are plenty of online resources where you can find free sticker templates and clip art, which will make the design process a lot easier.
Printing Your Stickers
Some Important Points to Print the Stickers
- Make sure your printer is set to the correct paper size. Most inkjet printers have a default setting for printing stickers, but it’s best to check just in case.
- Select the “borderless” printing option, if available. This will ensure that your stickers are printed edge-to-edge.
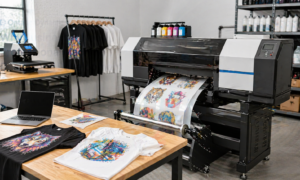
- If you’re printing a lot of stickers, it might be worth investing in an inkjet sticker printer. These printers are designed specifically for printing stickers and use less ink than a regular inkjet printer.
- Print a test sheet to make sure the colors and images look correct.
Sticking Your Stickers
- Now that your stickers are printed, it’s time to put them to use! Here are a few tips for sticking them:
- Make sure the surface is clean and dry before applying the stickers.
- If you’re using transparent stickers, apply them to a light-colored surface for best results.
- For best results, wait 24 hours before peeling the stickers off the paper.
- If the Paper of the Sticker is not Dry then don’t try to get the Sticker Because in the Wet Condition it may disorder into Different Pieces.
So, here are some important Steps for Printing a Sticker Printer at Home. Use Mind and Get the Best Ideas to Make Your Projects and Books Stylish. Be creative and have fun with it!