
How to Install a Solar Pump Inverter

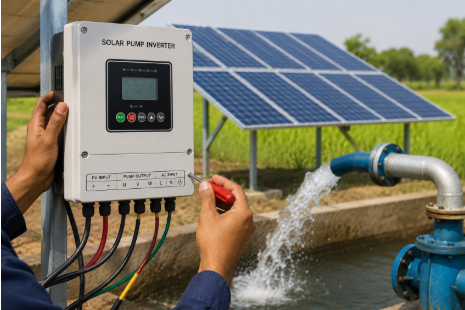
A solar pump inverter is an essential component of any solar-powered water pumping system. It converts the electricity generated by solar panels into the power needed to operate a water pump efficiently. Whether you’re installing a system for agricultural irrigation, livestock watering, or residential water supply, proper installation ensures reliable performance, reduces energy costs, and extends the lifespan of your equipment. Choosing a high-quality newpro solar pump inverter can also improve system efficiency with advanced features like MPPT technology and intelligent pump control. This guide explains the installation process in a simple, easy-to-follow manner.
What Is a Solar Pump Inverter?
A solar pump inverter is a specialized device that converts direct current (DC) electricity from photovoltaic (PV) panels into alternating current (AC) to power a water pump. Unlike a standard solar inverter, it is designed specifically for water pumping applications. It uses Maximum Power Point Tracking (MPPT) and Variable Frequency Drive (VFD) technology to optimize energy use, regulate pump speed, and improve overall system efficiency. It also serves as an intelligent solar pump controller that helps protect the pump from electrical faults and operating issues.
Tools and Materials You’ll Need
Before beginning the installation, gather all the necessary tools and equipment to ensure a smooth process. Having everything ready will help reduce installation time and improve safety.
You will typically need:
- Solar pump inverter
- Solar panels
- Water pump
- Mounting brackets
- DC and AC electrical cables
- Circuit breakers or fuses
- Screwdrivers and wrenches
- Multimeter
- Grounding equipment
- Safety gloves and protective eyewear
Always verify that the inverter is compatible with your pump motor and solar panel capacity before installation.
Step-by-Step Installation Guide
1. Choose the Right Installation Location
Select a dry, clean, and well-ventilated location for the inverter. Avoid direct sunlight, excessive moisture, and dusty environments. Adequate airflow helps prevent overheating and ensures stable operation.
2. Install the Solar Panels
Mount the solar panels securely where they receive maximum sunlight throughout the day. Proper panel positioning and tilt angle will maximize solar energy production and improve pumping efficiency.
3. Mount the Solar Pump Inverter
Install the inverter on a sturdy wall or mounting surface according to the manufacturer’s recommendations. Keep enough space around the unit to allow proper ventilation and easy maintenance.
4. Connect the Solar Panels
Connect the DC cables from the photovoltaic panels to the inverter input terminals. Carefully check the wiring polarity before powering on the system, as incorrect connections may affect performance or damage equipment.
5. Connect the Water Pump
Connect the inverter’s AC output to the pump motor using appropriately sized electrical cables. Ensure all connections are secure and match the pump’s voltage and power requirements for efficient operation.
6. Ground the System
Proper grounding is essential for protecting both the inverter and the pump against electrical faults, lightning strikes, and voltage fluctuations. Follow local electrical safety standards throughout the installation.
7. Test the System
Once all connections have been completed, power on the inverter and monitor its display. Confirm that the pump starts smoothly and operates without warning indicators or unusual noises. A newpro solar pump inverter equipped with intelligent monitoring features can make it easier to verify system performance during startup.
Common Installation Mistakes to Avoid
Many installation issues result from simple mistakes. Avoid using undersized cables, installing the inverter in poorly ventilated spaces, or connecting incompatible pump motors. Failing to ground the system properly or skipping the initial inspection can also reduce efficiency and increase maintenance costs. Taking the time to follow the recommended installation process helps ensure safe and reliable operation.
Maintenance Tips
Regular maintenance keeps your solar water pumping system performing efficiently. Clean the solar panels to remove dust and debris, inspect cables for loose or damaged connections, and ensure ventilation openings remain unobstructed. Periodically check the inverter display for warning messages or performance alerts. Routine inspections can extend the lifespan of both the inverter and the pump while maintaining consistent water flow.
Benefits of Proper Installation
A properly installed solar pump inverter delivers better energy efficiency, lower operating costs, and improved pump performance. It also protects the motor from overload, voltage fluctuations, and dry-running conditions. Modern systems equipped with MPPT technology automatically optimize power generation, making them an ideal solution for agricultural irrigation, commercial water supply, and remote water pumping applications.
Conclusion
Installing a solar pump inverter correctly is the key to maximizing the performance and reliability of a solar water pumping system. By selecting the right location, following proper wiring procedures, and performing routine maintenance, you can enjoy efficient water pumping for many years. Investing in a dependable newpro solar pump inverter ensures advanced protection features, intelligent energy management, and long-term value for residential, agricultural, and commercial applications.







Comment