Converting multiple Blender blend files to GLTF can save time when you need to prepare several 3D models for websites, games, apps, or other digital projects. Instead of opening and exporting every file separately, you can use a structured workflow to process your models more efficiently. The GLTF format is widely used because it is designed for sharing and displaying 3D content while keeping files relatively efficient and compatible with modern applications.
If you have several Blender projects that need to be converted, understanding the right export settings and preparation steps can help prevent missing textures, incorrect materials, or unwanted changes to your models.
What Is a BLEND File?
A BLEND file is the native project format used by Blender. It can contain 3D models, materials, textures, animations, lighting, cameras, and other project information. Because .blend is designed primarily for Blender, it may not be the most convenient format when you want to use your models on websites or in applications that support web-friendly 3D formats.
Before converting your files, make sure each BLEND project opens correctly in Blender and that the required textures and materials are available.
Why Convert BLEND to GLTF?
GLTF, which stands for Graphics Language Transmission Format, is designed for efficient transmission and loading of 3D scenes. It is commonly used for websites, interactive applications, AR experiences, games, and other platforms.
Converting blend to gltf can make your models easier to use outside Blender. GLTF can preserve important information such as geometry, materials, textures, and animations, depending on the content of the original Blender project and the export settings you select.
For example, if you have 20 Blender models for an online product catalogue, exporting them to GLTF can make them easier to integrate into a web-based 3D viewer.
How to Convert Multiple BLEND Files to GLTF
1. Organise Your BLEND Files
Start by placing all the Blender files you want to convert into a dedicated folder. Check each file before beginning the conversion process.
Make sure the models are complete and that textures are correctly connected. If a model depends on external texture files, keep those files organised as well.
A clean folder structure can make the conversion process much easier, especially when working with dozens or hundreds of models.
2. Open the BLEND File in Blender
Open one of your .blend files in Blender and check the model carefully. Look for missing textures, broken materials, incorrect geometry, or objects that should not be included in the final GLTF file.
This step is important because exporting a model does not automatically fix problems inside the original Blender project.
3. Prepare the Model
Before exporting, remove unnecessary objects and check the scene hierarchy. If the model contains cameras, lights, hidden objects, or unused elements, decide whether they need to be included.
You should also check the scale and orientation of the model. Consistent scale and positioning are particularly important when you are converting multiple models for the same project.
4. Export the Model as GLTF
In Blender, use the GLTF export option to export the prepared model. Blender provides several GLTF-related options that allow you to control how geometry, materials, textures, animations, and other scene information are exported.
Depending on your project, you may choose between GLTF variations such as .gltf with separate resources or .glb, which packages much of the model data into a single file.
For websites and applications, GLB can often be convenient because it keeps the model and associated resources together in one file.
5. Repeat the Process for Multiple Files
If you only have a few models, you can repeat the export process manually. Open each BLEND file, check the scene, select the appropriate export settings, and save the resulting GLTF or GLB file.
However, manually exporting a large number of files can become repetitive. If you regularly work with many Blender projects, automation or batch-processing workflows can significantly reduce the amount of time required.
Can You Convert Multiple BLEND Files at Once?
Yes, multiple Blender files can be processed using a batch workflow. The exact method depends on your requirements, Blender version, and whether the files need individual preparation before export.
For simple projects with consistent structures, automated processing can open each BLEND file, export it using predefined settings, and save the resulting GLTF files into a selected output folder.
For more complicated models, however, it is recommended to inspect the files first. Different scenes may contain different textures, animations, object structures, or materials, which can require different export settings.
Check Textures After Conversion
One of the most important steps after converting multiple files is checking the resulting GLTF models. A model may appear correctly in Blender but look different after export if its textures or materials are not supported or correctly referenced.
Open the exported files in a compatible GLTF viewer and check the geometry, textures, materials, transparency, animations, and overall appearance.
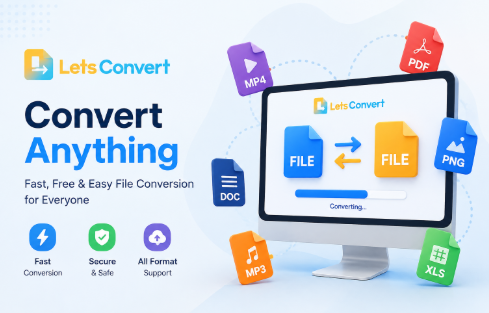
If you are using Lets Convert as part of your file-conversion workflow, always review the converted output before using it in a final project.
Common Problems When Converting BLEND to GLTF
Several issues can occur during conversion. Missing textures are one of the most common problems, particularly when external texture files are not correctly referenced.
Materials may also look different because Blender-specific shader features may not transfer perfectly to GLTF. Complex modifiers, procedural textures, simulations, or other Blender-specific features may require additional preparation before export.
Another common issue is file size. High-resolution textures and extremely detailed meshes can make GLTF or GLB files unnecessarily large. Optimising meshes and textures before conversion can help improve loading performance.
Tips for Better Batch Conversion
Before converting a large collection of models, test the workflow with two or three BLEND files. Confirm that the exported models look correct and that the naming system works as expected.
Use clear filenames, keep your source files separate from exported files, and maintain an organised folder structure. If you are converting models for a website, also consider optimising polygon counts and texture sizes so the final files load quickly.
It is also a good idea to keep a backup of your original BLEND files. Conversion should not replace your original project files because you may need to return to Blender later and make changes.
Final Thoughts
Converting multiple BLEND files to GLTF is a practical way to make Blender models more portable and suitable for websites, applications, games, and interactive 3D experiences. For a small number of files, manual exporting through Blender is straightforward. For larger collections, a batch-processing workflow can make the process considerably faster.
The most important part is not simply exporting the files but checking the final GLTF models for textures, materials, geometry, animations, scale, and file size. With the right preparation and export settings, you can efficiently convert multiple Blender projects while maintaining the quality and usability of your 3D assets.