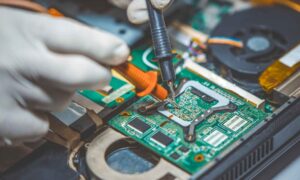
Do you know that a video graphics card is the powerhouse behind the stunning visuals in your games? The smooth-resolution videos you see on the screen and the life-like visuals you experience while gaming are only possible because of a graphic card.
However, like any other piece of hardware, a graphic video card also needs regular maintenance to ensure optimal performance. Cleaning your video card might sound tricky, but even beginners can do it easily if directed correctly.
This blog will take you through five simple steps to clean your graphics card and keep it running smoothly. But first, let’s understand the importance of a clean video graphic card.
The Importance of a Clean Video Graphics Card
A clean video graphics card is necessary for your computer’s best performance and longevity. Dust and debris buildup on your video card can lead to multiple issues, including overheating, lowered airflow, and lack of high performance.
Besides, without proper video card repair, you can get permanent damage to your video graphics card, which might lead you to further expenses. We will explore how to clean your video card to make things effective. Let’s see and take your video graphic card performance to the best.
Step 1: Gather All the Necessary Tools
Before you jump into cleaning your graphics card, make sure you have these basic tools handy:
Screwdriver: This trusty tool will open your computer case and access the graphics card.
Compressed Air Canister: It’s essential for blowing away dust and debris without causing any
harm to your precious video graphics card.
Soft-bristle Brush: Dust can be stubborn and might need extra effort to remove. That’s where a small, soft-bristle brush comes in handy. It’s like a broom for your graphics card, cleaning all the dust with the soft bristles.
Now that your tools are ready to work let’s move on to the next step and get that graphics card cleaned up!
Step 2: Power Off Your Computer
With safety, you can play perfectly! Before starting cleaning or video graphic card repair, follow these simple steps:
Shut Down Your Computer: First, ensure your computer is powered off completely. It’s like putting your computer system at rest before doing any maintenance to save it from the computer repair expense.
Unplug It: Remember always to unplug your computer from the power source. Consider it pulling the plug on your graphics card’s power nap. This step is essential to prevent accidental mishaps while working.
By powering down and unplugging, you’re ensuring your graphics card’s safety and your own during the cleaning process.
Step 3: Open Your Computer Case
Use your screwdriver to open your computer case. Graphics cards are typically located on the motherboard. Gently remove any cables or connectors attached to your graphics card, then carefully remove the card itself. Make sure not to touch the card’s sensitive components to refrain from potential damage.
Step 4: Remove Dust and Debris
Now that you have your graphics card, it’s time to eradicate dust and debris. This step is crucial because dust buildup can lead to overheating and show a lack of performance.
Use Compressed Air: Hold the can of compressed air upright and use short bursts to blow away dust from the graphics card.
Brush Away Remaining Debris: For stubborn dust, use a soft-bristle brush to sweep it away gently. Be careful not to apply too much force or touch any sensitive parts.
Clean the Fans: Graphics cards often have fans to cool them down. Clean these entirely, as dust accumulation can hinder their performance.
Thermal Paste: Inspect your graphics card to check for thermal paste between the GPU and heatsink. It may need to be reapplied if it looks cracked or dried out.
Step 5: Reassemble and Test
After cleaning your graphics card, carefully place it back into the slot on your motherboard. Reconnect any cables or connectors you removed earlier.
Close your computer case, plug it back into the power source, and power it on. Observe your system graphic card is functioning as expected.
What Can Damage a Video Graphics Card?
Following are a few factors that can cause potential damage to your video graphic card.
Dust and Debris: Dust buildup can clog the card’s fans and heatsinks, causing overheating and damage.
Overheating: Running too hot for too long can lead to permanent damage.
Static Electricity: Electrostatic charges can zap and fry sensitive components in a card.
Insufficient Cooling: Poor airflow or malfunctioning fans can cause overheating.
Physical Damage: Drops, mishandling, or excessive force can physically harm the card.
How Regular Should You Clean Your Video Graphics Card?
Cleaning your video graphic card every 6 months is a good practice. Gamers and content creators might do it every 3 months due to higher heat generation. Dusty environments or issues like overheating require more frequent cleaning, around every 2 months. Always pay attention to performance and visual cues for timely maintenance.
To Sum Up
Cleaning your graphics card is simple; you can do it at home with the right tools. However, follow the steps above to ensure their graphics card stays in shape.
Regular maintenance can help control overheating and extend the life of your graphics card, saving you from costly replacements. So, the next time you see your computer running hotter or games not functioning as they should, take a break to give your graphics card the cleanup.


