Cutting out a background used to take 30 minutes in Photoshop. Today it takes three seconds. AI background removers have made precise image editing available to everyone — no design degree, no expensive software, no patience required.
Whether you are selling products online, building a brand, or creating social media content, a clean background makes your images look professional instantly. This guide explains how AI background removal works, walks you through every step using Nano Banana, and covers the tricky cases most tutorials ignore: hair, glass, fur, and transparent objects.
By the end, you will know exactly how to remove any background, what to do after you remove it, and how to pick the right output format for your use case.
What is an AI background remover?
An AI background remover is a tool that automatically separates the main subject of an image from its background. You upload a photo, the AI processes it in seconds, and you download a clean cutout — no manual selection, no tracing, no erasing.
Under the hood, two technologies make this work:
- Image segmentation — the AI classifies every pixel as either foreground (your subject) or background (what to remove). Fast and reliable for simple images.
- Alpha matting — the AI assigns a transparency value to each pixel instead of a binary on/off decision. This is what makes hair, fur, and soft edges look natural rather than choppy.
Most budget tools use only segmentation. Premium tools like Nano Banana use alpha matting, which is why the results look so much cleaner on complex subjects.
5 real use cases for AI background removal
- E-commerce listings — Amazon, Shopify, and eBay require clean white backgrounds. AI makes compliance instant for any product photo.
- Social media content — Layer your subject over branded backgrounds, gradients, or seasonal scenes in seconds.
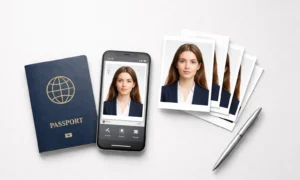
- Profile photos and headshots — Replace a cluttered office wall or messy room with a clean, professional backdrop.
- Marketing creatives — Isolate product images to place them in ad templates, banners, and landing pages.
- Virtual try-on preparation — Cut clothing items from their original backgrounds before compositing onto model photos.
- Design and print assets — Create transparent PNGs that slot cleanly into any layout without white borders or halos.
How to remove a background with Nano Banana — step by step
Nano Banana’s AI background remover handles everything in the browser. No download, no account setup, no plugin. Here is the exact process:
Step 1 — Prepare your image
Start with a well-lit photo where your subject stands out from the background. Good lighting and clear contrast give the AI more information to work with. Avoid heavily compressed images — low-quality JPEGs produce rough edges. For product photos, a solid or near-solid background behind the product gives the cleanest starting result.
Step 2 — Open Nano Banana and select the background tool
Go to nano-banana.com and open the Nano Banana Pro editor. In the tool menu, select the background editing option. You can also access it directly from the AI Image section. No mode switching or plugin activation needed.
Step 3 — Upload your image
Click the upload area or drag your image file directly into the editor. Nano Banana accepts JPEG and PNG files. You can also paste an image URL directly if you are working with an existing online image.
Step 4 — Use a text prompt to describe what to remove
This is where Nano Banana differs from basic background removers. Instead of just clicking a single button, you can use a text prompt to tell the AI exactly what to keep and what to remove. For example: “Remove the background and keep only the person” or “Remove the white studio background, preserve the product and its shadow.” This text-based editing gives you precise control that standard tools lack entirely.
Step 5 — Review the result
Examine edges closely — especially around hair, shoulders, or any fine details. Zoom in on areas where the subject meets the background. Nano Banana’s multimodal model handles these transitions with alpha matting, so edges should appear smooth rather than pixelated or jagged.
Step 6 — Download your cutout
Choose your output format — PNG for transparency, JPEG if you need a white background for a marketplace listing. Select your resolution (1K, 2K, or 4K) based on how you plan to use the image. Click download and the file is ready.
| Pro tip: For batch e-commerce work, upload multiple product images using the multi-image URL feature and apply the same background removal prompt across all of them. This saves hours compared to processing one image at a time. |
Handling tricky subjects: hair, glass, fur, and transparent objects
This is where most AI background removers fail — and where the difference between segmentation and alpha matting becomes obvious. Here is how Nano Banana handles each difficult case:
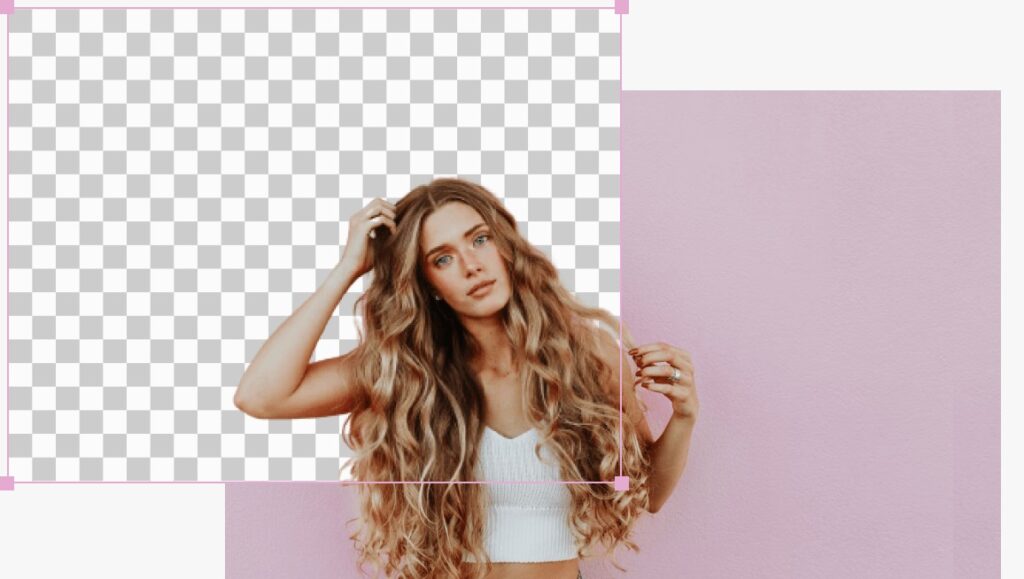
Fine hair and flyaways
Alpha matting calculates partial transparency per strand. No clipping, no choppy outline. For the best result, shoot portraits against a contrasting background — not a wall that matches the hair colour.
Glass and transparent objects
Glass requires transparency preservation, not full removal. Use a text prompt like “Remove background, preserve glass transparency” so the AI retains the translucent appearance rather than treating the object as opaque.
Fur and feathers
Dense, irregular textures need matting, not segmentation. Nano Banana’s model reads texture patterns to distinguish subject fur from background detail, preserving the natural silhouette.
Overlapping objects
When your subject overlaps another object (a hand holding a product, for example), the AI uses scene understanding to keep the subject intact and remove only the true background.
Jewellery and small details
Thin chains, small gems, and intricate metalwork require high-resolution input. Always upload at the highest quality available and download at 2K or 4K for jewellery product photos.
Soft fabrics and veils
Semi-transparent fabrics like chiffon and lace need alpha matting to preserve their texture. Request this explicitly in your text prompt if results look solid or flat.
| Common mistake: Using a low-resolution source image and then trying to export at 4K. The AI can only work with the detail that exists in the original file. Always start with the highest quality image available. |
What to do after removing the background
Most guides stop at removal. But removing the background is only the first step — what you do next determines how professional the final image looks.
Here are the most useful next steps, all available inside Nano Banana:
- Add a solid colour background — pure white (RGB 255, 255, 255) for Amazon and marketplace compliance, or a brand colour for social media.
- Generate an AI scene — use a text prompt to place your subject in a new environment. “Place the product on a marble kitchen counter with soft window light” is a prompt Nano Banana’s Pro model handles with character and scene consistency.
- Keep it transparent (PNG) — ideal for design assets, templates, and any compositing work in other tools.
- Apply colour grading — match the lighting tone of your cutout to the new background so the image looks naturally composed rather than pasted.
- Enhance the portrait — after removing a distracting background, use Nano Banana’s portrait enhancement feature to refine skin tone, sharpness, and facial detail.
PNG or JPEG: choosing the right output format
This decision matters more than most people realise. Here is a simple way to think about it:
| PNG — use when:
• You need a transparent background • The image goes into a design tool or template • You plan to composite it onto a coloured background later • The image has fine edges (hair, lace, glass) |
JPEG — use when:
• The marketplace requires a white background image • File size matters (ads, page speed) • The final background colour is already set • You need maximum compatibility across platforms |
If you are unsure, export as PNG first. You can always convert to JPEG afterwards without losing the work you have done. Converting JPEG to PNG does not recover lost transparency.
Frequently asked questions
Is Nano Banana’s AI background remover free to use?
Nano Banana offers a free starting point, with premium plans that unlock higher resolution exports, batch processing, and commercial usage rights. The Starter plan begins at $10.49/month billed yearly, which includes 9,600 credits — enough for hundreds of background removal tasks.
How accurate is AI background removal on complex images?
For standard subjects (people, products, animals) against clear backgrounds, modern AI tools achieve 95–99% accuracy. Complex cases like fine hair or transparent objects require alpha matting — which Nano Banana uses — rather than basic segmentation. For the remaining 1–5% of very complex images, a small manual touch-up in any editor takes under a minute.
Can Nano Banana process multiple images at once?
Yes. Nano Banana Pro supports multi-image input via image URLs. You can submit up to 8 images in a single task and apply the same text prompt across all of them. This makes it practical for e-commerce sellers processing large product catalogues.
Does it work on mobile?
Yes. Nano Banana is fully browser-based, which means it works on any device without downloading an app. The editor is accessible on both Android and iOS browsers. Image processing happens in the cloud, so device performance does not affect the quality of the output.
What is the difference between background removal and background replacement?
Background removal isolates the subject by deleting the background pixels, leaving you with a transparent image. Background replacement goes one step further — it places the isolated subject onto a new scene. Nano Banana does both in one workflow: remove the background, then use a text prompt to generate or apply a new one without switching tools.
| Ready to remove your first background? No Photoshop. No plugins. Just upload your image, type what you want, and download a clean cutout in seconds. Visit nano-banana.com/nanobananapro to try it free. |