Makers have always been interested in turning simple ideas into something useful, attractive, or worth sharing. A sketch can become a wooden sign, a digital drawing can become a decorative panel, and a basic product idea can turn into a working prototype. What makes this process exciting is the ability to experiment, make mistakes, and improve the design along the way.
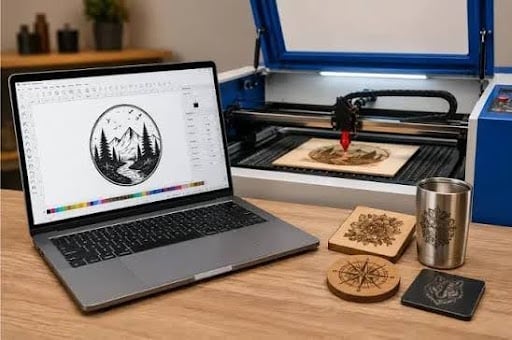
This is one reason the desktop laser engraver has become such a useful tool for modern makers. It gives hobbyists, designers, DIY enthusiasts, and small businesses another practical way to move from digital ideas to physical products. Instead of using the machine only for engraving names or decorative designs, makers can use it for cutting, prototyping, personalization, assembly, and small-scale production.
The real value of a desktop laser engraver is not simply what the machine can do. It is how easily it can become part of the maker’s everyday workflow.
From Digital Idea to Finished Project
A typical maker project does not begin with a machine. It usually begins with an idea.
The maker may create a drawing in design software, decide what material to use, prepare the dimensions, and then plan how the different pieces will fit together. From there, the workflow may look something like this:
Digital design → Choose material → Test settings → Position the design → Cut or engrave → Assemble → Refine
This process is particularly useful when using a laser cutter and engraver because cutting and engraving can be combined within the same project.
Consider a maker who wants to build a small desktop organizer. They could first design the sides, dividers, and base digitally. Before producing the complete organizer, they might test a small piece of the chosen material to check the cut and engraving settings.
Once everything looks right, the individual pieces can be cut and labeled. After assembly, the maker may discover that one slot is slightly too narrow. Instead of redesigning the entire project by hand, they can adjust the digital file and produce another version.
This is what makes a laser engraver for makers particularly practical. It supports an ongoing cycle of designing, testing, learning, and improving.
Personalization With More Flexibility
Personalization remains one of the easiest ways for makers to turn an ordinary item into something unique.
A name, date, logo, short message, or decorative pattern can give a simple product a completely different appearance. Wooden signs, boxes, ornaments, coasters, keychains, desk accessories, and gift items are common examples.
A laser engraving machine makes these changes relatively easy to manage because the artwork can be prepared digitally. If a customer wants a different name or message, the maker can modify the design without having to create an entirely new physical template.
A laser cutter and engraver can also combine personalization with cutting. For example, a maker could cut a wooden ornament into a custom shape and then engrave a family name onto its surface.
For small creative businesses, this flexibility can be especially useful. Instead of competing only on price with mass-produced products, makers can offer items that feel more personal and customized.
A Useful Tool for Small Businesses
Many makers start creating products as a hobby before realizing that other people are willing to buy them.
A desktop laser engraver can help support this transition because it is suitable for developing products in smaller workspaces, depending on the machine and its safety requirements. A creator can experiment with a few products, test customer interest, and gradually improve the designs.
Potential products might include personalized signs, wedding decorations, ornaments, engraved gifts, labels, display pieces, and other suitable items.
The important part is that the maker can continue refining the product rather than committing to a large production run immediately.
For example, a maker selling personalized wooden signs might create several design variations before deciding which one customers prefer. If a particular font is difficult to engrave cleanly or takes too long to produce, the design can be changed.
In this way, a laser engraving machine becomes part of product development as well as production.
Prototyping Before Production
One of the strongest practical uses of a laser cutter and engraver is creating prototypes.
Suppose a maker has an idea for a storage box, display stand, electronic enclosure, or small mechanical model. Producing a final version immediately could waste material if the dimensions are not correct.
Instead, the maker can create an early version using an affordable and suitable material. The prototype can then be assembled and tested.
Does the lid fit properly? Are the slots wide enough? Is the structure stable? Does the product look the way it did on the screen?
These questions are much easier to answer when the maker has a physical prototype in front of them.
If something needs to change, the digital design can be updated and another version can be produced. This makes prototyping less intimidating and encourages makers to try ideas that they might otherwise leave unfinished.
Understanding Materials Matters
A good maker knows that the machine is only one part of the process. Material selection matters just as much.
Wood is a popular option for many laser projects because it can be used for signs, boxes, ornaments, organizers, wall art, and decorative pieces. However, different types and thicknesses of wood can behave differently during laser processing.
Acrylic is also widely used for laser projects, but it requires more careful consideration. Engraving and cutting performance depends on the laser type, acrylic color, composition, thickness, and the capabilities of the specific machine.
Colored or opaque acrylic is commonly used for signs, displays, decorations, and accessories. Clear acrylic, however, should not be treated as universally compatible with every desktop machine. In particular, diode lasers generally cannot directly engrave or cut clear acrylic effectively.
For that reason, makers should always check the manufacturer’s specifications before choosing acrylic for a project.
The same caution applies to leather, paper, cardboard, and other materials. Not every material is suitable for laser processing. Some materials may produce dangerous fumes or create fire hazards. A responsible maker should always verify material compatibility, use appropriate ventilation, and follow the machine manufacturer’s safety instructions.
Creating Better Laser Engraving Projects
There is no shortage of ideas when it comes to laser engraving projects. The best projects, however, are not necessarily the most complicated.
A beginner might start with a personalized coaster or small nameplate. Once they understand basic design preparation and machine settings, they can move toward more detailed projects such as organizers, boxes, layered artwork, signs, and decorative panels.
A useful project might be a workshop storage system with engraved labels. The maker can cut the compartments, engrave the names of different tools or materials, and assemble the system into a practical organizer.
This type of project demonstrates an important advantage of laser technology: the result can be both functional and creative.
Learning Through Trial and Error
A desktop laser engraver can also become a learning tool.
Makers do not need to know every setting or technique before starting their first project. In many cases, practical experience is the best teacher.
A beginner may discover that an engraving is too light, a cut does not go completely through the material, or two parts do not fit together as expected. Rather than seeing these results as failures, the maker can use them to understand what needs to change.
Maybe the material was different from the previous sheet. Perhaps the design dimensions need adjustment. The machine settings may also need to be changed.
This trial-and-error process is an important part of making. Over time, a laser cutter and engraver becomes easier to use because the maker develops a better understanding of materials, design files, settings, positioning, and assembly.
Why Desktop Size Matters
Not every maker has access to a large industrial workshop.
A desktop laser engraver can be a practical option for creators working from a home workshop, studio, classroom, or small business environment, provided the machine’s ventilation, workspace, and safety requirements can be properly accommodated.
Its usefulness also comes from repeatability. If a maker needs several copies of the same design, a prepared digital file can help reproduce the design consistently when the material and machine settings are appropriate.
A laser engraver for makers can therefore support both one-off creative projects and small production runs.
More Than an Engraving Tool
The growing interest in the desktop laser engraver is ultimately about flexibility.
A maker can use it to personalize an object, create a prototype, produce a useful organizer, develop a product for a small business, or simply experiment with a new material. The machine can support different stages of the creative process rather than being limited to one task.
A laser cutter and engraver can turn a digital drawing into physical components, while a laser engraving machine can add labels, patterns, logos, or other details.
For anyone exploring laser engraving projects, the biggest advantage is the ability to keep improving. A project can be designed, tested, adjusted, and produced again without starting completely from scratch.
That is what makes a desktop laser engraver such a valuable addition to a modern maker workshop. It does not replace creativity or hands-on skill. Instead, it gives makers another way to apply those skills.
Whether the goal is to create a personalized gift, build a prototype, organize a workshop, or develop a small product line, a laser cutter and engraver can help make the path from idea to finished project more practical.
For makers, that freedom to experiment may be the most important feature of all.