Kitchen renovations often seem daunting, especially when it comes to the cost of new cabinetry. However, with DIY kitchen cabinets, you can achieve a stunning transformation without breaking the bank. By taking a hands-on approach, you can customize your kitchen to reflect your style while saving money. This guide will walk you through everything you need to know about installing or upgrading DIY kitchen cabinets, from planning and materials to the actual process and design tips.
Why Choose DIY Kitchen Cabinets?
Cost-Effectiveness
One of the most compelling reasons to choose DIY kitchen cabinets is the significant savings. Hiring professional contractors for kitchen renovations can be expensive, but with a DIY approach, you eliminate labor costs, which often make up a large portion of the total expense. You can invest your savings into high-quality materials or additional kitchen upgrades. Moreover, the ability to source materials independently lets you hunt for deals and ensure you stay within your budget.
Customization
DIY kitchen cabinets allow you to create a kitchen tailored to your needs. From the size and layout to the finish and hardware, you have complete control over every detail. This level of personalization ensures that your kitchen is both functional and aesthetically pleasing. You can incorporate unique design elements that reflect your personality, making the space truly your own.
Skill Development
Taking on a DIY project is an excellent way to develop new skills. From measuring and cutting wood to assembling and installing cabinets, you’ll gain valuable experience that you can use for future home improvement projects. Not only do you enhance your home, but you also build confidence in your ability to tackle other DIY challenges around the house.
Planning Your DIY Kitchen Cabinet Project
Assess Your Space
Before starting, take a close look at your kitchen. Measure the dimensions of the room and consider the placement of appliances, windows, and doors. Understanding your kitchen’s layout is crucial for determining the size and configuration of your cabinets. Think about the workflow in your kitchen, ensuring that your design complements how you use the space daily.
Set a Budget
Establishing a budget helps you make informed decisions about materials and tools. DIY kitchen cabinets can be as affordable or as luxurious as you want, depending on the materials and finishes you choose. A well-planned budget also helps you avoid unexpected expenses, keeping the project stress-free.
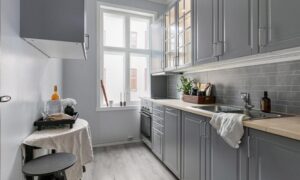
Choose a Style
The style of your cabinets will set the tone for your kitchen. Whether you prefer a modern, minimalist look or a classic, rustic charm, there are countless designs to choose from. Popular options include shaker-style cabinets, slab-front cabinets, and open shelving. Take inspiration from home improvement magazines, online design platforms, or even the kitchens of friends and family.
Create a Timeline
Setting a realistic timeline is essential for staying organized. Break the project into manageable phases, such as designing, purchasing materials, assembling, and installing. This approach helps you track progress and ensures that you stay on schedule.
Materials and Tools Needed
Materials
- Plywood or MDF: Commonly used for cabinet boxes and doors. Plywood is durable and long-lasting, while MDF offers a smooth surface for painting.
- Solid Wood: Ideal for a premium, durable finish and a natural aesthetic.
- Hardware: Hinges, handles, and drawer slides for functionality and style.
- Paint or Stain: To add color and protect the wood, ensuring a long-lasting finish.
- Screws and Nails: Essential for assembly and installation.
- Edge Banding: For a polished and professional appearance on exposed edges.
Tools
- Tape Measure: For precise measurements that are critical to the success of your project.
- Circular Saw or Table Saw: To cut materials to size with accuracy.
- Drill: For assembling and installing cabinets, as well as attaching hardware.
- Sander: To smooth surfaces before painting or staining, ensuring a flawless finish.
- Clamps: To hold pieces together during assembly for accurate alignment.
- Level: To ensure your cabinets are even and properly aligned.
- Jigsaw: For cutting intricate shapes or holes for pipes and cables.
Step-by-Step Guide to Building DIY Kitchen Cabinets
Step 1: Design Your Cabinets
Using your kitchen’s dimensions, sketch a layout of your cabinets. Decide on the number of cabinets, their sizes, and their configurations. Online design tools can help you visualize your project and create detailed plans. Factor in any unique features you want, such as spice racks, pull-out trash bins, or custom drawer organizers.
Step 2: Purchase Materials
Once you have a clear plan, purchase the materials you need. Many hardware stores can cut plywood or MDF to your specified dimensions, saving you time and effort. Take care to choose high-quality materials that suit your budget and design.
Step 3: Cut and Assemble the Cabinet Boxes
Start by cutting the panels for your cabinet boxes. Assemble the boxes using screws and nails, ensuring that all angles are square. Use clamps to hold pieces together as you work. Double-check measurements to avoid errors that could compromise the structural integrity of your cabinets.
Step 4: Add Shelves and Dividers
Install shelves and dividers inside the cabinet boxes, according to your design. This step enhances the functionality of your cabinets by providing storage for specific items. Adjustable shelving can add versatility, allowing you to accommodate different storage needs over time.
Step 5: Create and Attach Doors
Cut and assemble the cabinet doors, ensuring they fit snugly over the openings. Sand the doors thoroughly before painting or staining them. Attach the doors to the boxes using hinges. Consider adding soft-close hinges for a touch of luxury and to protect your cabinets from wear and tear.
Step 6: Install the Cabinets
Secure the cabinets to the walls using screws and a level to ensure they are straight. Begin with the upper cabinets before moving to the lower ones. Proper installation ensures stability and prevents issues like sagging over time.
Step 7: Add Finishing Touches
Install handles or knobs on the doors and drawers. Apply paint or stain to match your kitchen’s color scheme. Allow ample time for the finish to dry before using the cabinets. Adding a protective topcoat can further enhance durability.
Tips for a Successful DIY Project
Take Your Time
Rushing through the project can lead to mistakes. Allocate enough time for each step, from planning to installation. Patience ensures precision and quality.
Prioritize Safety
Wear protective gear, such as goggles and gloves, when using power tools. Follow all safety guidelines to avoid accidents. Keep your workspace clean and organized to prevent mishaps.
Seek Help if Needed
While DIY projects are rewarding, some tasks may require an extra set of hands. Don’t hesitate to ask a friend or family member for assistance. Collaboration can make the project more enjoyable and efficient.
Test as You Go
Periodically test the stability and functionality of your cabinets during assembly. Catching and correcting issues early prevents bigger problems later.
Design Ideas for DIY Kitchen Cabinets
Open Shelving
For a modern and airy look, consider replacing some upper cabinets with open shelves. This design not only saves material costs but also makes your kitchen feel more spacious. Display attractive dishware or decorative items for added charm.
Two-Tone Cabinets
Combine two colors for a striking effect. For example, use a darker shade on the lower cabinets and a lighter one on the upper cabinets. This contrast can add depth and visual interest to your kitchen.
Glass-Front Doors
Add elegance to your kitchen with glass-front cabinet doors. This design works well for displaying dishware and decorative items. Frosted or textured glass can provide a balance of style and privacy.
Hidden Storage
Maximize your kitchen’s functionality by incorporating hidden storage solutions, such as pull-out shelves and lazy Susans. These features help you make the most of your space while keeping the kitchen organized.
Maintaining Your DIY Kitchen Cabinets
To keep your cabinets looking their best, clean them regularly with a mild detergent and a soft cloth. Avoid using abrasive cleaners that can damage the finish. Inspect the hardware periodically to ensure it remains secure and functional. Address minor issues, such as loose hinges or scratches, promptly to prevent them from escalating.
The Joy of DIY Kitchen Cabinets
Creating your own kitchen cabinets is a fulfilling experience that combines creativity, craftsmanship, and practicality. By taking on this project, you’ll not only save money but also gain the satisfaction of building something unique and tailored to your needs. Whether you’re renovating your entire kitchen or simply upgrading your cabinetry, DIY kitchen cabinets offer endless possibilities for transforming your space into a beautiful and functional haven.