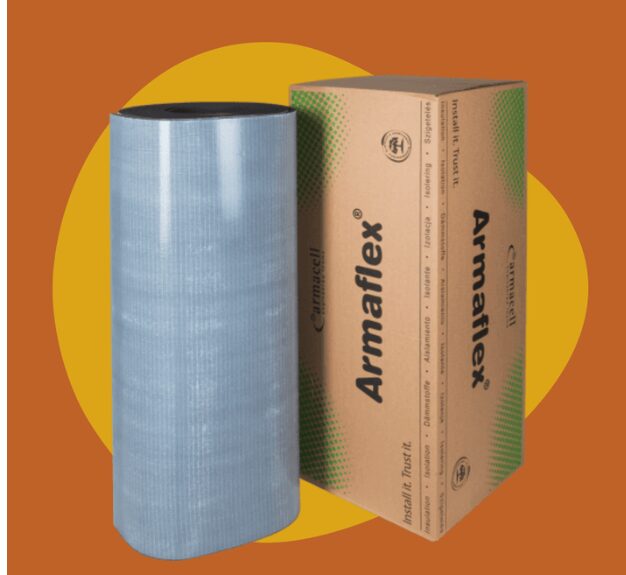
When it comes to insulating your camper, one of the best materials you can use is Armaflex. This closed-cell foam insulation is highly effective at reducing heat loss, preventing condensation, and improving overall comfort inside your camper. Whether you’re a weekend traveler or planning a full-time van life adventure, proper insulation is key to making your camper livable in various climates. In this comprehensive guide, we’ll discuss why Armaflex is an excellent choice, how to install it, and some tips to maximize its effectiveness.
Why Choose Armaflex for Camper Insulation?
Armaflex is a flexible, closed-cell elastomeric foam that provides superior thermal insulation. Unlike traditional insulation materials like fiberglass or polystyrene boards, Armaflex offers the following advantages:
1. Excellent Thermal Insulation
Armaflex provides outstanding thermal resistance, meaning it helps maintain a stable temperature inside your camper regardless of the weather outside. It minimizes heat transfer, keeping your camper warm in winter and cool in summer.
2. Moisture Resistance and Condensation Prevention
One of the biggest challenges in camper insulation is moisture buildup. Condensation can lead to mold growth, rust, and structural damage. Armaflex’s closed-cell structure makes it highly resistant to moisture, preventing condensation from forming on the walls and ceiling of your camper.
3. Easy Installation
Armaflex insulation is self-adhesive and highly flexible, making it easy to install even in difficult corners and curves of a camper van. You don’t need special tools or professional expertise to apply it effectively.
4. Lightweight and Space-Saving
Unlike bulkier insulation materials, Armaflex is relatively thin yet highly efficient. This helps conserve valuable space inside your camper while still providing excellent insulation performance.
5. Noise Reduction
Aside from thermal benefits, Armaflex also helps dampen noise. It reduces vibrations and external sounds, making your camper a quieter and more peaceful place to relax and sleep.
6. Long-Lasting and Durable
Armaflex is resistant to aging, UV exposure, and general wear and tear, making it a long-lasting investment for your camper build.
How to Install Armaflex Insulation in Your Camper
Now that you understand why Armaflex is a great choice for camper insulation, let’s go through the step-by-step installation process.
Step 1: Gather Your Materials
Before you start, make sure you have the necessary materials:
- Armaflex insulation (preferably Armaflex 19mm and Armaflex 6mm thick for optimal insulation)
- A sharp utility knife or scissors
- Armaflex tape
- A straight edge or ruler
- A marker or chalk
- A roller (optional, for better adhesion)
- A clean cloth for surface preparation
Step 2: Clean the Surfaces
For the adhesive to work effectively, the surfaces where you will apply Armaflex must be clean and dry. Use a cloth and mild detergent to remove dust, grease, and dirt. Allow the surface to dry completely before proceeding.
Step 3: Measure and Cut the Armaflex Sheets
Using your measuring tape, determine the dimensions of the camper walls, ceiling, and floor. Transfer these measurements onto the Armaflex sheets and cut them to size using a sharp knife or scissors.
Tip: Cut slightly larger pieces than needed to ensure full coverage without gaps.
Step 4: Apply the Armaflex Insulation
Peel off the protective backing and carefully stick the Armaflex to the surface. Start from one edge and slowly press down while smoothing out air bubbles. If necessary, use a roller to ensure a firm bond.
Step 5: Cover All Key Areas
Focus on insulating the following areas:
- Walls: Apply Armaflex directly to the metal or wooden surface of the camper walls.
- Ceiling: Insulating the ceiling is crucial to prevent heat loss.
- Floor: Though less critical, insulating the floor can help with temperature control and comfort.
- Doors and Windows: Use smaller pieces of Armaflex to insulate gaps around doors and windows where heat might escape.
Step 6: Seal and Secure
Check for any gaps or exposed areas and patch them up with additional pieces of Armaflex. This ensures complete insulation and eliminates cold spots.
Step 7: Add a Vapor Barrier (Optional)
While Armaflex itself is highly moisture-resistant, adding an extra vapor barrier can further enhance its performance, especially in very humid conditions.
Tips for Maximizing the Effectiveness of Armaflex Insulation
1. Use the Right Thickness
For camper vans, 19mm thick Armaflex is recommended as it offers excellent insulation without taking up too much space. In extreme climates, you might consider layering two thinner sheets.
2. Pair with Reflective Foil for Added Efficiency
If you’re traveling in particularly hot or cold environments, combining Armaflex with a reflective foil layer can improve insulation by reflecting heat radiation.
3. Insulate Window Covers
Windows are a major source of heat loss. Consider making insulated window covers using Armaflex and reflective foil to prevent unnecessary heat transfer.
4. Pay Attention to Ventilation
Proper ventilation is essential to prevent excess humidity and ensure air circulation. Installing roof vents or small fans can help maintain air quality inside your camper.
5. Test for Gaps
After installation, spend a night in your camper and check for any cold spots or drafts. Use additional Armaflex to cover problem areas if needed.
Where to Buy Armaflex for Your Camper?
For the highest quality Armaflex insulation at a competitive price, we recommend purchasing it from by NOMADS webshop. As specialists in camper conversions, they offer reliable and tested insulation materials that are perfect for your van build. Their online shop provides detailed product descriptions and fast shipping, ensuring you get exactly what you need for your camper insulation project.
Check out their webshop and order your Armaflex today to start your camper insulation the right way!
Conclusion
Using Armaflex insulation in your camper is one of the best ways to enhance comfort, prevent moisture problems, and regulate temperature effectively. Its ease of installation, lightweight nature, and durability make it a top choice for van lifers and DIY camper builders alike.
By following the steps outlined in this guide, you can ensure a well-insulated camper that remains cozy in winter and cool in summer. Investing in high-quality insulation will not only improve your overall travel experience but also help protect your camper’s interior from long-term damage.
Ready to start your camper insulation project? Get your Armaflex sheets today from by NOMADS and enjoy the benefits of a well-insulated, comfortable camper wherever your adventures take you!
Read More From Techbullion