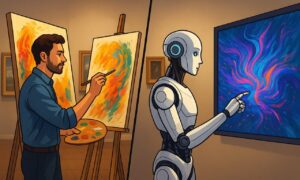
Since 2024 making AI (Artificial Intelligence) art is an exciting journey that adds technology, productivity and creativity. By following this step-by-step guide, you can explore the fascinating world of AI art and produce stunning visuals that captivate and inspire. Embrace the tools and techniques available, and let your creativity soar in this new artistic frontier.
Understanding AI Art:
What is AI Art?
AI art involves using artificial intelligence, particularly machine learning algorithms, to create or enhance visual art. These algorithms analyze vast datasets of images to understand patterns, styles, and structures, which they then use to generate new artworks or transform existing ones.
Why Use AI for Art?
AI offers a unique blend of technology and creativity, allowing artists to explore new styles and techniques. It can generate complex patterns, mimic famous art styles, and even produce entirely new forms of visual expression.
Conceptualization:
Define Your Vision:
Before diving into the technical aspects, it’s essential to have a clear vision of what you want to create. Consider the following:
Style:
Are you aiming for a realistic, abstract, or surreal look?
Theme:
What is the central theme or message of your artwork?
Medium:
Will you start with a photograph, a sketch, or a blank canvas?
Research and Inspiration:
Explore existing AI artworks and traditional art for inspiration. Platforms like Artbreeder and DeepArt.io can provide examples of what AI tools are capable of, helping you refine your concept.
Choosing the Right AI Tool:
Popular AI Art Tools:
Selecting the right tool is crucial for achieving your desired results. Here are some popular options:
DeepArt.io:
Ideal for style transfer, transforming photos into artworks inspired by famous styles.
Artbreeder:
Great for generating and blending images using GANs.
RunwayML:
Offers access to various machine learning models, suitable for both beginners and advanced users.
DeepDream:
Creates surreal, dream-like images by enhancing patterns in photos.
Evaluating Features and Usability:
When choosing a tool, consider the following:
User Interface:
Is the tool easy to use, especially if you’re a beginner?
Customization:
Does it offer enough control over parameters to achieve your vision?
Output Quality:
Are the generated images high-resolution and visually appealing?
Preparing Your Input:
Selecting Base Images:
If you’re using a style transfer tool, start by selecting a high-quality base image. This could be a photograph, a digital sketch, or any image you want to transform.
Preprocessing Images:
Ensure your base images are well-prepared. This might involve:
Cropping:
Focus on the subject by removing unnecessary elements.
Enhancing:
Adjust brightness, contrast, and saturation for better results.
Resizing:
Make sure the image meets the resolution requirements of your chosen AI tool.
Applying AI Techniques:
Style Transfer:
Style transfer involves applying the aesthetic of one image to another. Here’s how to do it:
Upload Images:
Upload your base image and style image to the tool (e.g., DeepArt.io).
Select Parameters:
Adjust settings such as style intensity and blending options.
Generate Art:
Let the tool process the images and generate the artwork.
Image Generation:
For creating new images from scratch, tools like Artbreeder use GANs. The process includes:
Starting Image:
Choose a starting image or generate one randomly.
Adjust Parameters:
Modify features such as age, gender, and facial expressions to customize the image.
Blend Images:
Combine multiple images to create a unique piece.
Image Enhancement:
Tools like DeepDream can enhance existing images:
Upload Image:
Start by uploading a high-resolution image.
Select Enhancements:
Choose the type and intensity of enhancements.
Process Image:
Allow the tool to analyze and enhance patterns, creating a dream-like effect.
Fine-Tuning and Refining:
Review and Adjust:
Once the initial artwork is generated, review it carefully. Look for areas that may need adjustments, such as:
Detailing:
Enhance specific details to add depth.
Color Balance:
Adjust colors for better harmony and impact.
Sharpness:
Ensure the image is sharp and clear.
Iterative Refinement:
AI art creation is often an iterative process. Make small adjustments and regenerate the artwork until you achieve the desired result. Tools like RunwayML allow real-time adjustments, making this process more efficient.
Finalizing Your Artwork:
Post-Processing:
After generating the final image, consider additional post-processing steps to enhance the artwork further:
Editing Software:
Use tools like Photoshop or GIMP for detailed edits.
Filters and Effects:
Apply additional filters or effects to enhance the visual appeal.
Resolution:
Ensure the final image is in high resolution, suitable for printing or digital display.
Saving and Exporting:
Save your final artwork in a suitable format (e.g., JPEG, PNG) and ensure it meets the required specifications for your intended use, whether for online sharing or printing.
Sharing and Showcasing:
Online Platforms:
Share your AI-generated art on social media platforms like Instagram, Twitter, and art communities like DeviantArt. Engaging with these communities can provide valuable feedback and increase visibility.
Building a Portfolio:
Create an online portfolio to showcase your AI artworks. Websites like Behance and Dribbble are excellent for reaching a broader audience and attracting potential clients or collaborators.
Participating in Competitions:
Enter AI art competitions and exhibitions to gain recognition and network with other artists. These events often provide exposure and opportunities for further growth.
Conclusion:
Artificial intelligence (AI) art has transformed the creative landscape, enabling artists to produce unique, captivating visuals using advanced algorithms and machine learning models. This guide provides a detailed, step-by-step process for creating AI art, from the initial concept to the final product, ensuring you achieve stunning results.


