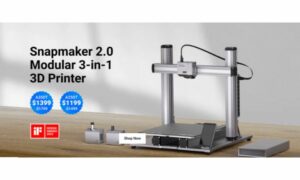
For the Snapmaker 2.0 3-in-1 3D printer, CNC router, and laser engraver, the Snapmaker Rotary Module is a revolutionary add-on. With the help of this module, you may easily engrave cylindrical and curved surfaces, broadening the scope of your artistic endeavors.
We’ll explore the capabilities and advantages of the Snapmaker Rotary Module in this article, as well as how it can improve your experience printing, engraving, and carving.
The Snapmaker Rotary Module: What is it?
The Snapmaker 2.0 3-in-1 machine has an add-on attachment called the Rotary Module. With the help of this module, you may print, engrave, and carve on cylinders that are up to 150mm in length and 70mm in diameter. It is simple to install and operate, compatible with the Snapmaker 2.0 A250, and A350 models.
The features of Snapmaker rotary module
The Snapmaker 2.0 rotary module differs from other rotary modules available on the market thanks to a number of characteristics. These qualities include:
- Motorized Rotation: A motor inside the module spins the item being etched. The Snapmaker touchscreen or the Snapmaker Luban software can be used to control this motor, making it simple to adjust the rotational angle and speed.
- Tailstock: The module features a tailstock that is adjustable, allowing you to fix the item in place and move it to the desired position. This tailstock is strong and long-lasting because it is made up of premium aluminum.
- Easy to Install: The module comes with a thorough instruction manual and is simple to install. It only takes a few minutes to install, and you can use it right away.
- Numerous Applications: The Snapmaker Rotary Module has numerous applications including engraving wine glasses, pens, and other cylindrical objects.
The Rotary Snapmaker Module’s advantages
- Saves Time and Effort: By automating the rotation of the item being engraved, the Snapmaker rotary module saves time and effort. By doing so, you won’t need to manually rotate the object, allowing you to focus on other tasks related to the project.
- Enhances Precision: The module makes sure that cylindrical items are accurately and precisely engraved. This is due to the fact that the object is firmly held in place and rotated evenly by the motor at a constant pace.
- Increases inventiveness: The Snapmaker Rotary Module gives you the opportunity to work on cylindrical items, which increases your level of creativity. Your projects become more diverse and dynamic as a result of this widening their scope of potential applications.
- Compatible with a Variety of Materials: The Snapmaker Rotary Module works with a variety of materials, including leather, acrylic, and wood. It can be used for a number of applications as a result, making it a versatile tool.
How to Use the Rotary Module for the Snapmaker
The Snapmaker Rotary Module is simple to use. Here’s an instructional guide to get you going:
Installing the Module: to install the module observe these steps:
- Unplug your Snapmaker 2.0 device from the power source and turn it off.
- Take the machine’s bed and clamps out.
- Place the rotating module firmly into the Snapmaker 2.0 machine’s slot after aligning it.
- Use the screws included in the package to firmly fasten the rotational module.
- Connect the motor cable to the machine’s and the module’s designated slot.
- Position the tailstock on the module’s opposing side and fasten it there.
Set up your project these 3 steps.
- Use your Snapmaker 2.0 device’s touchscreen or the Snapmaker Luban software to launch the program.
- Create or import your design, then change the settings to suit the requirements of your project.
- Ensure that the rotary module is selected in the settings and modify the rotation’s angle and speed as necessary.
Get your item ready for engraving.
- Select a cylindrical object that falls within the rotary module’s permitted size range.
- Insert the item into the tailstock and position it as needed.
- Verify that the item is level and centered.
Start engraving
- Press the start button on the touchscreen or the Snapmaker Luban software.
- While the laser, milling, or 3D printing head is engraving on the surface, the module will automatically rotate the object.
- Keep an eye on the engraving process and modify the settings as necessary.
- Take the item out of the module once the engraving is finished, then admire your handiwork.
The snapmaker rotary module is a vital tool for anyone looking to expand their creativity in 2023. To get one visit https://us.snapmaker.com/products/snapmaker-2-0-rotary-module


