One of the fundamental requirements of contemporary web applications and websites is the ability to upload files, such as documents, photos, and videos. For instance, users can publish videos and images on social networking platforms like Instagram.
Implementing and managing the file upload procedure was previously a difficult task. Thankfully, file uploads have gotten simpler as a result of advances in online technology. For instance, a Java file uploader makes file uploading rapid and convenient.
However, through file uploads, cybercriminals might introduce malware or other harmful content onto your machine and corrupt the server. Developers must therefore make absolutely sure that file upload on their website or web application is safe. To establish secure file uploading, we recommend you utilize a reliable Java file upload SDK.
We’ll go over how to use Java to build a file uploader in this article.
How To Implement a File Uploader Using Java?
A file uploader is nothing more than a “submit” that users can click to upload a file to a web application or website. A file uploader, however, means considerably more to developers.
We can create a simple file uploader in which we only use an HTML form and a servlet. In our example, the HTML form will have two input fields. One input field allows the user to upload his file and the second input field allows the developer to tell us where we should store the file.
We are suing POST method to send this the form data including the file to the server. Also, when we do file uploads, we use the encrypt=”multipart/form-data” because files contains lot of non-printable characters.
The servlet manages the POST request and extracts the File from the stream after processing the incoming file data. The destination specifies the location in the system where the File must be saved. When we press the Upload button, the data is transmitted to the servlet, which then stores the File at the designated location.
Creating an HTML file with the input field
Before we get started, create an index.html file to follow along.
The index.html should have the following code:
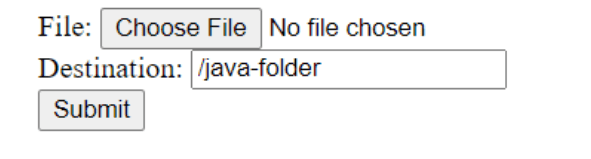
| <!DOCTYPE html> <html lang=”en”> <head> <title>Java File Uploader</title> <meta http-equiv=”Content-Type” content=”text/html; charset=UTF-8″> </head> <body> <form method=”POST” action=”upload” enctype=”multipart/form-data” > File: <input type=”file” name=”java-file” id=”java-file” /> <br/> Destination: <input type=”text” value=”/java-folder” name=”destination”/> </br> <input type=”submit” value=”Submit” name=”submit” id=”submit” /> </form> </body> </html> |
Here’s what your page should be like:
Handling server-side processing of the file
To write out servlet code, we will create a file called FileUploadServlet.java. Serlets use annotations to define components and metadata. So @WebServlet annotation is used to define a servlet component in Java.

Servlet annotation should say which HttpServlet should be executed for which URL. For that, we are defining the name and ulrPattern parameters in our @WebServlet annotation. Note that, when we submit our form, we will redirect to the /upload url where the FileUploadServlet Class will be executed.
@MultipartConfig annotation inform the servlet that it’s goint to receive multipart/form-data in MIME type.
Let’s write our complete code now.
| @WebServlet(name = “FileUploadServlet”, urlPatterns = {“/upload”}) @MultipartConfig public class FileUploadServlet extends HttpServlet { private final static Logger LOGGER = Logger.getLogger(FileUploadServlet.class.getCanonicalName()); protected void processRequest(HttpServletRequest request, HttpServletResponse response) throws ServletException, IOException { response.setContentType(“text/html;charset=UTF-8”); final String dest= request.getParameter(“destination”); final Part part = request.getPart(“file”); final String nameOfFile = getFileName(part); OutputStream out = null; InputStream cont = null; final PrintWriter printWriter = response.getWriter(); try { out = new FileOutputStream(new File(dest + File.separator + nameOfFile)); cont = part.getInputStream(); int reader = 0; final byte[] bytes = new byte[1024]; while ((reader = cont.read(bytes)) != -1) { out.write(bytes, 0, reader); } printWriter.println(“File “ + nameOfFile + ” created at “ + dest); LOGGER.log(Level.INFO, “File{0} uploaded to {1}”, new Object[]{nameOfFile, dest}); } catch (FileNotFoundException fne) { printWriter.println(“You did not mention a file name or are “ + “trying to upload a file to a nonexistent “ + “location.”); printWriter.println(“<br/> ERROR: “ + fne.getMessage()); LOGGER.log(Level.SEVERE, “Error while uploading the file. Error: {0}”, new Object[]{fne.getMessage()}); } finally { if (out != null) { out.close(); } if (cont != null) { cont.close(); } if (printWriter != null) { printWriter.close(); } } } private String getFileName(final Part part) { final String partHeader = part.getHeader(“content-disposition”); LOGGER.log(Level.INFO, “Part Header = {0}”, partHeader); for (String content : part.getHeader(“content-disposition”).split(“;”)) { if (content.trim().startsWith(“filename”)) { return content.substring( content.indexOf(‘=’) + 1).trim().replace(“\””, “”); } } return null; } }
|
The processRequest method invokes the getFileName method to obtain the file name from the file part after retrieving the destination and file part from the request. Following that, the method creates a FileOutputStream and transfers the file to the desired location. The method’s error-handling part detects and addresses a few of the most frequent causes of file not found errors.
Deploy the code
Now we have to build and run our program. For that, you can use any of your preferred IDE such as NetBeans, Eclipse, Intellij Idea etc. Once you have done that, part go to the
https://cdn.pixabay.com/photo/2016/11/30/20/58/programming-1873854__340.png
If you are using NetBeans, open Netbeans IDE and navigate to the working directory. Refer to Java’s official documentation if you have trouble. Right-click your folder in the Projects tab and choose Deploy. Next, we can access the browser and type the below URL:
http://localhost:8080/{foldername}/
The above-created HTML page will open after you enter the URL and press the enter key. To upload a file to the desired location, we can search the system and choose the file. We type the path to the folder in which we want to store the File in the destination area. The directory must be writable and already exist in the system. When we click the upload button with the destination field empty, an exception is raised.
The servlet receives a POST request when we click the upload button, and it copies the selected file to the specified folder.
We can visit the designated folder and check to see if the loaded File (for example TextFile.txt) is there after clicking the upload button.
Until now, we built a simple Java file uploader using HTML and Java. However, as the “simple” becomes a complex uploader with many features, it might be hard to keep track of the important features from those that aren’t. Not to mention, there are several security issues when we consider building an uploader from scratch. Therefore, the next section will take you through how you can upload files with the secure Filestack SDK.
How to easily upload files with Filestack SDK
To follow along, you will need a Filestack API key.
To get started, install the Filestack SDK using the command below:
| implementation ‘com.filestack:filestack-java:0.9.0’ |
To implement the upload features using Filestack, use the following code in your Java file:
| // Creating the client Config configuration = new Config(“API_KEY”); Client client = new Client(configuration); // Setting options and upload-related metadata StorageOptions option = new StorageOptions.Builder() .mimeType(“text/plain”) .filename(“file.txt”) .build(); // Perform a synchronous upload FileLink files = client.upload(“/filepath”, false); // Perform an asynchronous upload Flowable<Progress<FileLink>> upload = client.uploadAsync(“filepath”, false); upload.doOnNext(new Consumer<Progress<FileLink>>() { @Override public void accept(Progress<FileLink> progress) throws Exception { System.out.printf(“%f%% Your file is uploaded\n”, progress.getPercent()); if (progress.getData() != null) { FileLink files = progress.getData(); } } }); |
To assure it’s working, the following tests can be run:
| ./files test |
In case you are looking to deploy your app, Bintray is the target of deployments. To deploy, you need a user account that has been registered with the Filestack organization. Observe the basic Filestack release guidelines as well. Environment variables “BINTRAY USER” and “BINTRAY API KEY” are needed. To run:
| export BINTRAY_USER=” export BINTRAY_API_KEY=” ./files bintrayUpload |
Conclusion
You may also opt for a third-party tool if you find it tough to maintain and create your own Java file upload system. Due to data security and privacy concerns, people may avoid utilizing third-party systems, for example when uploading files holding medical records.
Additionally, they worry that they’ll have little control over who has access to the file storage infrastructure. However, you may guarantee the security of form and document data by utilizing a dependable file upload solution.
Frequently Asked Questions (FAQs)
Can you move files using an API?
Yes. Moving files using an API can be done using market-available API-based tools. This can be combined with programs running on various platforms such as online programs as well.
Can I submit a big file to REST API?
It can be difficult to upload large files, especially when other factors like poor bandwidth and network connections are present. It can result in numerous upload failures.
How does Java read an uploaded file?
Using input streams, a Java program reads collections of bytes or characters. File reading is a sequential operation that begins with constructing the file object, passes it to the input file, reads the data from the stream, processes it, and then closes the stream and file object.
What is a file upload tool?
It is an API or plugin that can be connected to your web application and allow users to upload photos, videos, and text files as well as allow some basic modifications, filter effects, etc.