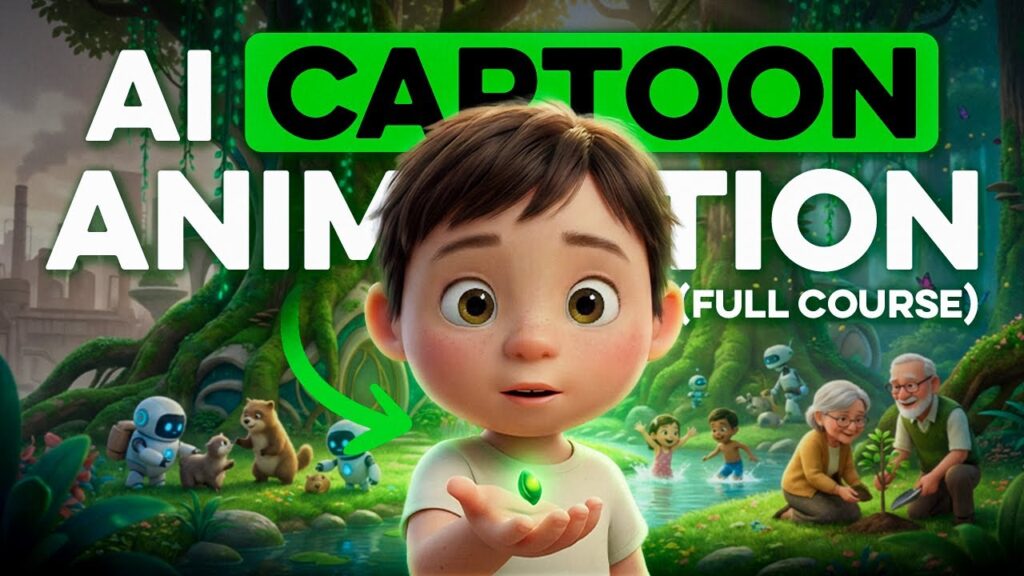
Making an animation movie from text no longer requires drawing every frame or mastering complex 3D software. With a reliable AI movie generator, a written idea can become a script, storyboard, collection of animated shots, and eventually a complete short film.
However, creating a movie involves more than entering one prompt and waiting for a finished result. Current AI models work best when a story is divided into scenes and individual shots. Characters, environments, camera directions, dialogue, and sound must then be coordinated across the project. This guide explains how to turn text into an animated movie while maintaining a consistent style and coherent story.
Can AI Turn Text Into an Animated Movie?
Yes. AI can help transform a premise, outline, story, or screenplay into animated footage. The process may include:
- Developing the story
- Formatting the script
- Designing characters and locations
- Creating a storyboard
- Generating animated shots
- Producing dialogue and narration
- Adding music and sound effects
- Editing the shots into a finished movie
Some platforms bring several of these tasks into one production environment. Others generate only individual clips, requiring you to assemble and finish the movie in separate software.
AI is especially useful for animated shorts, trailers, proof-of-concept films, story videos, educational content, branded narratives, and episodic social media projects.
How Text-to-Animation Works
Text-to-animation technology interprets written descriptions and converts them into moving visuals. A prompt can tell the model what appears in a shot, what the character does, how the camera moves, and what visual style the animation should use.
For example:
A curious young inventor enters a dusty clock shop at midnight. Tiny mechanical birds flutter between shelves while moonlight shines through a circular window. Wide establishing shot, slow camera push-in, whimsical hand-painted 2D animation.
The model uses those instructions to generate a short animated clip. To produce a movie, you repeat this process for each planned shot and assemble the results in narrative order.
The quality of the final film depends on three things:
- How clearly the story is structured
- How consistently characters and locations are described
- How carefully each generated shot is reviewed
How to Make an Animation Movie From Text
1. Begin with a focused movie concept
Summarize the story in one sentence. This is sometimes called a logline.
A useful logline identifies the protagonist, goal, obstacle, and stakes:
A lonely repair robot must restore a city’s last streetlight before a permanent storm covers the streets in darkness.
A focused concept gives every scene a purpose. If the story cannot be summarized clearly, it may be too complicated for a first AI animation project.
Start with a short film between 30 seconds and three minutes. Shorter projects make it easier to control character continuity, pacing, and generation costs.
2. Create a simple story outline
Divide the story into a beginning, middle, and end. A basic structure might look like this:
- Beginning: Introduce the character, setting, and problem.
- Middle: Make the character attempt a solution and encounter difficulty.
- Climax: Present the most important decision or action.
- Ending: Show the outcome and emotional change.
Next, break the structure into scenes. Each scene should have a location, participating characters, and a clear dramatic purpose.
For example:
- Scene 1: The robot discovers the broken streetlight.
- Scene 2: It searches an abandoned workshop for replacement parts.
- Scene 3: The storm intensifies as the robot begins the repair.
- Scene 4: The light turns on and guides residents home.
This outline becomes the production map for the animated movie.
3. Write the script for visual production
Write actions that can be shown on screen. Abstract emotions are difficult to animate unless they are translated into visible behavior.
Less useful:
The robot feels afraid but finds hope.
More useful:
The robot steps back as thunder shakes the workshop. It notices a small glowing battery beneath the workbench, pauses, and reaches toward it.
Use consistent character names and write action in the present tense. Include scene headings, action, and dialogue:
EXT. CITY STREET – NIGHT
Rain sweeps across an empty street. ARLO, a small copper repair robot with one blue eye, approaches a flickering streetlight.
ARLO
Just one more light.
Keep individual scenes concise. Long scenes containing many movements are harder to translate into coherent AI-generated footage.
4. Choose an animation style
Select the visual direction before generating characters or storyboards. Possible styles include:
- Hand-painted 2D animation
- Flat vector animation
- Cut-paper animation
- Clay-like stop-motion
- Stylized 3D animation
- Cel-shaded anime
- Graphic-novel animation
- Watercolor storybook animation
- Retro pixel art
- Minimal motion graphics
Describe the visual features rather than requesting an imitation of a copyrighted franchise or living artist. For example, use “soft 3D characters with rounded shapes and warm theatrical lighting” instead of naming a particular studio.
Record the following decisions in a style guide:
- Color palette
- Line quality
- Character proportions
- Texture
- Lighting
- Level of realism
- Frame composition
- Camera behavior
- Intended mood
Repeat the most important style details in every shot prompt.
5. Build character and location reference sheets
Character consistency is one of the biggest challenges when making an animated movie from text. Without stable references, a character’s face, clothes, height, or colors may change between scenes.
Create a character sheet for every recurring character. Include:
- Name and role
- Age range
- Body shape and proportions
- Face and hairstyle
- Clothing
- Distinctive colors
- Important accessories
- Personality
- Typical expressions
- Front, side, and three-quarter views
A compact character description might be:
Arlo is a waist-high copper repair robot with a rounded rectangular body, thin jointed arms, one circular blue eye, a faded yellow tool belt, and a small antenna bent to the left.
Create similar reference sheets for important locations and props. If a workshop appears in several scenes, establish its layout, lighting, major objects, and color palette before animating it.
Reuse the same approved reference images whenever the character or location returns.
6. Convert the script into a storyboard
A storyboard translates the written script into planned camera shots. It lets you evaluate the story before spending time generating final animation.
For every shot, record:
- Shot number
- Scene and location
- Characters
- Visible action
- Shot size
- Camera angle
- Camera movement
- Approximate duration
- Dialogue or sound
- Reference assets
A storyboard for one scene could include:
- Shot 1: Wide shot of the abandoned workshop
- Shot 2: Medium shot of Arlo entering
- Shot 3: Close-up of Arlo’s eye scanning the room
- Shot 4: Insert shot of the glowing battery
- Shot 5: Low-angle shot as Arlo reaches beneath the workbench
Check whether the sequence is visually understandable without dialogue. Remove repetitive shots and confirm that characters move through the space logically.
7. Choose an AI movie production tool
A basic text-to-video tool may be enough for a standalone clip. A multi-scene animated film benefits from a platform that can organize scripts, characters, references, shots, and revisions together.
HeyVigo AI is designed for structured video production rather than isolated generations. Creators can begin with an idea, outline, or finished script and organize the project around recurring characters, scenes, visual references, and individual shots.
It supports animated and stylized film workflows, including illustrated, fantasy, science-fiction, surreal, and anime-inspired directions. It also lets creators reuse approved project assets, choose an appropriate generation model for each scene, and revise individual shots without restarting the entire movie.
This shot-level approach is valuable when one scene needs improvement but the rest of the sequence is already working.
8. Write a prompt for every shot
Do not paste the entire screenplay into a single text-to-video prompt. Write a dedicated prompt for each storyboard panel.
Use this formula:
Character + action + location + composition + camera movement + lighting + animation style + continuity instructions
Example:
Arlo, a small copper repair robot with one circular blue eye and a faded yellow tool belt, kneels beside a broken streetlight in an empty city square. Medium low-angle shot. The camera slowly moves closer as Arlo opens a metal panel and sparks illuminate his face. Dark blue storm lighting with warm orange reflections. Hand-painted 2D animation with textured backgrounds and restrained character movement. Keep Arlo’s body shape, eye color, antenna, and tool belt consistent.
One primary action per prompt usually produces better results than a long list of movements.
9. Generate draft shots before final animation
Generate rough versions of every shot first. The purpose of this stage is to evaluate storytelling, composition, timing, and visual continuity.
Do not spend the highest-quality settings on an untested scene. Draft quickly, arrange the clips in order, and watch the entire sequence.
Ask:
- Is the story easy to follow?
- Does each shot add new information?
- Are important actions visible?
- Is the pacing too fast or slow?
- Do neighboring shots match?
- Does the character remain recognizable?
- Are the camera directions coherent?
Regenerate weak shots before moving to the final render stage.
10. Improve consistency between scenes
Reuse identical character and location references throughout the project. Copy stable descriptive details into every relevant prompt.
When moving between shots, pay attention to:
- Character appearance
- Clothing and accessories
- Screen direction
- Time of day
- Weather
- Light direction
- Prop placement
- Camera distance
- Animation style
- Color palette
First-and-last-frame generation can help when a shot needs a defined starting composition and ending composition. Image-to-video can also provide more control than pure text-to-video when the appearance of the opening frame is important.
If a shot contains visible inconsistencies, regenerate it rather than assuming viewers will not notice.
11. Add dialogue, voices, and lip-sync
Once the edited visual sequence is stable, produce the dialogue and narration.
Create a simple voice guide for each speaking character:
- Vocal age
- Pitch
- Tempo
- Accent
- Energy
- Emotional range
- Pronunciation notes
Generate or record clean dialogue before attempting lip-sync. Keep sentences short and leave natural pauses between lines.
Review every voice carefully. Make sure pronunciation, emotion, and pacing match the scene. Obtain the necessary permission before cloning or imitating a real person’s voice.
12. Create music and sound effects
Sound makes generated animation feel connected and intentional. Build the soundtrack in layers:
- Dialogue
- Environmental ambience
- Character movement
- Object sounds
- Transitional effects
- Music
For example, a storm scene might include rain, distant thunder, electrical sparks, metal footsteps, and a restrained musical theme.
Avoid filling every second with loud effects. Silence and subtle ambience can make important moments more effective.
13. Edit the animated movie
Place the approved clips on a timeline in storyboard order. Trim unnecessary frames and adjust each shot to match the rhythm of the dialogue and music.
During editing:
- Cut on movement where possible.
- Avoid holding visibly unstable frames.
- Use transitions only when they support the story.
- Keep dialogue louder than background music.
- Add captions when appropriate.
- Check that titles and credits are readable.
- Use color correction to unify shots.
- Review the film on both desktop and mobile screens.
A collection of impressive clips does not automatically become a movie. Editing creates the timing, relationships, and emotional progression that connect those clips.
14. Complete a final quality-control review
Watch the movie several times, focusing on a different issue during each review.
Check for:
- Changing facial features
- Inconsistent clothing or colors
- Extra fingers, limbs, or objects
- Flickering backgrounds
- Unnatural character motion
- Incorrect lip-sync
- Sudden changes in lighting
- Continuity errors
- Misspelled titles or captions
- Uneven audio levels
- Unlicensed source materials
- Unauthorized voices or likenesses
Export a test version before rendering the final master. Check the exported file from beginning to end rather than relying only on the editing preview.
Common Mistakes When Making an Animated Movie From Text
Trying to generate the entire movie at once
Current AI models are more dependable at creating individual shots than complete polished movies in one uninterrupted generation. Divide the script into scenes and shots.
Designing characters during production
Approve character designs before generating final footage. Otherwise, every scene may interpret the characters differently.
Writing abstract prompts
AI needs visible actions. Replace “she becomes suspicious” with “she narrows her eyes, steps away from the door, and hides the key behind her back.”
Mixing animation styles
A watercolor opening, glossy 3D middle, and flat-vector ending will feel disconnected unless the variation is intentional. Establish a visual guide and follow it.
Asking for several actions in one clip
Generate separate shots for separate actions. Complicated prompts frequently result in confused motion or skipped events.
Rendering final-quality shots too early
Build a rough version first. Approve the storyboard, timing, and scene order before using more expensive generation settings.
Ignoring sound until the end
Dialogue and music affect pacing. Plan them early, even if the final audio is added after the visual edit.
Turn Your Text Into an Animated Movie
Making an animation movie from text is best approached as a production pipeline: write the story, plan the scenes, establish the visual world, generate individual shots, and assemble them through editing and sound.
The technology can accelerate animation, but storytelling and creative judgment remain essential. Start with a short idea, keep your characters and style consistent, and refine the movie one shot at a time. That structured approach will produce a far more convincing film than relying on a single oversized prompt.
Frequently Asked Questions
Can AI make a full animated movie from a text prompt?
AI can support the entire production process, but a polished movie is normally generated scene by scene. The shots still need to be reviewed, arranged, edited, and combined with sound.
Can I turn a written story into animation?
Yes. Adapt the story into a visual script, divide it into scenes, create character references and storyboards, and then generate each animated shot.
How long should my first AI animation movie be?
A project between 30 seconds and three minutes is a manageable starting point. Short films make it easier to control visual consistency and finish the production.
What kind of text works best?
A structured script works better than a long block of prose. Use scene headings, consistent character names, present-tense action, concise dialogue, and clearly visible behavior.
How do I keep an animated character consistent?
Create an approved character sheet, reuse the same reference images, and repeat the character’s stable physical details in every shot prompt.
Do I need traditional animation skills?
Traditional skills are helpful but not mandatory. Storytelling, composition, editing, and creative direction still matter, even when AI handles much of the image generation.
Can I use an AI-generated animated movie commercially?
Commercial rights depend on the platform, generation model, subscription, source assets, and local laws. Review the applicable terms and confirm that you have permission to use every uploaded image, voice, logo, and reference.