One of the convenient label printing methods is direct thermal printing. Other than the convenience, it is also cost-efficient. That is why a Direct Thermal Labels Printer is the go-to option for the majority of businesses and individuals. It is equally suitable for both personal and commercial use.
But do you know how to work with a direct thermal label printer?
Here’s the complete tutorial to understand the usage of these label printers.
What is a Direct Thermal Labels Printer?
A direct thermal label printer is one of the two thermal printing technologies.
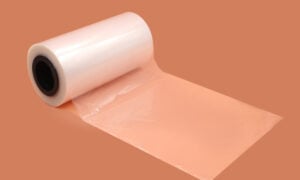
- It uses heat to print rather than ink, toner, or ribbon. For this, a special heat-sensitive label material is utilised. When the heated thermal printhead is pressed against this paper, it creates text or images. These are widely used to print labels, tickets, bar codes and receipts.
- Another advantage of using a direct thermal labels printer is that it has fewer components, making it relatively easy to handle. It’s also very compact.
- It’s not that these printers don’t have any disadvantages. One of them is that these labels are sensitive to abrasion and bound to fade in the long run. So, direct thermal label printers are better suited for short-term applications.
However, the pros outweigh the cons.
How to use Direct Thermal Label Printers?
One can easily learn how to work a direct thermal printer. If you are planning to purchase a direct thermal printer but are unsure if you will be able to handle it, don’t worry. It’s more manageable than you think.
Let’s go through each step and understand how everything comes together.
Step 1: Connect the printer
Once you have received the product, unpack it and plug in the power cord. Later, connect the printer to your computer using the USB cable.
Before you start operating the printer, make sure everything is plugged in correctly. Also, use the original power adapter.
Step 2: Read the manual
The printer comes with a manual; give it a read. The manual specifies everything a user needs to know to use the product efficiently. Out of everything, you must first study the buttons, ports, and other accessories the printer came with and their utility.
Half the work is done once you understand how each button, port, and accessory works. Typically, you are going to find:
- Power cord
- USB cable
- Paper guide (slot where the label material goes)
- Power adapter
- Status indicating button
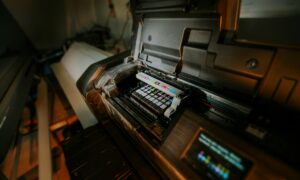
- Printhead module
- Testing label material
Step 3: Turn on and get started
Now you can begin printing labels. The process is quite simple. Turn on the printer and insert the heat-sensitive label paper into the paper guide. Ensure that the paper width fits perfectly into the slot.
Step 4: Set your printing preferences & print
Go to your computer and set up your printing preferences, such as paper type, print density, etc. You have to install the relevant software beforehand.
Click ‘print’ now, and the printer automatically pulls in the paper. The printer now applies heat to the paper and creates the text/images you want to print. It’s as easy as that.
One little caution is to turn off the printer once you are done using it. Don’t leave it on for days.
Direct Thermal Label Printer and Thermal Transfer Printer
People often mix up the direct thermal and thermal transfer printing. They are different in many ways. The latter is a tad more pricey than the former.
- Thermal transfer printing uses wax ribbons or ink instead of heat like direct thermal. Labels printed using thermal transfer last longer.
- Thermal transfer printing is best suited for long-term applications when the printing media will be exposed to extreme environments such as chemicals, light, high temperatures, or water for more than six months. For example, asset monitoring, laboratory specimens and blood bags, permanent identification, and freezer storage.
- Various printing materials, such as paper, plastic, and polyester, are available for thermal transfer printing. These materials come with different levels of durability, polyester being the most resilient material.
- Furthermore, thermal transfer printers allow you to utilize coloured ribbons to increase label design.
One way to tell thermal transfer print from direct thermal is by scratching on the label. It is direct thermal if you can see clear black scratch lines on it; if it doesn’t, it’s thermal transfer.
Many thermal transfer printers can also work without the use of ribbons in direct thermal mode. This might be a fantastic alternative for business owners who need more flexibility but don’t want the trouble or cost of having multiple printers.
Conclusion:
These are the answers to your printing troubles.
A direct thermal label printer is a good investment if you are a small business owner and your printables are limited. In contrast, it is an equally good investment if you are a family that requires printing for household matters.