Mehndi is a form of body art that is used in many parts of the world. It’s an ancient, traditional art form that originated in India and was carried on by the Muslim population.
Mehndi designs are traditionally drawn with henna, a plant-based dye, which comes from the leaves of the henna plant. The designs can also be drawn with other natural dyes such as walnut or indigo.
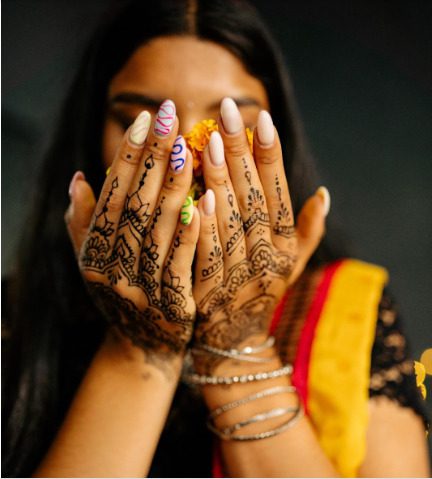
The mehndi design is created by drawing intricate patterns on the skin; it can be as simple or extravagant as you want it to be!
History of Mehndi
Mehndi is a traditional Indian art form that is practiced in India, Pakistan, Bangladesh and Nepal. The word mehndi is derived from the Sanskrit word “mendhika” meaning “to paint”. Mehndi has been used for over 3,000 years as a form of decoration and to express one’s feelings.
The beauty of mehndi design lies in its simplicity. It can be crafted with just henna powder, water and a cone-shaped applicator called a ‘mehnda’ or ‘Mehendi’. Henna is an all-natural dye that can last up to six weeks on the skin.
How to start off with mehndi designing
Even though applying mehndi is most commonly done for weddings and other celebrations, you may create beautiful artwork with it at any time of the year. There are several beginner-friendly mehndi designs that are very easy to make. You can produce a stain on your skin by making your own paste out of henna powder and applying it to clean your skin. Either educate yourself on more classic patterns, such as flowers and peacocks or start creating your own. You can create amazing works of art in the comfort of your own home with enough practice.
Make henna paste
You can start rapidly making designs if you buy paste in bottled form. Henna that has already been prepared is usable as soon as it is brought into the house. Because it typically comes in applicator bottles or cones, it’s possible that you won’t even need to purchase any other supplies. The quality of readymade paste can vary from bottle to bottle, which is one of the drawbacks of using it. Some pastes even employ fake henna that is created with industrial chemicals that are known to cause skin irritation and even burn.
You also have the option of making your own paste
If you want to produce your own henna paste, you will need to mix henna powder. The most fundamental form of henna paste is created by combining henna powder, sugar, and water. Some individuals add lemon juice, tea, or essential oils such as eucalyptus to the mixture in order to improve its smell and make it feel more pleasant when applied to the skin. [2] When working with handmade paste, you can rest assured that you are constantly utilizing a fresh product. The consistency of the paste can be altered to suit your preferences.
Maintain the paste in that location throughout the entire night.
If the paste is fresh, cover it and let it sit out at room temperature overnight. Hold the paste in a bowl designed for mixing. Wrap it in cling wrap or another airtight plastic container to keep the moisture in. After that, place the bowl in a location that maintains a consistent temperature. You may try setting the bowl on top of the refrigerator, on top of the countertop, or beneath the light of the stove.
Purchase some bottles and cones.
If you don’t already have any, you should get some applicator bottles or cones. The paste can be applied in a wide variety of various ways. The most common method is to utilize a piping bag, often known as a “carrot bag,” which is commonly used by bakers to decorate cakes. To remove the paste from the bag, you snip off the corner of the bag. [5] Plastic squeeze bottles, such as the ones that are used to carry dyes, are another option that is commonly used. When you’re working on a design, you’ll have more success if you use bottles of a smaller size.
Make use of the spoon to place the paste inside the bottles or cones.
Utilizing a spoon, transfer the paste into the appropriate containers. Take a sizeable scoop of the henna paste in your hand and cram it all the way into the applicator. Pack the paste in the applicator so that it is as close to the entrance as possible. To move more of the paste toward the entrance, roll or squeeze the applicator in any direction.
First, put it to the test on some paper.
Check the consistency of the paste by applying it to a piece of paper. Lightly squeezing the applicator will allow you to release a small amount of the paste. Make an effort to create a line that is straight. It is time to use the paste when it has a smooth appearance and a consistent rate of discharge from the container. Before applying anything to your skin, make any necessary adjustments to the applicator and the paste.
Then you should begin developing the design for your mehndi. Mehndi designs may seem complicated at the beginning but trust me once you do it two or three times, you will easily master them.
Why do couples generally do mehndi designs on their hands?
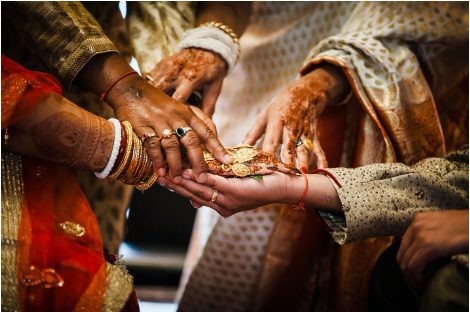
- Mehndi designs are believed to bring good luck to the bride and the groom
- It is done as a representation of showing love for each other which boosts the love tank factor
- It is a mandatory tradition in several wedding ceremonies
- Henna used in mehndi designs also has several health benefits
Make sure to practice mehndi designs on paper before doing it on someone’s hands or fingers if you are a newbie. If you have already gained enough confidence then directly start your mehndi designing on people’s hands.