A ten-second demo can make an AI video tool look ready for your next project. The lighting looks right, the camera moves smoothly, and everything stays in place. You rarely see the attempts that came before it. You also don’t know what happens when someone asks for a small change.
Those details matter when your team has a deadline. A good clip is a promising start, but you need to know how much work it takes to get there—and whether you can revise it without starting over.
A small trial can answer those questions. Start with one scene you need, decide what would make it usable, and follow it through to the finished export.
Pick a Scene From a Real Project
Suppose your team is making an explainer for a desk-booking app. You need an opening shot of a shared office before the video moves into a screen recording of the software.
That’s a useful first test because the generated scene has a clear, limited job. It needs to establish the setting. It doesn’t need to show the booking process or reproduce the app’s interface. The real screen recording will handle that part.
A request such as “make a launch video for our app” leaves too much open. If the result disappoints you, it will be hard to tell whether the problem was the tool, the brief, or the number of things you asked it to do.
Keep the Brief Consistent
Describe the subject, setting, action, and camera movement. For the office scene, that might mean a small shared workspace with empty desks, natural daylight, and a slow camera move. Add any details the scene must include, but leave out anything that won’t affect how you’ll use it.
Wizstar’s AI video generator is one option for a trial using a text prompt or reference image. Judge the output against your brief: could this clip work as the opening of the explainer, and what would need fixing first?
If you’re comparing tools, give each one the same core instructions and reference material. Note any changes a tool requires so you can account for them when reviewing the results.
The broader range of creation tools on wizstar.com may also be relevant if your project needs an avatar or narration. Test those tasks separately. A good office clip tells you little about how well another tool will handle your script.
Watch the Whole Clip
A convincing first frame doesn’t guarantee that the rest of the video holds up. Watch it at normal speed, then check any moment that looks strange.
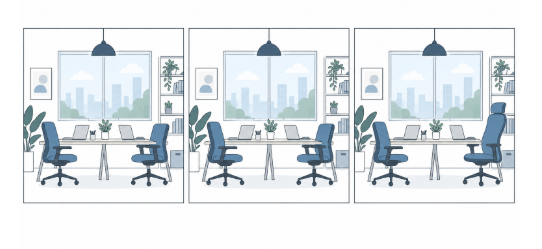
In the office example, a chair might change shape as the camera passes. A desk edge could bend, or an object could disappear behind a monitor and never return. Pay particular attention to movement and places where objects overlap.
The intended use will help you decide what matters. A small flaw in the background may be acceptable in a brief opening scene. A change to a product feature could make a demonstration misleading.
Watch the clip at the size your audience will see it, too. Something easy to miss on a phone may be obvious in a full-screen presentation. A tiny flaw you can only see by pausing and zooming in may not be worth another attempt.
When you find a problem, record its timestamp. “Chair changes shape at 0:04” is much more useful to the next reviewer than “looks a bit odd.”
Try One Revision
Someone reviewing the video may want a slower camera move or more room for a title. It’s worth finding out how the tool handles that request before you rely on it for a project.
For the office scene, try asking for a stationary camera while keeping the rest of the brief the same. Does the setting remain consistent? Has the change introduced a new problem elsewhere?
Some tools may require a fresh generation rather than an edit to the existing clip. If that’s the case, include it in your notes. A small request that sends you back to the beginning can affect how you plan review time.
Keep this test to one change. If you alter the prompt, reference image, and output settings together, you’ll have trouble working out why the next version is better or worse.
Take the Export Into Your Editing Software
Before calling the clip usable, export it and open it in the software your team normally uses. Check its dimensions, format, resolution, and any watermark. Make sure the plan you’re considering provides the export you need.
Then put the clip beside the other parts of the project. For the desk-booking explainer, that means a screen recording, narration, and captions. Seeing them together can reveal work that wasn’t obvious when you watched the generated scene alone.
Tools on the same website may have different export options. They may not pass projects between them, either. Check the steps you’ll actually use instead of assuming everything connects.
Use approved sample assets for the trial. If a later version will involve confidential screenshots or customer information, check your company’s requirements before uploading that material.
Count the Work Behind the Clip
The cost of a generation is only one part of the decision. Keep a short record of what it took to reach a version your team would publish.
| Item | What to record |
| Attempts | How many versions you generated |
| Review time | How long you spent checking the results |
| Revisions | What you changed and any new problems |
| Finishing work | Editing, audio, captions, or corrections still needed |
| Usable output | Which clips were ready to include in the project |
A scene that takes several attempts may still be worth the effort if filming it would be difficult. For a simple software demonstration, a screen recording may get you there sooner.
One trial won’t tell you how every future project will go. It can, however, help you make a specific decision about the work in front of you.
For the desk-booking explainer, you might keep the generated office scene and use real footage of the interface. Save the brief, the accepted clip, and the revision notes together. The next person working on the video will have a useful starting point.