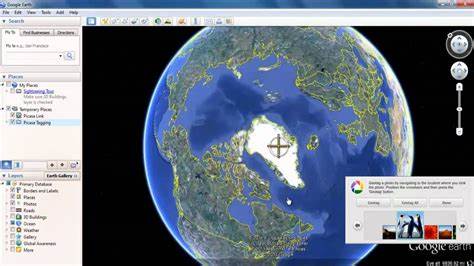
If you’ve ever seen a photo or video with a location tag, then you’ve seen geo-tagged photos. Geo-tagging is an incredibly helpful tool for photographers and videographers who want to accurately show where their work was taken. But it can also be tricky to set up and use.
In this blog post, we’ll explain exactly how to take geo-tagged photos and videos that showcase the where as well as the what of your work. Read on to learn more about this powerful tool and how you can use it to enhance your own photography!
What is a geo-tagged photo?
A geo-tagged photo is a photo that has been tagged with the location where it was taken. This information can be used to pinpoint the exact location of the photo on a map. Geo-tagging photos can be useful for a variety of purposes, such as sharing your location with friends and family, or finding out where a particular photo was taken.
Most smartphones and digital cameras come equipped with GPS capabilities, which allow them to automatically tag photos with their location. To take a geo-tagged photo, simply enable the GPS feature on your camera or phone and make sure that your device has an active connection to a satellite. Once these conditions are met, your device will be able to tag each photo with its coordinates (latitude and longitude).
Some social media platforms, such as Instagram, also offer geo-tagging features. When posting a photo on Instagram, you can choose to share your location with your followers. This can be a great way to let people know where you are and what you’re up to. It can also be useful for finding out if any of your friends are in the same area as you.
How To Take a geo-tagged Photo
There are a few things you need to do to take a geo-tagged photo. First, make sure your camera is set to geotag photos. This can usually be done in the settings menu. If you’re using a smartphone, there’s a good chance that your phone already has this feature enabled.
Next, find a place where you want to take a photo. Once you’re in position, take your photo as you normally would. Afterward, check the EXIF data of the photo to ensure that the GPS coordinates were recorded properly. You can do this using any number of online tools or EXIF readers.
That’s all there is to it! With these simple steps, you can add GPS coordinates to any photo you take from now on.
The Benefits of Taking Geo-Tagged Photos
There are many benefits to taking geo-tagged photos, including the ability to:
- Track your location: Geo-tagging photos allows you to track your location and see where you’ve been. This can be useful for travel or keeping track of your whereabouts.
- Share your location: Geo-tagging also allows you to share your location with others. This can be useful for meeting up with friends or family, or for sharing interesting places you’ve visited.
- Remember a specific place: If you take a photo of a place that you want to remember, geo-tagging can help you do just that! By tagging the photo with the location, you’ll always be able to look back and remember exactly where it was taken.
How To Store And Share Geotag Photos
There are two main ways to store and share geo-tagged photos: via a mobile app or online.
If you choose to use a mobile app, there are a few things to keep in mind. First, make sure the app you select allows you to share your photos with others. Second, check the privacy settings to ensure that only people you want to see your photos will be able to access them. Finally, consider whether you want to have the app automatically share your location with each photo, or if you’d prefer to manually add the location data before sharing.
If you opt to store and share your geo tag a photo online, there are also a few things to consider. Again, privacy settings are important – make sure only people you want to see your photos will be able to access them.
In addition, many online photo sharing services allow you to geotag your photos when uploading them – so if that’s something you’re interested in doing, be sure to check for this feature before selecting a service.
How To Use Geo tag Photos
If you want to take advantage of the geo-tagging capabilities of your camera, there are a few things you need to do. First, make sure your camera is turned on and that GPS is enabled. Once you’ve done that, simply take a photo like you normally would. The geotagging information will be automatically added to the photo’s EXIF data.
To view the geo-tagged information for a photo, you’ll need to open it in a program that can read EXIF data. Many photo editing programs, such as Adobe Photoshop and Lightroom, can do this. Once you’ve opened the photo in an appropriate program, look for the GPS information under the “Location” heading. This should give you the latitude and longitude coordinates for where the photo was taken.
Conclusion
Geo-tagging photos is an easy and fun way to document your travels and adventures. We hope this article has given you a better understanding of what geo tag photos are, as well as how to take them and add the location information yourself.
With a few simple steps outlined above, you can now start capturing geo-tagged images with ease! So have fun exploring the world around you – one shot at a time!


