Increasingly, modern smartphone models can successfully compete with the professional versions of digital cameras in terms of photo quality and using the iPhone, some famous directors have even managed to shoot several films. We can help you easily understand some of the subtleties of taking beautiful pictures with any model of iPhone. By the way, if you want to know how to invert colors on a picture on iPhone, read interesting articles on Skylum’s blog.
Why are we only talking about the iPhone now?
Almost all smartphones released by Apple rank at the top in terms of photo quality. In addition, the manufacturer does not get tired of placing huge advertising banners around the world, which demonstrate the high quality of photos. There are even special competitions for photos taken by Apple smartphones.
However, the iPhone itself is only a cool tool, and to get the best results, you also need some user effort. To do this, you need to choose an interesting composition and properly process the picture with the help of in-house tools or third-party applications. You may even need the knowledge of how to invert a photo on an iPhone, so it is better to study this point in advance. In this article, we will look at an example of how to photograph objects on the iPhone to get beautiful pictures. First of all, it should be noted that any modern model of iPhone is suitable for such photography, including versions with a single camera.
Look for natural light
Not everyone has the opportunity and needs to buy studio light, especially often the effect of using natural light is not worse. So, an ordinary breakfast photo can be turned into a beautiful picture for Instagram, if you just bring the coffee and dessert to the window, selecting the right background and arrangement of objects. And sometimes, on the contrary, you can use not natural light, but its absence – for example, the contrast between soft and hard light. If you put the object (or person) in the shade when the sunlight is bright, the effect will be much more impressive than if you just take a photo with natural light.
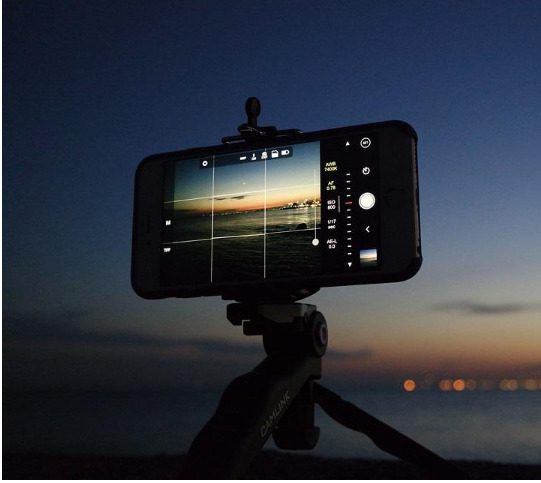
Lock the exposure
Many people wonder why they need to hold their finger on the iPhone screen when taking pictures and lock the exposure. First, by locking it in one position, you can conveniently control it – raise or lower it to add or take away light accordingly. Second, it’s a real gift for sunset photos – lower the exposure so that the model turns into a dark silhouette, and you take the original photo.
Frame the photo
If you’re photographing a person, you don’t have to frame the whole person. Neither is it necessary to crop a photo to fit a specific still object. Crop the photo to focus attention on the main part of the picture – a person or an object. For example, if you want the model’s cup of coffee or other accessories to be more visible in his hands. Full-length shots are also great, but only when the background demands it. Often you can do with cropping and end up with a more interesting photo.
Shooting and post-processing
So, let’s start taking pictures. To prevent dust and dirt particles on the lens from affecting the quality of the photo, wipe it with a microfiber cloth. After that, follow a few simple steps:
- Choose the best angle and method of shooting.
- Select the normal macro mode and tap the image of the subject on the smartphone display so that it can focus on it.
- Take several seemingly identical photos.
You can use a tripod or an optional lens (if you have a set of such iPhone accessories). After selecting the photo you think is best, click the “Edit” button at the top right of the screen. Then select the effect that best suits the photo and set the optimal color and light value. Save the result. If you don’t like the effect, you can continue processing the photo with the help of special applications. We recommend using Lumar Neo because it’s very simple and intuitive even for beginners while containing advanced editing tools. For example, you do not have to spend a long time learning how to invert colors on iPhone photos, you can do it in just a couple of clicks.
IOS’s ability to improve photo quality
The IOS operating system has a significant number of features that allow you to take pictures with your iPhone to the next level. Some of them are known to every user, but some of them few people have heard of:
- Capture out-of-frame photos. This is a feature that is activated in the settings and allows you to increase the number of captured objects in the frame. When implementing this option, the smartphone uses the wide-angle lens at the same time as the main lens, which allows you to increase the frame capture area during editing.
- Soft shift focal length. When the smooth change of focus function is activated, you can switch between the cameras by tapping on the bottom of the display. The lens and focal length are changed sharply and by a pre-selected value. To switch smoothly and find the individual focal length, hold your finger on the lens shift icon.
- Adjusting the exposure level. A yellow frame and an icon appear when you click on the subject you want to capture in focus. By pulling it up and down, you can change the exposure level manually, that is, brighten or darken the picture.
Using these iOS system features, you can take cool and beautiful photos on your iPhone. Still, the functionality is only half of it, so the above practical skills will come in handy, too. If you still need a theory on how to invert colors on a picture on iPhone, then go to the official website of Skylum.