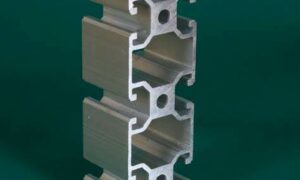
Thanks to their robustness, lightweight, and affordability, aluminum extrusions have become essential in various industries. However, they are not without flaws – when these extrusions aren’t straight, their production process can become a nightmare.
Straightening them may seem difficult, but with the appropriate tools and techniques, it’s possible. This article will explore in detail the art of effectively straightening aluminum extrusions.
Tools Required
To straighten the bent extrusions and make them align perfectly again, you’ll need a few indispensable tools:
- A straightening table – A perfectly flat surface with no bumps or wrinkles that may further harm the delicate aluminum.
- A clamp or vise – To anchor the extrusion to the straightening table securely.
- A straightening tool – Think hydraulic press, hammer, or rubber mallet; powerful enough to discipline the extrusion but gentle enough not to harm it.
- A straight edge – An essential measuring tool for evaluating bending intensity and confirming if your marvel of engineering now stands tall and straight.
- A heat source – Be it a heat gun or torch, this little number will amplify the malleability of aluminum and facilitate smooth straightening.
Steps to Straighten Aluminum Extrusions
Step 1: Inspect the extrusion
Before getting your hands dirty with the straightening action, perform an insightful inspection of the extrusion. Seek out any cracks or fractures that demand repair before embarking on this triumphant task.
Step 2: Secure the extrusion
Securely fasten the aluminum extrusion profile to the straightening table using a clamp or vice. It must remain stationary throughout the extrusion process.
Step 3: Apply heat
Ignite your heat gun or torch and lavish some warmth onto the area that needs to be straightened. Soften the aluminum’s bar, making it pliable and eager to reshape.
Step 4: Straighten the extrusion
Post heating, use your tool – the straightening tool – and apply pressure to the curved section. Straighten the bent part with caution and patience. Vigorous force could provoke cracking or breaking.
Step 5: Check for straightness
After subjugating the extrusion, wield your straight edge to verify its new-found linearity. If it remains bent, battle the bend again until it straightens perfectly.
Step 6: Let it cool
Finally, when the extrusion is returned to its desired form, permit a moment of respite to cool down before setting it free from the straightening table. This will ward off further distortion or false bending.
Final Verdict
Straightening aluminum extrusions is no easy feat! We can’t stress enough the importance of investing in proper protective gear, such as gloves and eye protection, before even trying to do this.
Don’t rush into the task; take your time and be careful because extrusions can easily be damaged. It’s fundamental to use the right type of straightening tool that matches the extrusion’s size and shape to guarantee the best result.
Caution is key here; refrain from applying too much pressure on the extrusion, which could be disastrous, causing irreparable damage. So, inspect the extrusion carefully before commencing the actual task, ensure its securely placed, and proceed with determination using the guidelines we provided above.