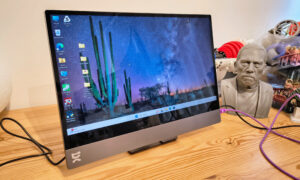
Setting up a portable monitor with a laptop is easy as long you have the right connectors. Worry no more if you are wondering how to use your portable monitor as a second screen. This article will guide you on how to set up a portable monitor with a laptop in minutes.
Read on!
How to Setup a Portable Monitor with a Laptop
Portable monitors stand out because they are lightweight and easy to carry around. However, you can only enjoy a lot more out of portable monitors by connecting them to a laptop. Follow the steps below to connect and set up a portable monitor.
Connect the Portable Monitor to a Laptop
You must find the right ports and connectors to connect a portable monitor and a laptop. Before purchasing a connector or cable, check the output ports on your laptop and input ports on your portable monitor.
Suppose you have not yet purchased a portable monitor. Check your laptop’s output ports and choose a display with matching ports.
Your laptop can either have modern or old output ports depending on its age and brand. Old video ports include S-Video, DVI, and VGA. In contrast, modern ports include USB, USB-C, HDMI, and DisplayPort.
On the other hand, portable monitors are modern devices with USB, USB-C, HDMI, and DisplayPort input ports.
Depending on the type of ports on your devices, you can connect them with an HDMI cable or USB-C cable.
Suppose your portable monitor and laptop have different connections. In that case, buy an adapter to connect them. The most common adapters include;
- Mini DisplayPort-to-DisplayPort
- VGA-to-HDMI
- DVI-to-HDMI
- HDMI-to-DisplayPort
- DisplayPort-to-HDMI
- USB-C-to-HDMI
The connection process is the same whether you choose the HDMI, USB-C, or adapter combination. Plug one cable side into the laptop’s output and the other into the portable monitor’s input.
Note that if you use an adapter, you will need an extra cable to pair the adapter and the portable monitor.
Moreover, ensure that your portable monitor is connected to power. Some are powered by the laptop through the USB-C port, while others use a wall charger.
Set Up the Display Preferences
Once the laptop and portable monitor are connected, a laptop icon will appear on some portable monitor models. Proceed to set up the laptop’s display settings following the steps below.
- Head to Start
- Open the Windows settings
- Click on System
- In the System settings window, click the Display option
Under Display, your laptop and the additional screen will be displayed. You will see two boxes numbered 1 and 2. In most cases, number 1 represents the internal Display.
- Press Identify to verify which device is 1 and 2.
Drag the boxes representing the screen and arrange them as they are positioned on your desk.
Once you detect and orient your displays, you can choose the brightness, resolution, orientation, and display option from the settings.
- Click on Multiple Displays, and you will get the following on the drop-down menu:
- Duplicate these displays– select if you want to see the same information on both screens.
- Extend these displays– click if you want to use the screens as one large desktop
- Show only on 1– select if you want to use the laptops screen only
- Show only on 2– choose if you want to use the portable monitor on. The laptop’s screen will turn off, but the contents will show on screen 2.
- Click Apply and save your Display settings.
Wrap Up
Portable monitors are great solutions to display space obstacles. You only need a portable monitor and connection cables to extend or mirror your laptop display and enhance productivity. Also, ensure to purchase your portable monitors from reputable stores like Lepow. Visit the store today for high-quality and affordable displays.


