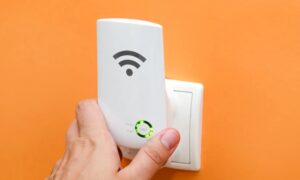
The Wavlink Aerial HS2 Extender is a wifi range extender with two bands. The high-power amplifier technique eliminates the dead zone at your location.The Wavlink Aerial HS2 N300’s fastest setting enables for speeds of up to 600 megabits per second. We’ll walk you through the Wavlink N300 and Wavlink Aerial HS2 Extender setup processes on this page.
Wavlink Aerial HS2 setup can be done using 3 methods.
- Repeater
- Router
- Lan Bridge
How to Setup Wavlink Aerial HS2 N300 Extender | Repeater Mode
One of the most basic methods is to configure your extender in repeater mode.Follow the steps below to complete the Wavlink Aerial HS2 Extender setup in repeater mode:
- Initially, a power supply must be connected to the Aerial HS2 POE connector.
- If the N300 has a firm green signal, connect the POE’s ethernet connection to the extender.
- Remove any wirelessly capable devices, such as laptops and phones, from the area.
- Additionally, look for the WAVLINK-N network in the wireless settings menu.
- After connecting to the default network, launch an Internet Explorer-compatible web browser. Google Chrome, Mozilla Firefox, and Safari are the three options.
- Now enter 192.168.10.1 or ap.setup.
- You have arrived at the settings page for the Wavlink Aerial HS2 outdoor extender.
- Login using the default password “admin.
- The extender has now been set up to function as a repeater on your current WiFi network.
Wavlink Aerial HS2 setup via Router mode
- To begin, plug in the Wavlink N300 connection (POE) box.
- Connect the Ethernet cable from the POE box to the Aerial HS2 extender.
- Connect the second Ethernet wire to your main router or modem using the same connection box.
- You can now connect any of your wirelessly capable devices to the WAVLINK-N network.
- Once you have made the connection, launch a web browser and navigate to wifi.wavlink.com.
- You’ve arrived at the configuration page for the N300 extender.
- Login using the default password “admin”.
- Choose “Router” and give your booster a catchy name.
- Set the security from none to WPA2-PSK ( recommended ). Then, enter your extender’s password and click “Continue.”
- The Wavlink outdoor extender has been successfully configured in router mode.
Wavlink Aerial HS2 extender setup using LAN Bridge
- Connect the Wavlink N300 to a power outlet and turn it on.
- Connect the Wavlink N300 to your router using an Ethernet cable.
- Connect your device (such as a computer or TV) to the Wavlink N300 using another Ethernet cable.
- On your device, go to the network settings and ensure that it is connected to the Wavlink N300 network.
- On your device, launch a web browser, and type the IP address.
- Enter the default login credentials for the Wavlink N300.
- Navigate to the “LAN” or “Network” settings in the Wavlink N300’s web interface.
- Under the “LAN Bridge” or “Bridge Mode” section, select the option to enable LAN bridging.
- Save your changes and restart the Wavlink N300 for the changes to take effect.
- Your device should now be connected to the internet through the Wavlink N300 and your router.
- Now your Wavlink Aerial HS2 Extender setup is complete
Wavlink N300 firmware update
Wavlink N300 firmware update is required for the effective operation of a Wavlink N300 extender since new firmware enhances the functionality of features and the security of a device. To resolve any difficulties, you must upgrade the firmware on your Wavlink N300. It has new features that will help you solve your problems, as well as increased security.
The following are the processes for updating the firmware on a Wavlink extender:
- You have enabled your Wavlink Aerial HS2.
- Navigate to Ap.setup.
- Choose settings and then firmware upgrade.
- Follow the steps to finish the firmware upgrading procedure.
- Do not interrupt or power down while the extender is updating.
- When the update is finished, the extender reboots automatically.
That’s how we update the firmware on the Wavlink N300.
Resetting Wavlink Aerial HS2 N300 wifi extender reset
If you have forgotten your admin login or password and need to reset your N300 extender, you must first do a factory reset. When you reset the Wavlink N300 reset , all of your personal information, including passwords, usernames, and SSIDs, is erased, prepping your extender for a new setup procedure. To finish the factory reset procedure, use a paper clip or a needle.
To reset the Wavlink N300, follow these steps:
- You can Locate the reset button on the back of the device.
- Press and hold the reset button for approximately 10 seconds using a paperclip or a small object.
- Wait for the device to restart.
- Once the device has restarted, you can access the setup page by typing the default IP address (usually 192.168.0.1) into your web browser.
- Follow the prompts on the setup page to configure the device to your desired settings.
- Once you have finished setting up the device, it will be reset and ready to use.
If you face any problem regarding your Wavlink Aerial HS2 Extender setup then feel free to contact us or live chat with us via our official website.