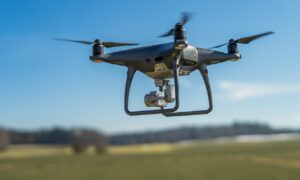
In today’s world, drones have become increasingly popular as tools for aerial photography, mapping, and more. However, as with any technology, drones can sometimes fail or break.
Drones are one of the most versatile and fun pieces of tech you can own. From capturing stunning aerial footage to racing with friends, it’s no wonder that drones have become so popular.
Whether it’s a crash, a failed motor, or a malfunctioning circuit board, knowing how to repair a broken DJI drone can save you time and money. In this blog, we will provide a step-by-step guide on how to repair a broken DJI drone.
Step 1: Diagnose the Problem
The first step to repairing a broken DJI drone is to diagnose the problem. Start by examining the drone for any visible damage, such as cracks, dents, or loose parts. Then, check the drone’s batteries and motors to make sure they are functioning properly. Fortunately, the process of repairing a DJI drone is relatively straightforward and can be done without professional assistance. This step-by-step guide explains how to repair a broken DJI drone, including how to diagnose and identify the problem, what repair tools you will need, and how to replace damaged parts.
Additionally, this guide provides advice on when you should seek professional DJI repair services and the best ways to ensure your drone remains in top condition. With the help of this guide, you can repair your DJI drone quickly and easily.
Step 2: Gather Tools and Supplies
Once you have identified the source of the problem, you can begin gathering the tools and supplies you will need to complete the repair. These may include a soldering iron, replacement parts, and a screwdriver set. If you are replacing a motor or circuit board, be sure to purchase the correct parts for your drone model.
Step 3: Disassemble the Drone
Once you have all the necessary tools and supplies, it’s time to disassemble the drone. Start by removing the battery, then unscrew the screws on the body of the drone. Carefully remove all the components, taking note of how they fit together. Be sure to be gentle and avoid applying too much force, as this could damage the drone further.
Step 4: Replace the Damaged Parts
Once you have removed all the components, you can begin replacing the damaged parts. If you are replacing a motor or a circuit board, be sure to follow the manufacturer’s instructions for installation. If you are replacing any other parts, refer to the drone’s manual for guidance.
Step 5: Reassemble the Drone
Once you have replaced all the parts, it’s time to reassemble the drone. Start by putting all the components back in their original places. Then, use the screws and nuts to secure the components in place. Be sure to tighten all the screws and nuts, but not too tightly, as this could damage the components.
Step 6: Test the Drone
Once you have reassembled the drone, it’s time to test it. Connect the battery, turn on the power, and launch the drone. If you are using the DJI Go app, check for any software or firmware updates. Once the drone is up and running, check for any issues with the motors, battery, or other components.
Conclusion
Repairing a broken DJI drone can be a challenging and time-consuming process. However, with the right tools and supplies, it is possible to complete the repair and get your drone back up and running. By following this step-by-step guide, you can diagnose the problem, gather the necessary tools and supplies, disassemble the drone, replace the parts, reassemble the drone, and test it to make sure it’s working properly.


