If you’re responsible for a commercial site in Southern Ontario, winter isn’t a season. It’s a stress test. On your building, on your budget, and on your reputation.
You already know what’s coming: freeze–thaw cycles, surprise ice storms, 5 a.m. calls about slippery walkways, tenants texting photos of “mystery leaks” in the ceiling. Some winters are worse than others, but none of them are easy.
The way you prep in October and November decides how ugly January looks. Or how boring it is. Boring is the goal.
Step 1: Do a Brutally Honest Exterior Walkthrough
Forget the glossy reports for a minute. Start with boots on the ground and a clipboard (or tablet) in your hand. One full lap of the property, slow and methodical.
Hit these zones in order, and write down every issue, no matter how small:
- Main entrances and secondary doors – look for cracked stair treads, loose handrails, uneven landings, thresholds that collect water.
- Sidewalks and crosswalks – note where water settles, where shade lingers, where you’ve had ice patches in past winters.
- Accessible routes – ramps, curb cuts, accessible parking stalls, drop-off points. These are lawsuit magnets if neglected.
- Parking lots and drive lanes – potholes, heaved asphalt, bad drainage near catch basins, narrow choke points for plows.
- Loading docks and delivery bays – sloped areas that freeze, dock plates that pool water, overhead clearance for plows and loaders.
- Fire exits and emergency routes – out-of-sight paths that are easy to forget during storms and the first places an inspector will check.
Take photos. Lots of them. You’re not just building a fix list; you’re building a liability record in case someone goes down in February and a lawyer starts asking, “What was the condition before winter?”
This is also where you start thinking about snow: where it falls, where it blows, where you’ll pile it, and where it absolutely cannot end up. If you’re in Mississauga or the GTA and your lots are tight, this is exactly when you should be looping in a local commercial snow removal Mississauga partner to walk the site with you before the first storm.
High-Risk Items to Flag Immediately
- Broken or loose handrails on stairs and ramps.
- Cracks or holes in pavement where water can sit and turn into black ice.
- Areas with historically poor drainage near entrances or loading docks.
- Blind corners in parking lots or around the building where plows and pedestrians mix.
- Low spots near doors where meltwater creeps inside and turns lobbies into skating rinks.
Circle those on your notes. These are non-negotiables, not “when we have time” projects.
Step 2: Lock Down Your Snow & Ice Management Plan
Winter doesn’t care about your budget, staffing levels, or how many meetings you have. Snow falls when it feels like it. Your plan decides whether you’re reacting or running the show.
Define Your Priority Zones
Break the site into zones, then rank them by risk and traffic:
- Priority 1 (must be clear first): Main entrances, accessible routes, emergency exits, key sidewalks, primary drive lanes, fire routes.
- Priority 2: Secondary entrances, overflow parking, loading docks, side walkways.
- Priority 3: Far corners of lots, low-use areas, back-of-house spaces that can wait.
Draw this on a site map for your team and your contractor. Don’t rely on verbal descriptions like “that side entrance” or “the east lot”, someone will misinterpret it at 3 a.m. during a whiteout.
Set Trigger Depths and Response Times
No vague “we’ll keep it clear” talk. You want numbers and timelines.
- Snow trigger: Example – plowing begins at 2–5 cm, or continuous plowing during major storms.
- Clear-by times: Example – main entrances and primary lots cleared and salted by 7:00 a.m. on weekdays.
- Ice response: Example – re-salting within X hours of freezing rain or significant temperature drops.
Write it in plain language. If an operations manager has to decode legalese at 4 a.m., you’ve already lost.
Plan Snow Storage and Hauling
Random snow piles create half your winter problems. They block sightlines, choke parking, and melt in exactly the wrong direction.
Decide now:
- Where plows will stack snow so it doesn’t block signs, sightlines, or fire routes.
- How you’ll keep accessible parking usable all season, not just after the first storm.
- When snow piles are considered “too big” and trigger snow hauling and off-site removal on busy or constrained properties.
If you run plazas or large parking lots, hauling isn’t a luxury, it’s what keeps tenants from screaming when half the stalls disappear under snow mountains in February.
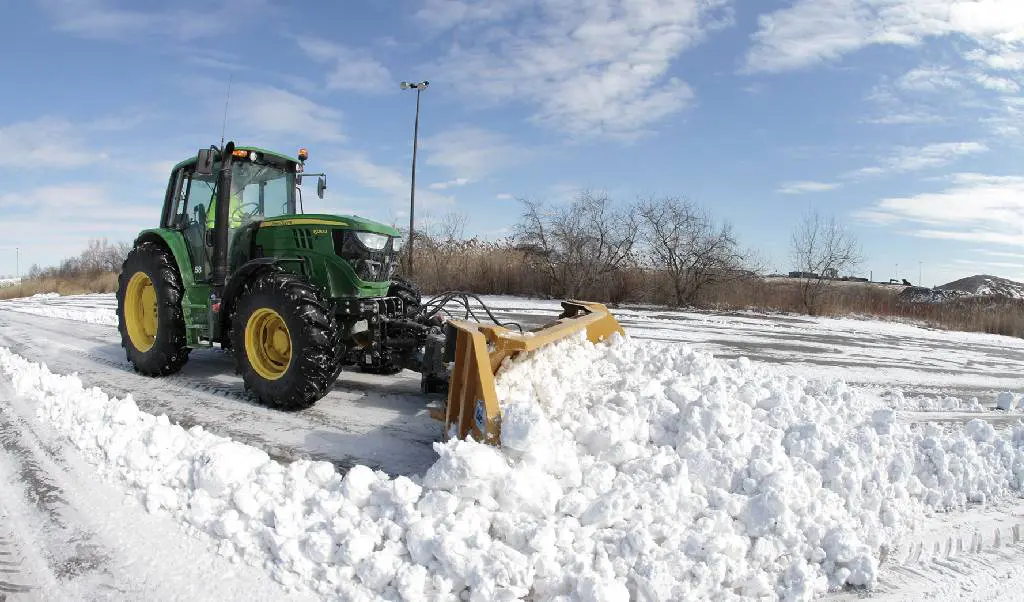
Step 3: Choose (or Re-Evaluate) Your Commercial Snow Contractor
If you manage property in Mississauga or the GTA, you know how fast snow contracts can go sideways. Everything sounds great until that first back-to-back storm, then you find out who actually has the crews and who just subcontracts everything out and prays.
What to Look For in a Contractor
- Real commercial experience – malls, plazas, office parks, industrial sites. Not just “we also plow driveways.”
- Proper insurance and WSIB coverage – and proof on file, not “we’ll send it later.”
- Equipment sized for your site – loaders for big lots, sidewalk machines for tight walks, backup units when one goes down.
- 24/7 emergency snow response – with direct contact info, not a general voicemail box.
- Documented processes – service logs, time stamps, sometimes GPS tracking and photos after major storms.
Ask straight questions:
- How many commercial sites do you run in a typical storm, and how many crews cover them?
- What happens if a truck breaks down mid-event?
- Who makes the call on extra salting or return visits during freeze–thaw?
- Can you walk my site with me pre-season and help map priorities and pile locations?
If the answers are vague, you already have your answer. Move on.
Understand the Contract Models (So They Don’t Bite You Later)
Most commercial snow deals fall into three buckets:
- Seasonal (flat rate)
Predictable billing. You pay the same regardless of snowfall. Great for budgeting, but you need clear language about “historic averages,” cap clauses, and what happens in an extreme winter. - Per-push / per-event
You pay each time the contractor plows, salts, or clears sidewalks. More volatile but can be cheaper in a light winter. You need defined triggers and what counts as a separate event. - Hourly
Pay for time on-site. Simple on paper, risky on large properties unless you really trust the vendor and track hours carefully.
Whichever model you pick, make sure the scope spells out:
- Plowing: which lots, lanes, driveways, plus clear boundaries.
- Sidewalks: exactly which walks, ramps, stairs, and landings are included.
- De-icing: materials (salt, liquid de-icer, sand mix), application frequency, ice monitoring expectations.
- Snow hauling: when it triggers, where snow goes, and how it’s billed.
- Response: expected response times for standard storms vs. major events.
No assumptions. Assumptions are what get you dragged into claims and “he said / she said” fights in March.
Step 4: Winterize the Building Itself (Not Just the Pavement)
Everyone obsesses over snow; a lot of the expensive damage comes from water and ice where you can’t see it. Roofs, drains, mechanical systems, these are the quiet time bombs.
Roof, Gutters, and Drainage
- Inspect the roof for obvious issues – loose flashing, ponding areas, damaged membranes, open seams.
- Clear gutters, downspouts, and scuppers – debris in October becomes ice dams in January.
- Confirm downspouts direct water away from entrances and walkways – not right onto high-traffic paths.
- Check catch basins in parking lots for blockages – leaves, garbage, construction debris.
Document what you find. Take photos. Get your roofer or building engineer on anything that looks questionable before freeze hits. That one “iffy” area often turns into a leak above a key tenant.
HVAC and Mechanical Systems
- Service heating equipment – boilers, rooftop units, furnaces. Verify they’re actually delivering designed capacity.
- Check freeze protection on exposed piping – insulation, heat trace, and any vulnerable mechanical rooms near exterior walls.
- Verify controls and schedules – BMS settings, setback temps, and alarms for low temp conditions.
- Review fuel supply – if you’ve got backup generators or fuel-fired equipment, confirm tank levels and delivery arrangements.
A no-heat call on a Sunday night in January costs more than a fall service visit ever will. Plus it wrecks your credibility with tenants.
Exterior Lighting and Life Safety
- Test all exterior fixtures – parking lots, walkways, entrances, loading bays.
- Replace burnt-out lamps now – don’t wait for a dark, icy evening.
- Confirm emergency lighting and exit signs work and are visible even in bad weather.
- Make sure fire routes, hydrants, and access doors are clearly marked and will stay accessible with snow piles.
Half of winter “safety” is just people being able to see where they’re going and where the hazards are.
Step 5: Stock Up and Stage Your Winter Supplies
The week before the first real storm is when every supplier magically runs “low on stock.” Don’t be that last-minute buyer.
Core Supplies to Have On-Site
- Ice melt / salt (and a plan for how much you’ll store, where, and in what containers).
- Shovels, pushers, ice choppers – not leftovers with cracked handles from five years ago.
- Entrance mats – long enough to actually remove snow and water, not just decorative rugs.
- Wet floor signs and caution cones – for lobbies, vestibules, and known trouble spots.
- Spill kits or absorbent – for entrances where meltwater always sneaks in.
Stage the supplies:
- Salt and shovels at every key entrance, not just one “central” closet nobody wants to walk to.
- Dedicated bins outdoors near doorways, properly labeled and weather-protected.
- Clear guidance on who can grab and apply product (maintenance staff, security, concierge, etc.).
“We had salt, but it was in the back room” isn’t a defense when someone slips at your front door.
Step 6: Build a Simple, Ruthlessly Clear Winter Checklist
You don’t need a 40-page manual nobody reads. You need a working checklist your team can actually follow. Daily, weekly, and “before/after storm” tasks.
Sample Winter Readiness Checklist by Zone
Entrances & Lobbies
- Check mats are in place, flat, and long enough.
- Inspect for pooling water; deploy wet floor signs as needed.
- Confirm exterior steps and landings are salted/cleared.
- Check door closers so doors fully shut and don’t leak cold air.
Sidewalks, Ramps, and Stairs
- Inspect for ice buildup, especially in shaded or wind-blown areas.
- Salt or de-ice high-risk spots proactively ahead of forecasted freeze.
- Verify handrails are tight and intact.
- Confirm accessible routes are truly accessible, not half-covered or blocked.
Parking Lots and Drive Lanes
- Confirm plowing sequence and pile locations with your contractor.
- Inspect after storms for narrow lanes, blocked visibility, or icy patches in turn areas.
- Ensure fire routes and loading docks remain unobstructed after every event.
- Log any damage to curbs, bollards, or wheel stops for spring repairs.
Roofs, Drains, and Mechanical
- Post-major-storm roof checks (if safe and permitted) for unusual drifts or ponding.
- Monitor interior for ceiling stains or new leaks.
- Verify mechanical room temperatures stay above minimums.
Turn this into a one- or two-page PDF or printed sheet. Put names and roles beside tasks. No orphaned responsibilities.
Step 7: Get Serious About Slip-and-Fall Prevention and Documentation
Most facility managers aren’t terrified of the storm itself. They’re worried about the incident report that shows up three days later with security footage attached.
Common High-Risk Hotspots
- Bottom of exterior stairs and ramps.
- Crosswalks where pedestrians cut between parking rows.
- Areas where downspouts discharge near sidewalks or doorways.
- Thresholds at vestibules and revolving doors with heavy foot traffic.
Target these with extra care:
- Pre-storm anti-icing, not just post-storm salting.
- Extra checks during temperature drops or freeze–thaw swings.
- Temporary cones or barrier tape when conditions are questionable.
Documentation That Protects You
Verbal assurances mean nothing in a claim. Paper and timestamps matter.
- Snow event log – date, time, weather, what was done (plowing, salting, sidewalk clearing), by whom.
- Contractor reports – service records, time in/out, material used, notes on conditions.
- Photos – before/after shots of problem areas during major events.
- Incident records – near-misses and minor slips, not just full injury claims.
Keep this organized in one shared location, digital if possible. When insurance or legal teams ask, you don’t want to be digging through random email threads and old notebooks.
Step 8: Align Your Team and Tenants Before the First Storm
Most winter chaos isn’t from snow itself. It’s from people not knowing who’s responsible for what.
Internal Team
- Clarify roles – who calls the contractor, who walks the property, who logs events.
- Train staff on spotting hazards – ice film, leaking downspouts, blocked drains.
- Set expectations for after-hours calls – who’s on-call, escalation paths, authority to approve extra work.
No one should be guessing at 2 a.m. whether they’re “allowed” to call for additional salting.
Tenants and Occupants
- Send a preseason winter memo – parking rules, snow pile areas, who to contact about unsafe conditions.
- Ask tenants to report issues fast – icy spots, water intrusion, blocked entrances.
- Clarify responsibilities in shared spaces – especially if tenants control some exterior doors or private sidewalks.
You’re managing expectations as much as you’re managing ice. Tenants who know what’s being done (and how to report problems) complain less and cooperate more.
Step 9: Budget with Your Eyes Open (Not Fingers Crossed)
Winter budgets blow up when everything is “we’ll deal with it if it happens.” That’s code for “we’ll overpay in emergencies.”
Where to Spend First
If funds are tight, prioritize spending in this order:
- Critical safety and access – entrances, emergency exits, accessible routes, main drive lanes.
- Snow and ice management – a reliable contractor with clear scope beats a cheap one every single time.
- Preventive repairs – fixing drainage and trip hazards that turn into recurring winter headaches.
- Cosmetic or convenience tasks – nice to have, but they come after safety and reliability.
Then add a realistic contingency line. You will have a nasty storm or oddball freeze–thaw week. Pretending otherwise doesn’t save money; it just moves the pain into overtime and emergency invoices.
Step 10: Do a Post-Season Review (While It’s Still Fresh)
Once the snow is finally gone and everyone is thinking about patios instead of plows, take one meeting and squeeze value out of the pain you just lived through.
- Review winter incident logs – where did slips, complaints, and emergency calls cluster?
- Assess your contractor – response times, quality of clearing, communication, billing accuracy.
- Update your checklist – add tasks for chronic trouble spots, adjust priorities and routes.
- Capture photos of damage – curbs, landscaping, asphalt, guards – and roll repairs into spring/summer planning.
Do this once, properly, and next winter is already easier. Not perfect, never perfect, but calmer, more predictable, and less likely to wreck your budget or your weekends.
That’s the real target for a facility manager: not a winter with no problems, but a winter where the problems you do get are the kind you already expected and are ready to handle.