A monitor’s refresh rate can hold back a gaming setup even when the GPU still has headroom. Monitor overclocking runs the display above its factory refresh rate, which can deliver smoother motion and faster input response without buying a new monitor. The sections below cover how monitor overclocking works, the steps involved, and what to verify before making changes.
What Is Monitor Overclocking?
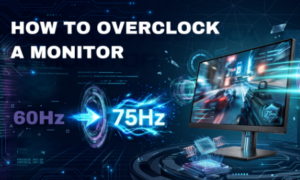
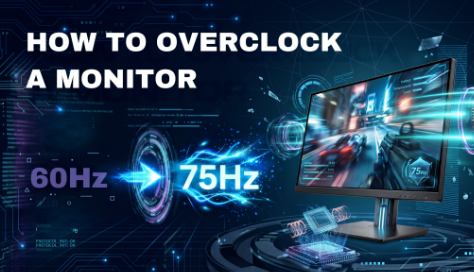
Monitor overclocking pushes a display past its factory-rated refresh rate. A 60Hz panel, for example, might run at 70Hz or 75Hz if it can handle the higher rate. The extra refresh cycles make motion look smoother and interactions feel snappier, especially in games and other fast-moving content. How far a given monitor can go depends on the panel, resolution, connection type, and the rest of the hardware.
Before you overclock your monitor, it’s helpful to understand the basics: What does overclocking mean?
How to Overclock a Monitor on Windows
Custom refresh rates can be created in Windows through graphics driver settings. Exact steps vary depending on the GPU and monitor.
Open display settings
Go to Settings → System → Display → Advanced display to check the monitor’s current resolution and refresh rate.
Create a custom refresh rate
If the graphics driver supports custom resolutions, open NVIDIA Control Panel or AMD Software and look for the option to create a custom display mode.
Increase the refresh rate gradually
Keep the resolution unchanged and raise the refresh rate in small steps. For a 60Hz monitor, try 65Hz, then 70Hz, then 75Hz.
Apply and test the new setting
Save the custom setting and check whether the display behaves correctly. If the screen flickers, goes black, shows artifacts, or becomes unstable, revert to the previous refresh rate.
Verify the result
After applying the new refresh rate, test for frame skipping and other display issues. A setting that appears in Windows doesn’t necessarily mean every frame is being displayed correctly.
How to Overclock a Monitor on Linux
On Linux, monitor overclocking can be done by creating a custom display mode with tools such as xrandr. The exact process depends on the distribution, display server, GPU, and desktop environment.
Check current display settings
Open a terminal and run:
xrandr
This lists the available resolutions and refresh rates for connected displays.
Create a custom refresh rate
A tool such as cvt can generate a Modeline for the target refresh rate. For example:
cvt 1920 1080 75
This produces the timing information needed for a 1920×1080 display at 75Hz.
Add the custom display mode
Use the generated Modeline with xrandr –newmode, then add it to the target display output with xrandr –addmode.
Apply the new refresh rate
Select the newly created display mode and check whether the monitor operates normally at the higher refresh rate.
Test for stability and frame skipping
A monitor accepting a custom refresh rate doesn’t necessarily mean it’s displaying every frame correctly. Check for flickering, artifacts, black screens, or frame skipping before relying on the new refresh rate day to day.
Note: These commands mainly apply to X11-based environments. Linux systems using Wayland may require a different method depending on the compositor and hardware.
How to Test for Frame Skipping
After raising the refresh rate, testing for frame skipping confirms the display is actually showing every frame. An online frame-skipping test makes this straightforward: set the monitor to the new refresh rate, follow the test instructions, and photograph the moving pattern with a camera using a relatively long exposure. A correctly displaying monitor will capture a consistent sequence of squares. Missing squares suggest some frames aren’t making it to the screen.
If skipped frames, flickering, artifacts, or other display issues show up, drop the refresh rate and test again. A lower but stable setting beats a higher one that can’t display frames consistently.
Risks and Limitations of Monitor Overclocking
Monitor overclocking doesn’t guarantee a higher stable refresh rate. The result depends on the panel, resolution, connection, GPU, and display timing. Common issues include flickering, artifacts, black screens, signal loss, and frame skipping. In some cases, a higher refresh rate may only hold if the resolution is reduced or a different connection is used. If a custom refresh rate causes problems, revert to the monitor’s last stable setting. Pushing higher isn’t worthwhile if the display can’t show every frame consistently.
FAQ
Can You Overclock Any Monitor?
No—not every monitor can be overclocked successfully. What’s achievable comes down to the panel, resolution, connection, GPU, and display timing. Some panels manage only a small bump; others won’t accept a higher refresh rate at all.
How Much Can You Overclock a Monitor?
There’s no universal ceiling. A 60Hz panel might run at 70Hz or 75Hz, but the actual limit varies by monitor. The practical approach is to raise the refresh rate in small increments and test each setting for stability and frame skipping.
Does Monitor Overclocking Increase FPS?
Not directly. Monitor overclocking raises the display’s maximum refresh rate—it doesn’t increase the FPS the GPU generates. A higher refresh rate simply lets the monitor display more of the frames the system is already capable of producing.
Can Overclocking a Monitor Damage It?
Monitor overclocking can introduce instability or display problems when the panel can’t handle the higher refresh rate. Common symptoms include flickering, artifacts, signal loss, and frame skipping. Increasing in small steps and testing each setting helps identify a stable limit; if problems appear, reverting to the previous stable refresh rate is the practical move.