Are you looking to learn how to make a horizontal video vertical? Need to turn your wide video into one that is taller? Because platforms like TikTok, Instagram Reels, and YouTube Shorts like videos shot vertically, using one from the horizontal side will make you stand out for all the wrong reasons. But cropping could lose some integral parts, and resizing can introduce some distortion.
Don’t worry, this piece will illustrate for you three easy steps for solving this. Manually, through the HitPaw Edimakor AI tool, or using ready-made vertical layouts – you will find something you can apply regardless of your experience level.
How to Make Horizontal Videos Vertical: 3 Methods
If you are looking to learn how to make a horizontal video vertical creatively, you can easily do this through many processes. One of the easiest and best is by using Edimakor, an AI tool for quickly resizing and formatting videos for use on social platforms.
It automatically frames, sharpens the main elements, and creates the transition from the horizontal to the vertical. But for the hands-on type, you can also make this happen by yourself.
Below are some methods of how to make a vertical video horizontal:
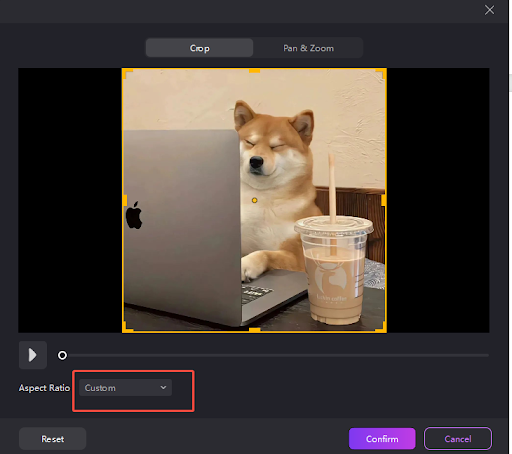
Method 1: Manual Cropping and Reframing
For those who like total frame control, Edimakor allows you to crop and reframe your video yourself. This allows you to bring the main elements of the clip into the limelight.
Step-by-Step Process:
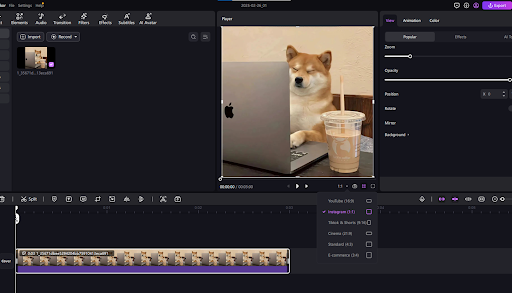
- Upload Your Video – Open Edimakor and embed your horizontal video.
- Select Manual Cropping – Select the 9:16 vertical orientation for social media
- Adjust Positioning – Manually refocus, pan, and reframe for emphasis
- Enhance Your Video (optional) – Add text, filter, or blur the background for added visual appeal.
- Export Your Clip – Save the final clip and download the MP4 one.
Pros:
- Full control over the frame of the clip
- Ensures no detail is lost
- Allows creative transformations like zoom and pan
- Option to apply background blur for clean appearance
- Works for all types of videos
Cons:
- Requires manual intervention, potentially causing delays
- Might be hard for beginners not acquainted with video framing
- Not ideal for batch processing multiple videos simultaneously
Method 2: Auto-Crop and Auto-Resize Feature
If you prefer something hands-off and quick, Edimakor’s Auto-Crop AI tool can easily crop your video into vertical mode keeping the subject sharp.
Step-by-Step Process:
- Upload Your Video – Simply upload your sideways video into Edimakor.
- Enable Auto-Crop – Select the Auto-Crop & Resize option.

- Choose Aspect Ratio – Select 9:16 for vertical video
- Let AI Handle the Work – AI will frame the shot and make sure the main points can be seen.
- Preview and Download – Preview the final movie and download.
Pros:
- Fully automatic – doesn’t need manual setting
- AI keeps the subject matter under its watch
- Saves time, especially for batch processing multiple videos
- Beginner-friendly – nothing is needed
- Great for interviews, vlogging, and head-talk videos
Cons:
- AI might clip some things out when the shot is not ideally framed
- Limited customization versus manual cropping
- Requires internet connection for video handling
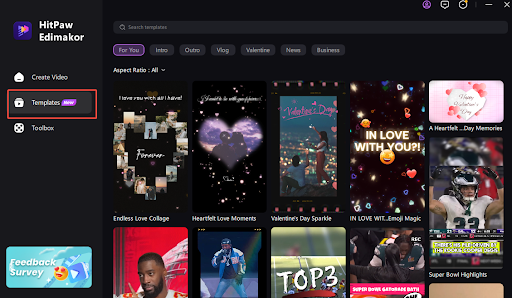
Method 3: Using Pre-Designed Vertical Video Templates
For a stylish and attractive video, Edimakor has ready-made vertical templates that will transform your video for you with creative additions.
Step-by-Step Process:
- Upload Your Video – Open Edimakor and import your side by side video.
- Select a Vertical Template – Choose from various 9:16 video templates for use on social media.
- Adjust the Layout – Resizes your video for you when you customize text, overlays, or effects.
- Enhance Your Clip – Add background music, stickers, or transitions for increased engagement.
- Export and Post – Save your clip and upload it directly onto your favorite social networks.
Pros:
- Easy and simple
- Saves time by utilizing pre-existing layouts
- Adds a professional finish to your videos
- Perfect for your branding and marketing writing
- Great for recording high-definition videos for social media
Cons:
- Less flexibility when using manual cropping
- Some templates will not apply for all videos
- Free versions can only handle limited customizations
That’s all you need to know to convert horizontal video to vertical.
Additional Tips and Best Practices
Turning a horizontal video into one that is vertical is not entirely about resizing. Make sure the video is good, clear, and well-framed. These tips will help you make good vertical videos:
●Check the quality
Before saving, preview your video to ensure key elements aren’t lost in the transition from horizontal to vertical. Check that the main subject, text, and graphics are visible and properly framed. If needed, adjust cropping or reposition the subject.
●Be Consistent
For multiple videos, maintain consistency in color, fonts, and aspect ratio, especially for business content. A uniform style looks professional and keeps your audience engaged.
●Try Different Methods
Not every clip will work for the same technique, so don’t shy away from experimenting with multiple options. If you like total control, manual crop lets you make the edits yourself. If you need something quick and simple, the auto-crop tool will work for you.If you like something creative, using pre-made templates can give you the professional finish you require. Experimenting with multiple techniques will allow you to find the best for your videos.
●Make Sure That It Fits the Platform
Each social media platform has its own set of specifications for sizes for videos. For example, TikTok, Instagram Reels, YouTube Shorts, and Facebook Stories all allow the use of the 9:16 vertical orientation.If your video is the improper sizes, you will not display properly. Be sure your video is the proper dimensions before you upload. This will make your video sharp and clear.
●Keep the Main Subject Centrally Placed
Since vertical videos will be wider, you will need to leave the main elements of the video towards the middle. If your subject or text is placed towards the edge, you may risk them being cut when played using different devices.Having the main subject centrally placed will make the video balanced and easier for viewers to watch. Alternatively, you can also slightly zoom in or frame-shift for greater emphasis on the main points.
By following the tips here, you can create high-quality vertical videos that will look great on all platforms.
Conclusion
That’s how to make a horizontal video vertical. Adopting best practice guidelines like quality checks, keeping things consistent, and keeping the main elements centrally positioned, you can create professional-looking vertical videos for display on any platform.
FAQs
How do you turn a video from landscape mode to portrait mode?
You can make the horizontal video vertical for Edimakor by selecting the video, changing the aspect ratio to vertical (9:16), and adjusting the frame. Double-check the appearance before you save, ensuring nothing is being cut off.
How to make your iPhone display videos in the right orientation?
To do this from an iPhone, upload your clip onto the video editing tool. Auto-crop the clip using the tool provided or crop the clip yourself to the vertical dimensions. If you like the look, save and download the vertical clip onto your phone.
How to make a vertical video horizontal (portrait to landscape)?
To turn the vertical video into the desired one, upload the video onto Edimakor and set the aspect ratio to 16:9. Zoom out and maybe slightly shift the video to make the wider screen fit. Double-check the appearance by previewing the save before doing the save.