Wireless security cameras offer a practical solution for enhancing home security without the need for complex wiring. Their ease of installation and flexibility make them a popular choice for homeowners looking to monitor their property. This guide will walk you through the entire process of installing wireless security cameras, from understanding their benefits and types to troubleshooting common issues. By the end of this guide, you’ll be equipped with the knowledge to set up your security system efficiently and effectively, ensuring peace of mind and enhanced safety for your home. Let’s dive into the step-by-step instructions to get your wireless security cameras up and running.
What Are Wireless Security Cameras?
Wireless security cameras are surveillance devices that transmit video and audio signals to a receiver using a wireless connection, eliminating the need for physical cables. These cameras can connect to your home Wi-Fi network, allowing you to view live or recorded footage remotely via a smartphone, tablet, or computer. They come in various styles, including indoor, outdoor, and doorbell cameras, each designed to meet specific security needs. Wireless cameras are popular due to their ease of installation, flexibility in placement, and ability to integrate with other smart home devices for enhanced security and convenience.
Benefits of Wireless Security Cameras
Wireless security cameras offer numerous benefits that make them an excellent choice for home surveillance. They are easy to install, requiring no complex wiring or drilling, which saves time and reduces installation costs. Their flexibility allows you to place them anywhere within range of your Wi-Fi network, providing comprehensive coverage of your property. Additionally, wireless cameras can be easily moved and repositioned as needed. They also support remote monitoring, enabling you to keep an eye on your home from anywhere using a smartphone app. Moreover, many models come with advanced features like motion detection, night vision, and cloud storage.
Types of Wireless Security Cameras
There are several types of wireless security cameras, each designed for specific purposes. Indoor cameras are ideal for monitoring the inside of your home, offering features like two-way audio and high-definition video. Outdoor cameras are weather-resistant and equipped with night vision to provide reliable surveillance in various conditions. Doorbell cameras combine a doorbell with a security camera, allowing you to see and speak with visitors via your smartphone. Additionally, there are wireless PTZ (pan-tilt-zoom) cameras that offer remote control over the camera’s viewing angle. Choosing the right type depends on your specific security needs and the areas you want to monitor.
Step-by-Step Installation Guide
Choosing the Right Location
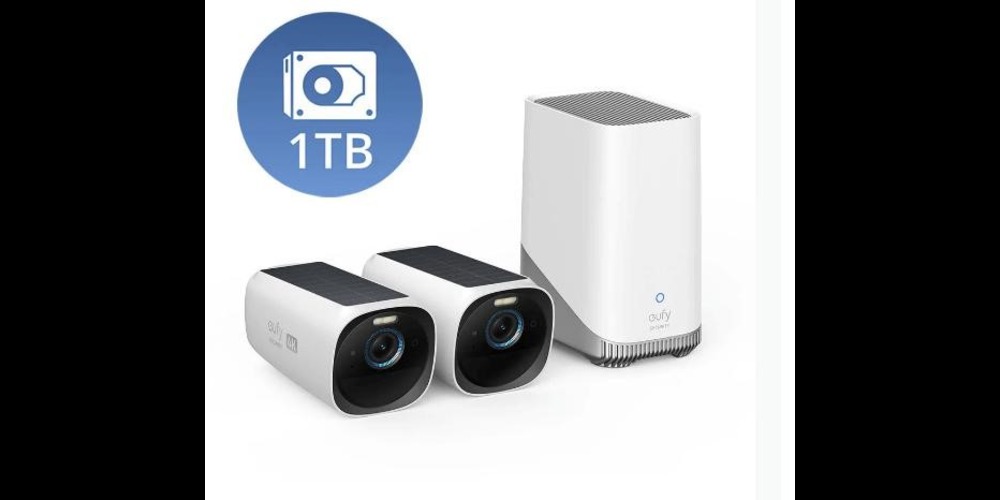
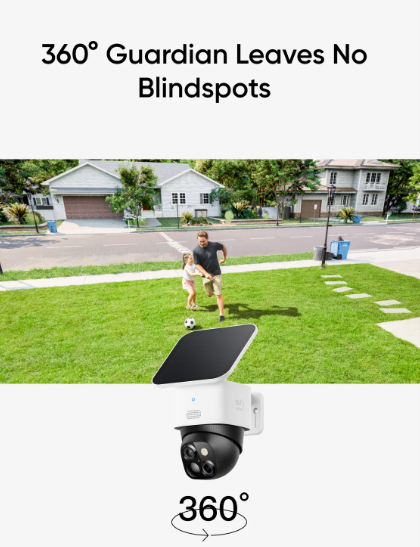
Selecting the optimal location for your wireless security cameras is crucial for effective surveillance. Start by identifying the most vulnerable areas of your property, such as entry points, driveways, and backyards. Ensure the camera has a clear, unobstructed view of these areas. Avoid placing cameras too high or too low; an ideal height is around 8-10 feet to capture detailed footage while being out of reach from tampering. Additionally, consider the camera’s field of view and ensure it covers the desired area without blind spots. Ensure the location is within range of your Wi-Fi network to maintain a stable connection. The eufy SoloCam S340, which is Solar-Powered, Install Once and it Runs Forever: Experience constant peace of mind with this solar-powered security camera that’s easy to set up and always on, thanks to its removable solar panel.
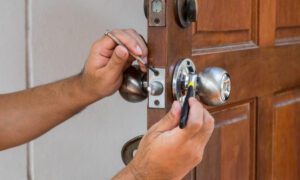
Mounting the Camera
Mounting your wireless security camera correctly is essential for stable and reliable performance. Begin by using the mounting bracket that comes with your camera. Mark the drilling points on the wall or ceiling based on the bracket’s holes. Drill the holes and insert the wall anchors provided. Secure the bracket with screws, ensuring it is firmly attached. Attach the camera to the bracket and adjust its angle to cover the desired area. Make sure the camera is stable and not prone to vibrations or movements. Some cameras may offer adhesive mounts as an alternative, but screws provide more secure and long-lasting support.
Connecting to Wi-Fi and Configuring Settings
Once the camera is mounted, connect it to your Wi-Fi network and configure its settings. Power on the camera and follow the manufacturer’s instructions to enter setup mode. Use the companion app on your smartphone to search for available networks and select your home Wi-Fi. Enter the network password to establish a connection. After connecting, configure the camera settings through the app, such as motion detection sensitivity, recording schedules, and notification preferences. Test the live feed to ensure the camera is functioning correctly and adjust the settings as needed for optimal performance. Regularly check for firmware updates to maintain security and functionality.
Common Issues and Troubleshooting
Connectivity Problems
Connectivity issues can hinder the performance of your wireless security cameras. If your camera frequently loses connection, start by checking the signal strength of your Wi-Fi network. Ensure the camera is within range of the router and consider using a Wi-Fi extender if necessary. Interference from other electronic devices can also disrupt the signal, so try relocating the camera or router to reduce interference. Ensure your camera’s firmware is up to date, as updates often include connectivity improvements. If problems persist, restarting the camera and router can help re-establish a stable connection.
Camera Positioning Issues
Improper camera positioning can result in poor surveillance coverage. Ensure your camera is angled correctly to capture the desired area without obstructions. Avoid pointing the camera directly at bright light sources, as this can cause glare and reduce image quality. If the camera is exposed to extreme weather conditions, consider using a weatherproof housing to protect it. Regularly clean the camera lens to maintain clear footage. If the camera is placed in a high-traffic area, ensure it is securely mounted to prevent accidental dislodging or tampering. Adjust the positioning as needed to optimize the field of view and coverage.
App Configuration Challenges
App configuration challenges can prevent you from fully utilizing your wireless security camera’s features. If you encounter issues, start by ensuring your smartphone and camera app are up to date. Check the app’s settings for any misconfigurations or disabled features. If notifications are not working, verify that app permissions are enabled on your smartphone. For motion detection issues, adjust the sensitivity settings within the app to find the optimal level for your environment. If problems persist, consult the camera’s user manual or the manufacturer’s support website for troubleshooting tips and detailed instructions on resolving common app-related issues.
Conclusion
Installing wireless security cameras is a straightforward process that significantly enhances your home security. By following this step-by-step guide, you can ensure your cameras are correctly installed and functioning optimally. Remember to choose the right locations, securely mount the cameras, and configure the settings properly. Be prepared to troubleshoot common issues to maintain the effectiveness of your surveillance system. With your wireless security cameras in place, you can enjoy peace of mind, knowing that your home is under constant watch. Regular maintenance and updates will ensure your system continues to provide reliable security for years to come.
Read More From Techbullion And Businesnewswire.com