Installing Windows 11 on a new SSD using a flash driver is undoubtedly the ideal way to boost performance and increase storage capacity. However, there may be situations where you do not have a USB driver or other bootable device. In such cases, you may be wondering how to install Windows 11 on a new SSD. This article addresses this concern by providing a comprehensive and detailed guide on how to install Windows 11 on a new SSD without USB or alternative options.
How to Install Windows 11 on a New SSD without a USB?
Case 1: The SSD Was Newly Added to the PC
In this case, the simplest way is to migrate Windows 11 to the newly added SSD, in which you can keep your personal settings and important data, without using a removable driver. To do this, we need to use the disc cloning tool iSumsoft Cloner, as Windows 11 contains certain registry files that cannot be moved by simple copy and paste. Here’s what you need to do:
1: After adding the new drive to the PC, you need to initialize the drive. Click on the Win icon and select Disk Management.

2: You will then see a dialogue box, check the new disk, and select GPT partition style, then click OK to complete.

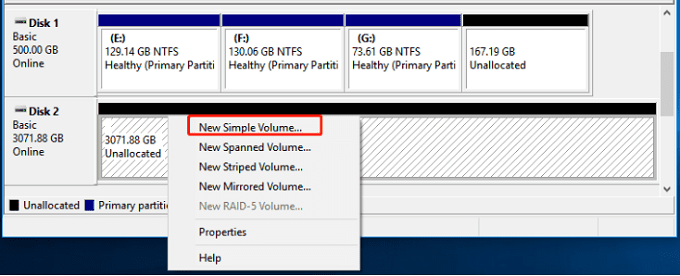
3: Right-click on the new disk and select New Simple Volume, then follow the onscreen instructions to create a new volume on your disk.
3: Download and install iSumsoft Cloner, then launch it.
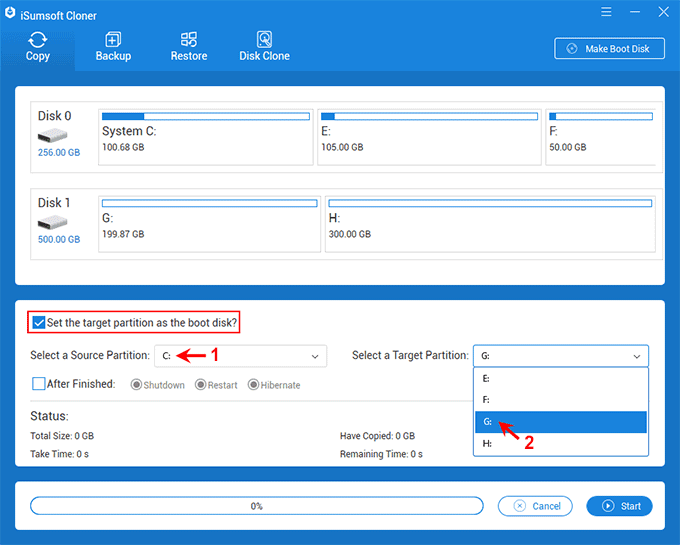
4: On the interface, select Copy. The program will show all available drives and partitions.

5: Check Set the target partition as the boot disk option. Then you need to select the partition installing the operating system as the source partition, and then select the new SSD as the target partition by clicking on the dropdown button respectively.
6: Once complete, click Start. If asked Yes or No, click Yes to continue.

7: The copy is completed. You can view the backup folder on the new SSD.
8: Reboot your computer. During the startup process, press down the hotkey, such as F12 and Delete key, to access the Boot device order. Note that the specific hotkey may vary depending on your computer model. You can search for the appropriate hotkey for your computer model online.
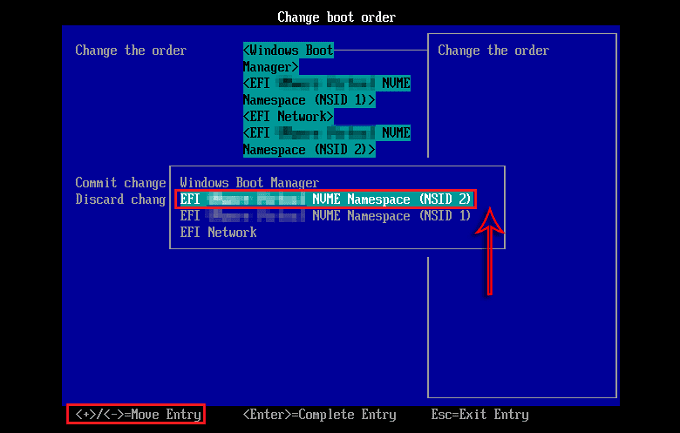
9: Enter Change boot order.

10: Move the new SSD to the top of the list by using “+” and “-” keys. Then commit changes and exit by pressing Enter.
11: The computer will restart. Then launch Disk Management and you will find that Windows 11 has been installed on the new SSD.
Case 2: The New SSD Replaced the Old Drive
This case is similar to the previous one and we still need to use the iSumsoft Cloner. The difference is that you don’t have to change the boot order. Follow these steps:
1: Connect the new SSD to the computer using a USB cable or adaptor.
2: Run Disk Management. When a pop-up window appears, click on the GPT option and click OK.
3: Right-click on the unallocated drive and select New Simple Volume. Then follow the wizard to allocate a partition and assign a drive letter to the new drive.
4: Complete the installation of iSumsoft Cloner, then launch it.
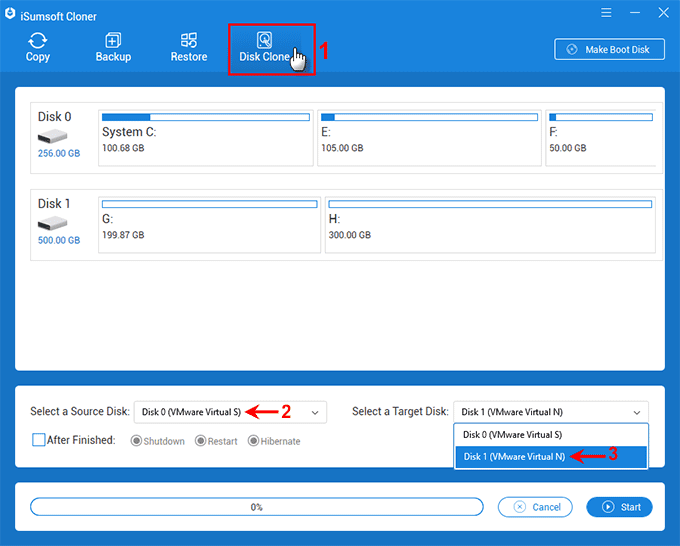
5: Switch to Disk Clone section which allows you to copy the whole drive to the new SSD. Then select the drive installing Windows 11 as the source disk and select the new disk as the target disk.
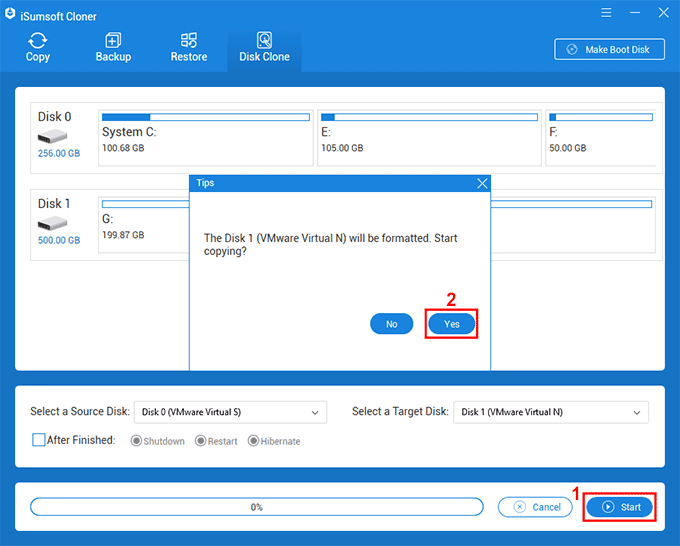
6: Click Start to begin cloning, and you will then be prompted that the new SSD will be formatted, click Yes to confirm.
7: The process is finished.

8: Shut down your PC, and then replace the old hard drive with the new SSD. Now you’ve successfully installed Windows 11 on a new SSD without USB.