How to Create Your Own Electric Skateboard from Scratch
Building your own electric skateboard is a fun and rewarding project that allows you to customize your ride exactly the way you want it. Not only will you have the satisfaction of creating something yourself, but you’ll also save some money compared to buying a pre-built board. Plus, you get to choose the exact components and features that suit your needs.
In this guide, we’ll walk you through everything you need to know to build your very own electric skateboard, from gathering materials to putting everything together. Whether you’re a beginner or have some DIY experience, this step-by-step approach will make it easy for you to get started.
What You’ll Need to Get Started
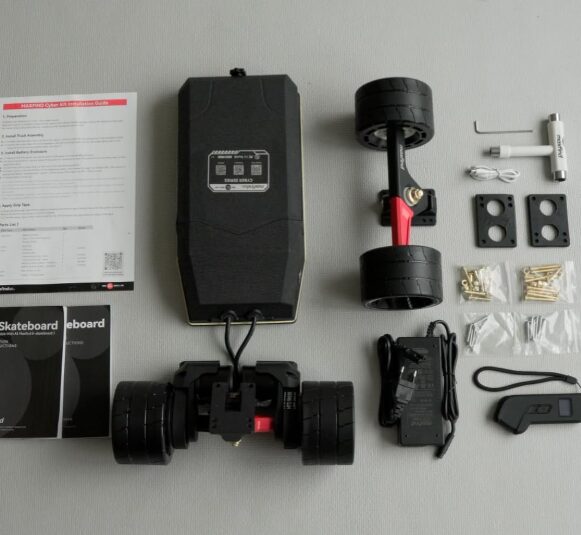
Before diving into the actual build, let’s take a look at the tools and parts you’ll need. Having everything in place beforehand will make the process smoother and faster.
Essential Tools and Components
Tools:
- Soldering iron: For connecting wires and electronics.
- Screwdrivers & wrenches: To attach and tighten components like motors and wheels.
- Drill: Used to make holes for mounting components.
- Heat shrink tubing or electrical tape: For insulating your wiring.
Parts:
- Deck: You’ll need a skateboard deck to serve as the foundation. The size and material of the deck depend on your preferences. A longer deck generally offers better stability and space for components.
- Motor: The motor is what gives your skateboard its electric power. You’ll need to choose between a hub motor or a belt-driven motor depending on your preference for performance and maintenance.
- Battery: The battery powers the motor. A good battery will provide the range you need for long rides. Li-ion batteries are the most common choice for electric skateboards.
- ESC (Electronic Speed Controller): The ESC controls the motor’s speed and braking. It is a crucial component for smooth operation and safety.
- Wheels & Trucks: Choose wheels based on your riding style. Larger wheels are better for rough terrain, while smaller wheels are ideal for smooth, paved roads. Trucks are the metal parts that connect the wheels to the deck.
- Remote Control: You’ll need a wireless remote to control your board’s speed and braking.

Where to Source Your Materials
You can find the parts you need at local hardware stores or online marketplaces like Amazon, eBay, or specialized electric skateboard retailers. Some websites, like Maxfind and HobbyKing, offer complete DIY electric skateboard kits with everything you need, making it easier for you to get started.
Understanding the Key Parts of an Electric Skateboard
To build an electric skateboard, it’s important to understand the function of each key part. Let’s take a closer look at what each component does and how to choose the best options for your build.
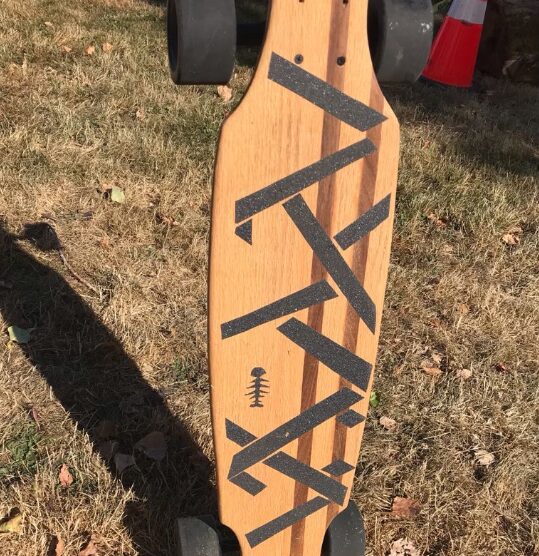
The Deck
The deck is the base of your skateboard. It provides the platform to mount your components. When selecting a deck, consider the following:
- Size: Longer decks tend to offer more space for your components and provide greater stability at higher speeds.
- Material: Popular deck materials include wood, carbon fiber, and bamboo. Carbon fiber is lightweight and strong but can be more expensive, while wood offers a more affordable and flexible option.
- Shape: Choose a shape that suits your riding style. For instance, a drop-through deck offers better stability, while a kicktail deck is better for tricks.
The Motor
Your motor is what drives the skateboard forward. There are two main types of motors:
- Hub motors: These motors are integrated into the wheels, making them quieter and lower maintenance. They’re a good choice for those who want a cleaner, more compact build.
- Belt-driven motors: These motors connect to the wheels using a belt system. They’re generally more powerful and offer better torque, making them ideal for off-road or high-speed riding.
Battery and ESC
The battery is the heart of your electric skateboard. It stores the energy that powers the motor. For most DIY electric skateboards, Li-ion batteries are the best choice because they offer a good balance of performance, weight, and affordability. The size and voltage of your battery will depend on how fast and how far you want to ride.
The ESC (Electronic Speed Controller) is responsible for managing the power going from the battery to the motor. It controls speed and braking. Make sure to select an ESC that matches your motor type and battery configuration. VESC (Variable Electronic Speed Controller) is a popular option that’s customizable and offers smooth control.
Step-by-Step Guide to Building Your Electric Skateboard
Now that you have all the components, let’s go through the process of assembling your electric skateboard.
Step 1: Preparing the Deck
The first step is preparing the deck. If the deck doesn’t have pre-drilled holes for the trucks, here’s what to do:
- Mark the drill spots: Use a ruler to ensure even spacing for the truck mounts.
- Drill the holes: Carefully drill the holes for the trucks, ensuring the correct size for your screws.
- Mount the trucks: Attach the trucks with bolts, making sure they’re securely tightened.
Step 2: Installing the Motor
Next, install the motor:
Hub motors:
These are simpler to install since they’re integrated into the wheels. Attach the motor to the wheel and mount it onto the trucks.
Belt-driven motors:
Mount the motor to the deck using motor mounts. Attach the motor pulley to the wheel pulley using a belt. Ensure the pulleys are aligned properly.
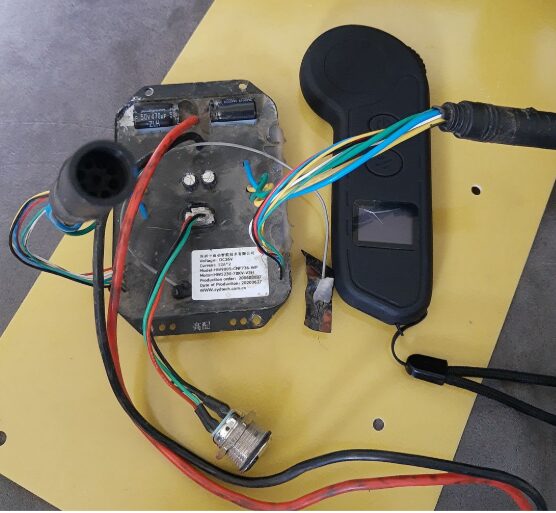
Step 3: Wiring the Battery and ESC
Now it’s time to wire the battery and ESC:
- Mount the ESC: Attach the ESC to the underside of the deck.
- Connect the battery: Wire the battery to the ESC, making sure the positive and negative connections are correct.
- Connect the motor: Attach the motor wires to the ESC, securing them with insulation to prevent shorts.
- Secure the wiring: Use electrical tape or heat shrink tubing to protect the wires.
Step 4: Testing and Adjusting the Setup
Once everything is in place, test your board:
- Power on the ESC and battery: Check that the board powers up and that all wiring is intact.
- Test the motor: Start at low speed and gradually increase to check for smooth acceleration and braking.
- Check for issues: Listen for any unusual noises from the motor or vibrations from the mount. Adjust as needed.
- Adjust braking: Test the brakes and adjust the settings if they’re too weak or too strong.
Once you’re confident everything works, take the board for a short test ride in a safe area. If everything feels good, you’re ready to enjoy your custom electric skateboard!
Common Issues You Might Face (and How to Solve Them)
During the build process, you may encounter some common problems. Here are a few troubleshooting tips:
ESC Tuning Problems
If your skateboard isn’t accelerating or braking smoothly, it could be due to improper ESC settings. Most ESCs allow you to adjust parameters such as acceleration curve, braking strength, and motor detection. Consult your ESC manual and make the necessary adjustments.
Battery Issues
Battery problems, like overheating or poor range, are common in DIY builds. Ensure your battery is properly secured and that it’s the right size for your motor and ESC. If the battery isn’t holding a charge, you may need to replace it or check for any wiring issues.
Motor Alignment and Mounting Problems
If your motor is vibrating excessively or making unusual noises, it could be a sign that it’s misaligned. Double-check the motor mount and pulley alignment, and ensure the motor is securely mounted.
Safety Tips for Riding Your Custom Electric Skateboard
Building your electric skateboard is exciting, but safety should always be your top priority. Here are some important safety tips to follow:
- Wear protective gear: Always wear a helmet, knee pads, and elbow pads while riding. Protecting yourself from falls is crucial.
- Test in a controlled environment: When you first test your board, do it in a safe, open area free from obstacles and traffic.
- Check your board regularly: Before every ride, check that all components are securely fastened, and the battery is charged.
Enjoy Your Custom Electric Skateboard!
Congratulations, you’ve built your own electric skateboard! Now that your board is up and running, enjoy the freedom and fun that comes with riding it. Remember to ride safely, keep your board well-maintained, and most importantly, have fun! Whether you built it for daily commuting or just for fun, your custom electric skateboard is sure to turn heads and deliver an awesome ride.