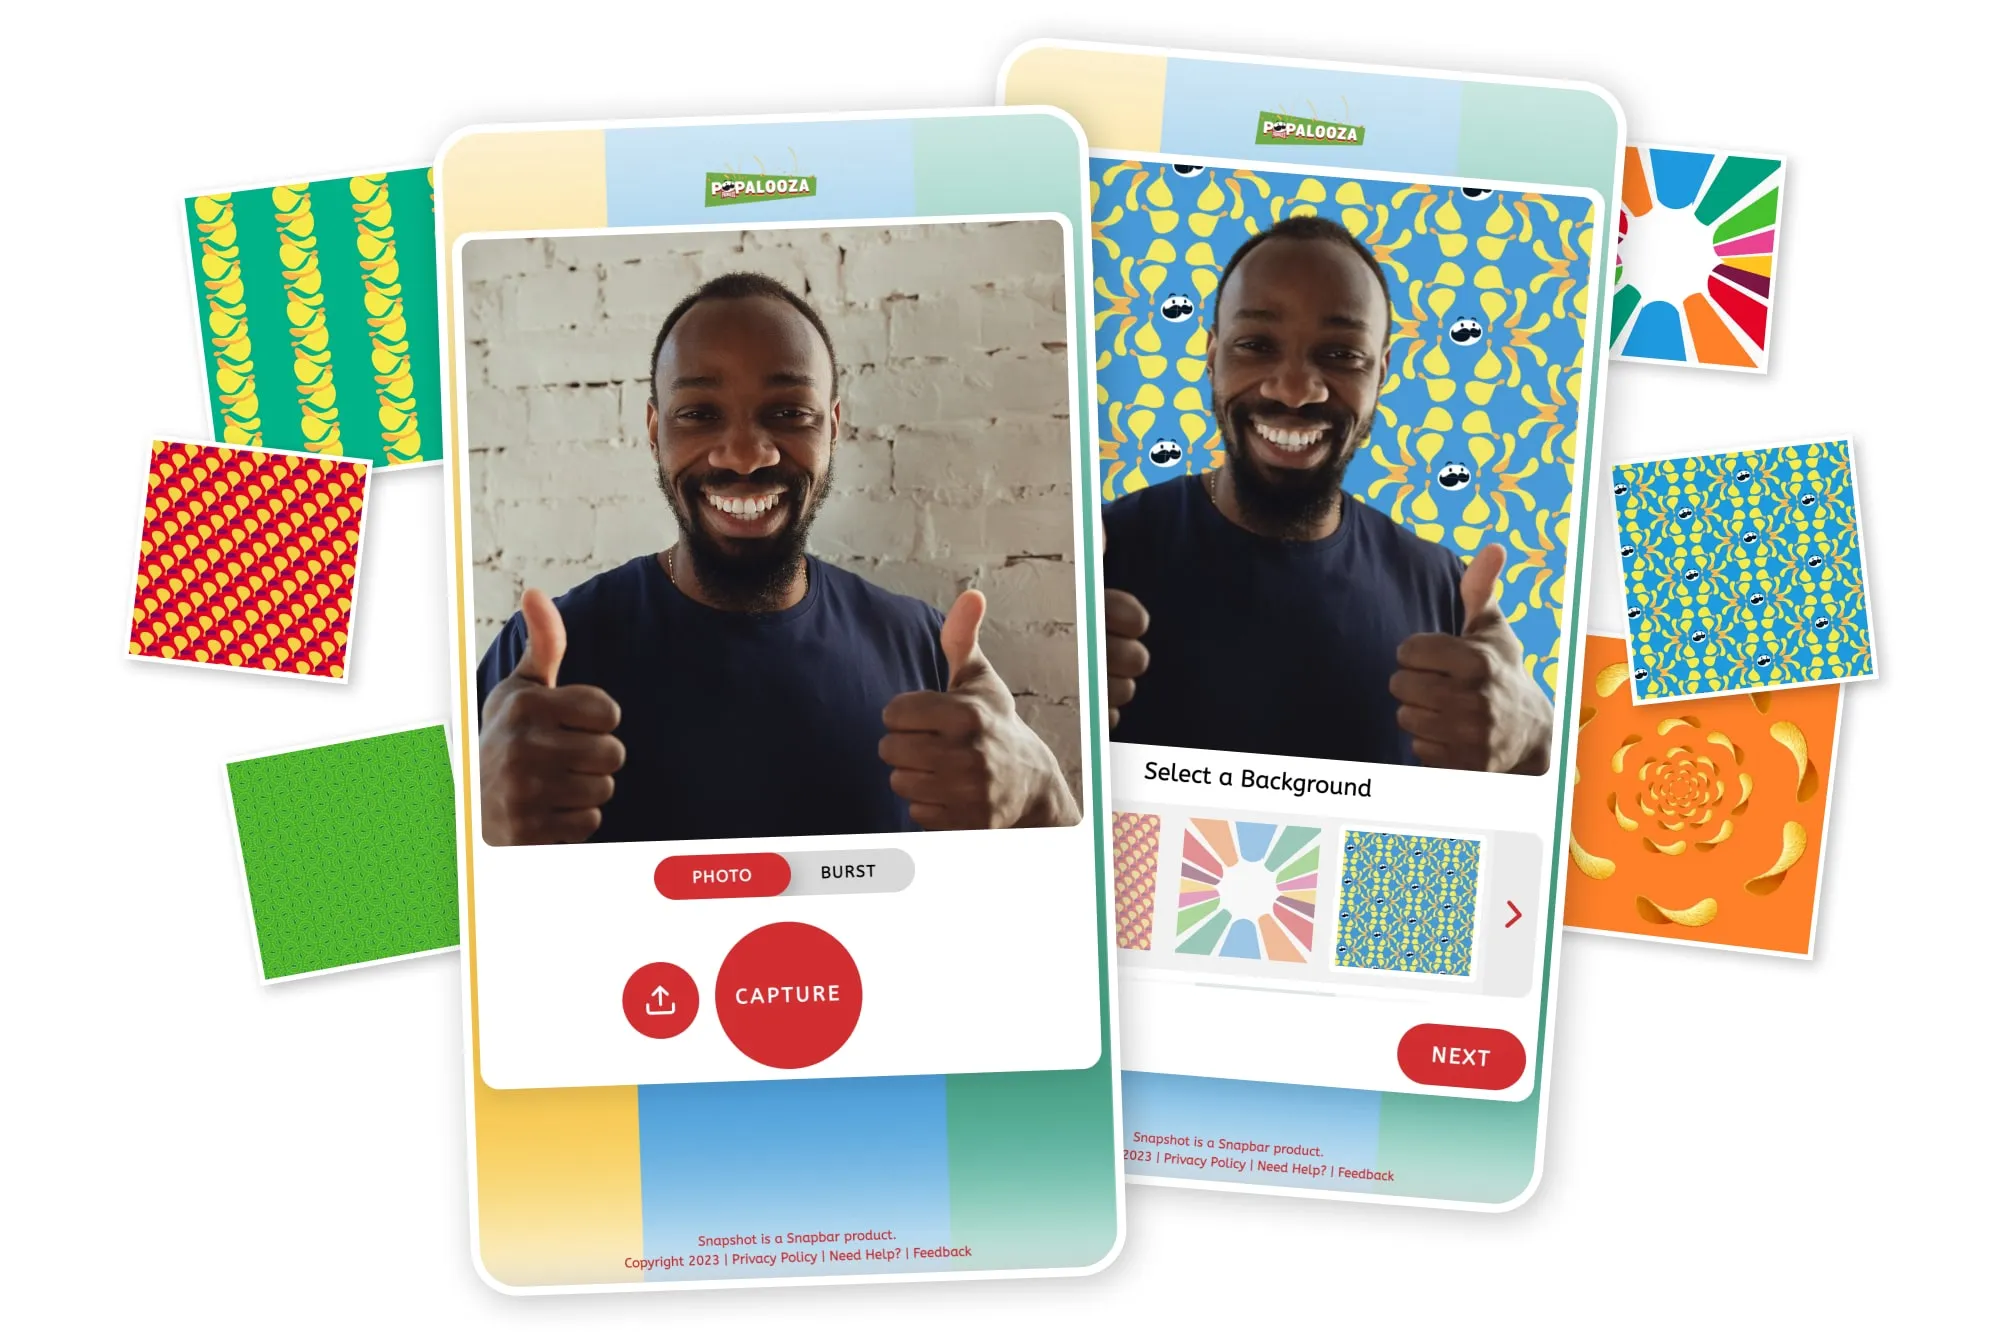
A well–designed and photo booth overlay can transform an ordinary picture into a branded, stylish, and unforgettable visual. Whether you’re creating still layouts, animated GIFs, or Rebound videos, overlays give you the power to add personality and purpose to every shot. With just a few creative elements, like logos, text, borders, and themed graphics, you can instantly elevate your Simple Booth images and make them stand out in any setting.
Interactive photobooth web overlays are more than just decorative layers; they serve as powerful branding tools that highlight sponsors, showcase event themes, and enhance your guests’ experience. From weddings and corporate parties to festivals and promotional events, the right overlay can turn simple photos into shareable keepsakes that people love to post online.
Why Are Photo Booth Overlays Important?
Photo booth overlays are essential design elements that elevate ordinary photos into branded, stylish, and memorable visuals. Overlays allow you to customize images with text, graphics, and effects that enhance both quality and appeal.
Overlays give you the flexibility to transform simple photos into visually rich creations. By adding frames, shapes, textures, or decorative elements, you can match your photos with any theme, be it corporate, casual, festive, or promotional.
Strengthening Branding with Watermarks
One of the most common uses of overlays is branding. Adding a logo or watermark safeguards your images from misuse while increasing brand visibility. Every photo shared online becomes an opportunity to showcase your identity and attract new customers.
Enhancing Photos with Special Effects
Overlays allow you to apply creative effects such as textures, lighting flares, filters, or patterns. These enhancements instantly improve the mood and style of your photos without requiring heavy editing skills, making your images look more polished and professional.
Perfect for Celebrations and Event Themes
From birthdays and weddings to holidays and corporate gatherings, custom overlays add personality to event photos. They help create a festive, cohesive look that guests enjoy and love to share.
Boosting Social Media Engagement
Social media creators often use overlays to add captions, hashtags, emojis, or call-to-action text. These additions make posts more readable, visually appealing, and highly engaging.
Before You Start: Here’s What You Need to Know
Good design takes time, and beginning with the right resources will make your process much smoother. To help you get started quickly, Simple Booth offers a growing library of free, ready-made event themes inside the app.
Before creating your own custom overlay from scratch, it’s worth browsing these templates, you may find one that perfectly fits your event style.
Preparing to Design Your Overlay
Before designing, you’ll need a graphics editing tool.
Photoshop is the industry standard and ideal for experienced designers, but beginners often prefer simpler, more budget-friendly options. Two popular choices are:
- Pixlr: Similar to Photoshop, but easier for beginners and available online.
- Canva: Extremely user-friendly, great for non-designers.
Both tools can create high-quality overlays, though saving a transparent PNG in Canva requires a Premium subscription.
Once you’re ready, creating an overlay for the HALO app takes just three simple steps.
1. Pick the Right Layout
Each photo booth layout has its own dimensions, so it’s important to base your overlay on the exact layout you plan to use. Your final size will depend on:
- Layout type (single photo, 1×2 strip, 1×3 strip, etc.)
- Photo crop (square, circle, or none)
- iPad orientation (portrait or landscape)
- Margin thickness
- Whether a logo is included
Set these options first to avoid redesigning later. The correct dimensions will appear in the Design panel of your preset.
If your overlay is a few pixels off, don’t worry, Simple Booth HALO slightly adjusts overlays to fit without visible distortion.
2. Design Your Overlay
Now it’s time to create! Use your editing software to:
- Create a new image using the exact dimensions of your layout.
- Ensure the background is transparent (Pixlr allows this at file creation; Canva allows transparency when exporting).
- Add creative elements, frames, shapes, logos, or decorative accents, around the edges. Keep the center mostly clear so photos remain visible.
- Avoid overcrowding the design. Remember: less is often more.
- Save your overlay as a PNG file to preserve transparency.
If you’re new to Pixlr or Canva, both platforms offer tutorials and guides, and YouTube has countless beginner-friendly walkthroughs.
3. Upload to Simple Booth
When your overlay is ready:
- Upload it through the Design panel inside the app, or
- Transfer the PNG to your iPad (AirDrop, Dropbox, email, etc.) and save it to Photos, then upload to Simple Booth.
If you encounter issues, the Simple Booth Support Center provides additional resources. You can also send your overlay file and a screenshot of your Design panel to the support team for personalized help.
Must Know These Advanced Overlay Techniques
Once you’re comfortable creating basic photo booth overlays, you can start experimenting with advanced techniques that bring greater depth, creativity, and visual impact to your designs. These methods allow you to craft overlays that feel polished, dynamic, and truly customized for any event or brand.
Use Layer Masks for Creative Control
Layer masks are powerful tools that help you create refined effects such as smooth fades, soft gradients, or custom-shaped cutouts. By adjusting visibility on selected parts of a layer, you can blend elements seamlessly without permanently altering your artwork.
Experiment with Layer Compositing
Layer compositing involves stacking and blending multiple layers to produce richer, more complex visuals. By using blending modes like Multiply, Overlay, Screen, or Soft Light, you can control how layers interact with each other, perfect for adding depth, lighting flares, or textured effects.
Design Custom Shapes for Unique Styles
Custom shapes allow you to break free from standard design elements. Whether you want elegant curves, geometric patterns, or themed icons, designing your own shapes gives your overlays a unique identity and helps better match event themes.
Enhance Text with Professional Styling
Typography plays a big role in overlay design. Try experimenting with text paths, outlines, shadows, gradients, or 3D effects to make your wording stand out. Stylish text can instantly elevate the overall look, especially for brand names, event titles, or hashtags.
Apply Filters and Special Effects
Modern design software offers countless filters, glows, blurs, textures, color enhancements, and more. Use these effects thoughtfully to add personality, realism, or mood to your overlay. A subtle filter can transform a simple design into a striking visual element.
FAQs
What file format should a photo booth overlay be?
The best format for overlays is PNG, because it supports transparency. JPEG files do not support transparent backgrounds, so they won’t work properly as overlays in most photo booth apps.
What size should my photo booth overlay be?
Overlay size depends on your layout (single photo, 1×2 strip, 1×3 strip), orientation (portrait or landscape), margins, and crop settings.
Why is my overlay not lining up correctly in the app?
Misalignment usually happens when the overlay dimensions don’t match the layout size exactly. Even being off by a few pixels can cause issues. Recheck the required dimensions, adjust your design, and re-upload the PNG. Most apps can automatically stretch minor differences.
How do I add my logo to a photo booth overlay?
Upload your logo as a PNG with a transparent background into your design software (Pixlr or Canva). Place it along the bottom or top edge where it won’t block the photo area. Resize it to fit the overlay layout and export the final design as a PNG.