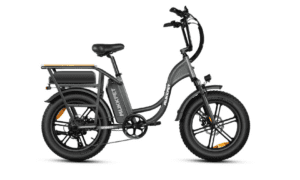
When faced with a shifting problem, electric bike riders may believe that a bike shop is the only solution. However, this may be an issue that the rider can fix.
Misalignment of the derailleur can cause shifting problems. You may resolve the shifting issue with a few easy adjustments and the electric bicycle back on the road.
Adjusting the ebike’s gears is critical for ensuring effective and consistent shifting performance. It also helps to avoid problems with the drivetrain. As a result, appropriate derailleur adjustment is necessary. It is a fundamental and essential component that aids in correctly turning the gears. It directs the chain from cog to cog on the cassette, ensuring a safe and comfortable ride.
The derailleur is a bike component that moves the chain from one cog to another when the shifter is used while pedaling.
If the cogs or chains are very dirty, grungy, or sticky, the bike’s ability to shift will suffer.
A derailleur adjustment is necessary if the bike chain comes off the freewheel cogs or if the bike is loud or imprecise when shifting.
The derailleur is essential because it allows the shifts to move the chain from one shift to the next when the rider utilizes it. This shift change is vital for varied terrains and types of affordable electric bike riding. For example, one gear is recommended for a straight route and another for an incline. When the chain or gears become dirty or sticky, the overall performance of the ebike suffers, as does the ability to shift gears effectively. As a result, it is advised to make periodic derailleur adjustments for the ebike chain when it becomes dislodged from the gears. Furthermore, you should inspect the derailleur to see if the bike’s gears make noise or are imprecise when shifting gears.
As previously stated, the bike derailleur adjustment is required to align the rear derailleur with the individual cogs and establish the shifting limits. This provides smooth and precise shifting. The calibration of the bike derailleur adjustment entails four distinct steps. These are the derailleur alignment, cable tension, limit screws, and B-tension.
This article will walk you through all the steps to get the most out of the process.
- Prepare the Ebike
The first step in effective bike derailleur adjustment is to prepare the ebike. What does it imply? So, first and foremost, turn off commuter bikes. If it is turned on, you cannot work on it. You should then remove the battery. For safety reasons, You must remove the battery. The next stage in bike preparation is to tidy it up a little. Begin by wiping the gears and chain of dirt, stains, oil, and mud. The procedure will necessitate the use of a Phillips screwdriver. An ebike frame is also required to set up the ebike. When the bike is ready, you can proceed to the subsequent phases.
- Inspect the derailleur
The second step is to inspect the derailleur. First, examine the derailleur. It is situated behind the rear wheel. Check to see if it lines up correctly under the gear set by the shift lever. The chain should be on the biggest gear while in first gear. The chain should be on the smallest gear in the 7th gear. Suppose the derailleur or derailleur hanger is bent and does not hang directly beneath a specific gear. In that case, the ebike must be serviced by a specialist. This means you’ll need to choose a reliable and qualified bike shop specializing in repairs.
- Adjust the derailleur
The adjustment and steps for the derailleur vary depending on the scenario.
If the chain falls, it might be due to the derailleur being too close or too far from the gears. You’ll need to locate and adjust the derailleur limit screw. If the chain comes off the smallest cog, twist the crank forward and change to the seventh cog. Then, using a Philips screwdriver, tighten the upper setscrew clockwise. Repeat until the chain on the upper pinch roller is just below the smallest cog. Rotate the crank forward if the chain falls off the biggest gear. With a Phillips screwdriver, shift it into first gear. This tightens the lower limit screw by turning it clockwise. It also lowers the derailleur to the flywheel. Turn the upper wheel until the chain is squarely beneath the bull gear. Shift between gears to check the alignment.
If there is noise while shifting gears, it might indicate that the cable tension is too tight. Turn the crank forward into 7th gear to correct this. This will shift the chain into a lower gear and loosen the derailleur’s barrel adjuster. Turn the barrel adjuster a 1/2 turn clockwise. Check to see if the gears move smoothly.
If the chain climbs the gears too slowly, it might indicate that the derailleur is too loose. You must accelerate and shift into the seventh gear. Tighten the barrel to adjust and set the derailleur. Test it once again to ensure that it operates smoothly.
Summary:
You’ll need to:
- Prepare the bike for servicing. Turn off the bike, remove the battery, then press the MODE button to drain any leftover power.
- Inspect the derailleur. Inspect the derailleur at the rear wheel to determine if it is positioned just below the gear the shifter is set to. When in 7th gear, make sure the chain is on the little cog. The chain should be on the biggest cog while in first gear.
- Adjust the derailleur. The derailleur adjustment and steps differ based on the scenario.
You can effectively adjust the bike derailleur by following these steps. You can quickly and safely adjust the derailleur depending on the scenario and other signs that may arise on your ebike. Having a fully working derailleur will not only extend the life of your ebike, but it will also make your ride safer, smoother, and more enjoyable. It must be cared for and regularly maintained to ensure that your ebike lasts as long as possible. The process is straightforward, and with this guide, you can quickly solve the problem yourself. This will show you how the gears change more smoothly, there are no rattling noises, and the ride is as smooth as possible. And all you need is a screwdriver to complete the task. However, if you cannot address a problem, seek experienced and expert help.


