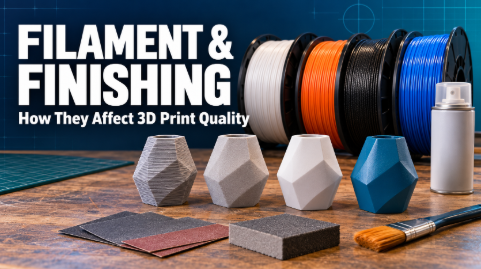
Two prints made on the same machine can look—and perform—completely different. One may have clean walls and strong layer bonding, while the other shows fine strings, rough patches, or corners lifting from the build plate. The difference is often not the printer itself. Filament, slicing settings, storage conditions, and post-processing all shape the final result.
That is why the relationship between filament choice and 3D print quality is more useful than searching for a single “best” material. Quality depends on what the part is supposed to do. A display model needs clean surfaces and visual detail; a workshop bracket needs strength and dimensional accuracy; a flexible seal needs controlled elasticity.
Understanding that chain—material, settings, printed part, and finishing—makes it much easier to get the result you actually want.
Print Quality Is More Than a Smooth Surface
People often judge 3D print quality by visible layer lines, but appearance is only one measure.
For a decorative model, quality may mean crisp details, minimal support marks, and an even painted finish. For a functional component, it may mean accurate dimensions, good layer adhesion, and enough heat or impact resistance for its intended environment.
A part can look polished and still fail under load. Another may show visible layers but work reliably for years. Before choosing a 3D printer filament, decide which qualities matter most:
- Surface appearance
- Strength and layer bonding
- Dimensional accuracy
- Flexibility
- Heat and chemical resistance
- Ease of printing and finishing
This gives you a practical way to evaluate different 3d printing filament types without assuming that one material is suitable for every project.
PLA: Easy to Print and Easy to Finish
PLA is often the starting point for hobby printing because it usually produces predictable results without requiring a heated enclosure. It works well for display models, organizers, prototypes, toys, and other parts that will not be exposed to high temperatures or heavy mechanical stress.
Its relatively low printing temperature and limited tendency to warp make it easier to achieve sharp corners and clean surfaces. PLA is also straightforward to sand, prime, and paint, although sanding too aggressively can create heat and soften the surface.
For a desktop figure, a carefully printed PLA model followed by light sanding, filler primer, and paint may look better than a model printed at extreme speed with a smaller layer height. Good finishing can hide minor layer lines and support marks, while color and texture draw attention away from the manufacturing process.
PLA does have limitations. It can soften in hot environments, and some formulations are more brittle than PETG or ABS. It is therefore not automatically the right choice for parts used inside a car, near a heat source, or under repeated mechanical load.
PETG: A Practical Choice for Functional Parts
The PLA vs PETG decision usually comes down to printability versus functional durability.
PETG is commonly selected for brackets, protective housings, workshop accessories, and parts that may encounter moisture or moderate mechanical stress. It generally offers more impact resistance and temperature tolerance than standard PLA, while remaining easier to print than many engineering materials.
However, PETG can be prone to stringing and oozing. It also tends to stick strongly to some build surfaces, so the correct bed preparation matters. Excessive nozzle temperature, poor retraction settings, or damp filament can leave fine hairs between features and make the surface look untidy.
For a functional PETG bracket, perfect cosmetic smoothness may not be the main goal. Consistent extrusion, dimensional accuracy, wall thickness, and layer adhesion are usually more important. Heavy sanding could even alter a critical dimension or weaken a thin section.
PETG can still be sanded and painted, but it often requires more surface preparation than PLA. A suitable primer can help paint adhere evenly.
ABS: Useful When Heat Resistance Matters
ABS is suited to parts that need greater heat resistance and toughness than ordinary PLA can provide. It can be useful for enclosures, automotive-related prototypes, handles, and workshop components.
The trade-off is a more demanding printing environment. ABS shrinks as it cools, which can pull corners away from the build plate or cause layers to separate. A stable bed temperature, controlled airflow, and an enclosure are often more important than simply increasing nozzle temperature.
ABS also offers a finishing option that many other common filaments do not: controlled acetone smoothing. Acetone vapor or careful surface application can soften the outer layer and reduce visible lines. The process can also blur small details or change dimensions, so it is better suited to decorative surfaces than precision interfaces.
Because acetone is volatile and flammable, chemical smoothing requires proper ventilation, appropriate protective equipment, and strict fire safety. It should never be treated as a casual desktop technique.
TPU: When Flexibility Defines Quality
TPU filament is used for flexible parts such as protective covers, grips, seals, feet, and vibration-damping components. In these applications, quality is not about creating the hardest or glossiest surface. It is about producing predictable flexibility without gaps, jams, or inconsistent extrusion.
TPU usually prints better at controlled speeds with a well-managed filament path. Retraction settings that work for rigid PLA may cause problems with flexible material because the filament can stretch or compress inside the extruder.
Post-processing options are also limited. Sanding a soft TPU part is rarely productive, and paint may crack or peel as the part bends. It is usually better to improve the result through orientation, layer height, temperature, and speed before printing.
Where Resin Fits Into the Comparison
Resin is not filament, but it is worth considering when surface detail is the priority. Resin printers can reproduce fine textures and small features that are difficult to achieve with a standard filament setup, making them popular for miniatures, jewelry prototypes, and display models.
The workflow is different. A resin print must normally be washed and cured, and support contact points may still need trimming and sanding. Resin also requires careful handling, ventilation, protective equipment, and proper disposal practices.
A detailed resin model may need less work to hide layer lines, but it does not come off the printer completely finished. Orientation, support placement, washing, and curing all influence its final appearance and mechanical behavior.
Good Filament Does Not Guarantee a Good Print
Premium material cannot compensate for poor calibration or unsuitable settings.
Nozzle temperature affects how well the material flows and bonds. If it is too low, layers may not fuse properly. If it is too high, the material may ooze, string, or lose fine detail. Bed temperature influences first-layer adhesion and warping, while cooling affects overhangs, bridges, and the way each new layer solidifies.
Speed adds another variable. Printing faster can save time, but only if the hotend can melt material consistently and the printer can control motion without introducing ringing or weak extrusion. Layer height, retraction, flow rate, and the slicer profile must work together.
When something goes wrong, change one variable at a time. A structured 3d print troubleshooting process is more reliable than changing temperature, speed, retraction, and cooling simultaneously.
Moisture Can Change the Same Filament Completely
Most printing materials absorb some moisture from the air, although the rate varies. TPU and several engineering materials are particularly sensitive, while PETG can also show noticeable deterioration after unsuitable storage.
When damp filament enters a hot nozzle, absorbed water turns into steam. The resulting pressure disrupts the flow of molten plastic. You may hear popping sounds or see bubbles in the extruded strand. On the print, this can appear as stringing, oozing, rough surfaces, uneven extrusion, or weak layer adhesion.
This explains why a familiar spool may suddenly print worse even though the machine and slicer profile have not changed.
A sealed container with desiccant helps keep dry filament dry. If a spool has already absorbed moisture, it may need controlled drying at a temperature suitable for that specific material. Drying temperatures should come from the filament manufacturer, since excessive heat can deform a spool or damage the material.
Finishing Starts Before the Print Finishes
Post-processing cannot repair every printing problem. Deep gaps, major warping, and weak layer bonding should be corrected through material handling and print settings first.
For appearance-focused parts, finishing usually follows a simple sequence:
- Remove supports carefully and trim obvious marks.
- Sand progressively rather than starting with extremely fine paper.
- Clean away dust before applying primer.
- Use filler primer to reveal and reduce remaining layer lines.
- Sand again where needed, then apply paint in light coats.
Different materials respond differently, so anyone learning how to smooth 3d prints should confirm that the chosen method is compatible with the material. Sanding and filler primer work for many rigid prints, while chemical smoothing is material-specific and may change dimensions or fine details.
Finishing also involves a trade-off. Each sanding pass removes material. On decorative surfaces, it may be harmless, but on clips, gears, fitted enclosures, or screw holes, it can affect tolerances.
Match the Process to the Part
Imagine three projects.
For a painted desktop model, PLA printed at a moderate speed with a sensible layer height provides an accessible starting point. Careful support placement, sanding, filler primer, and paint will probably make a greater visual difference than chasing the smallest possible layer height.
For a functional wall bracket, PETG may be more appropriate. Here, dry material, strong layer bonding, correct print orientation, and accurate dimensions matter more than eliminating every visible line.
For a flexible protective foot, TPU is the logical candidate. The key is maintaining steady extrusion and choosing the right wall structure and infill. Sanding or polishing adds little value because flexibility—not surface gloss—defines the success of the part.
These examples show why the best filament for 3D printing depends on the job. Exploring different 3d printing filaments is useful, but material selection should always begin with the part’s environment and purpose.
A Better Route to Better Prints
If you want to improve 3D print quality, work in the right order. Choose a material that suits the part, keep it dry, use a tested slicer profile, and calibrate temperature and flow before increasing speed. Then select a finishing method that improves the result without damaging dimensions or mechanical performance.
The most polished print is not always the highest-quality print. Sometimes quality means a clean painted surface. Sometimes it means a bracket that fits correctly, a flexible part that bends repeatedly, or an enclosure that remains stable in a warm environment.
Once the intended use becomes the starting point, filament selection and finishing stop being separate decisions. They become parts of the same practical process.