How to Resolve Video_Scheduler_Internal_Error
“I tried putting a new graphics card into my computer, but it caused my system to crash. Now, all I see is that annoying blue screen with the ‘video_scheduler_internal_error’ message.’ The issue hasn’t gone away, so any help would be appreciable.”
—-A question from Reddit
The Video Scheduler Internal error is a common issue many Windows 10/11 users face. It often appears as a Blue Screen of Death (BSOD) with a stop code, leaving users feeling confused and helpless. Despite its seriousness, there are six solutions in this article that can help you resolve this error. We’ll also discuss what this error means and why it happens. So keep reading till the end!
Part 1: What Is the Video Scheduler Internal Error and Why Does it Occur?
The video scheduler internal error Windows 11/10 is a stop code error that happens when the video scheduler detects a violation. When you see this error pop up, it usually points to a problem with your graphics card or the software that runs it. Sometimes, you might even get an error code like 0x00000119.
Before diving into solutions, you can first try to diagnose the issue:
- Out-of-date, corrupted, or incompatible graphics card drivers.
- Outdated system, corrupt system files, or a recent OS update.
- Faulty or overheating graphics cards.
- Hardware issues, such as a damaged GPU or its components.
- A virus or malware has corrupted your Windows 10/11 PC.
- Certain software or system processes may conflict with the graphics card drivers.
Part 2: Recover Data Before Fixing Video_Scheduler_Internal_Error
Now that you’ve got the lowdown on why the blue screen video scheduler internal error happens, there is one important thing you might need to consider. Many Windows users have reported that the stop code video_scheduler_internal_error can cause them to lose their unsaved data. Moreover, trying to fix it can sometimes lead to losing important data.
Therefore, it’s better to recover your files beforehand, as you wouldn’t want to risk overwriting or losing them permanently. Consider trying the 4DDiG Windows Data Recovery tool. It’s a solid choice to get back your data before dealing with the video scheduler internal error. The tool uses an advanced algorithm to dig and deeply scan your lost, hidden, deleted, formatted, and corrupted data to recover it. Here’s what more it can do:
- Get back your files lost due to partition issues, deletions, formatting, crashes, viruses, etc.
- It restores various file types like photos, videos, docs, music, and more.
- Recover data from over 2000 storage devices like hard drives, USBs, SD cards, and cameras.
- Works with Windows 10/11 and MacOS.
- Easy to use; you don’t have to be a tech guru.
Just 3 simple steps to recover data before fixing the video_scheduler_internal_error in Windows 11/10:
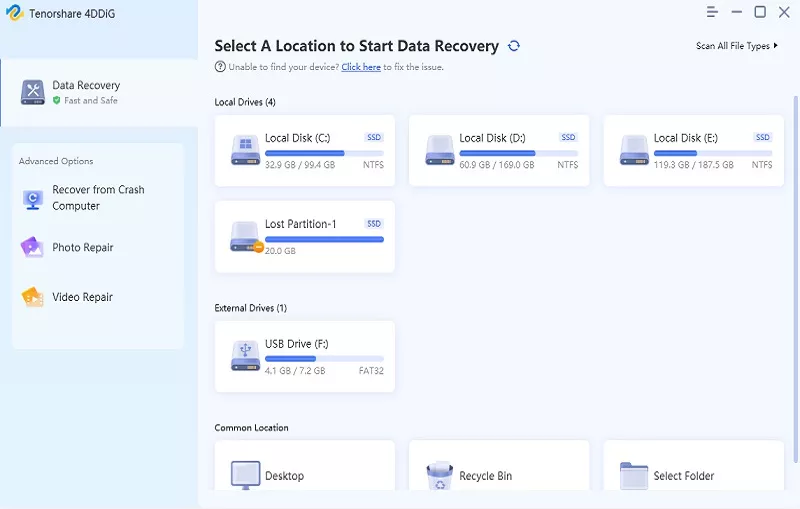
Step 1: Choose a Disk for Data Recovery
Install and open the 4DDiG Windows Data Recovery tool on your PC. Choose the local disk from which you want to recover data. Optionally, you can select specific file types before scanning using the options at the top-right. Once the files are selected, click “Start” to begin the recovery process from the disk.
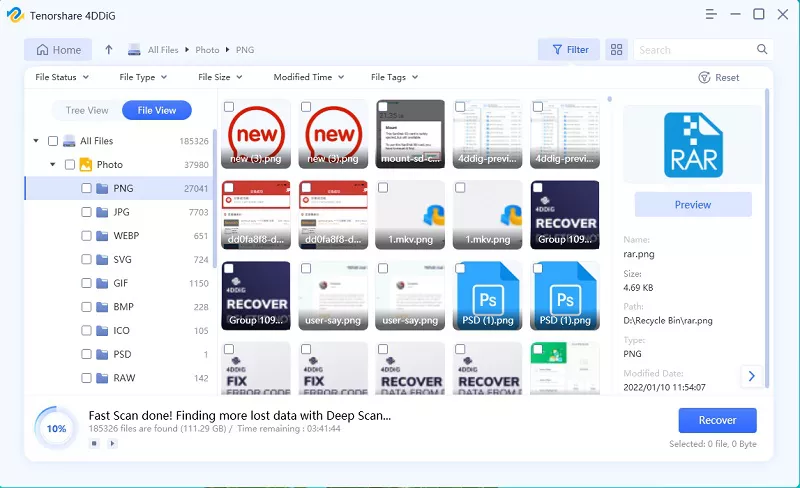
Step 2: Pause Scanning to Preview Files
While scanning, you can pause or stop anytime if you find the files you need. After scanning, preview the identified files to confirm.

Step 3: Export Recovered Data
Select a safe location to save the recovered data and press “Export.” But avoid the same partition or disk to prevent overwriting.
Part 3: How to Fix Video Scheduler Internal Error in Windows 11/10?
Solution 1: Run SFC and DISM Commands
After you’ve got your data back, let’s tackle the video_scheduler_internal_error with confidence. First, do an SFC scan. If that doesn’t cut it, give the DISM scan a shot. SFC targets corrupt system files, while DISM is a heavy hitter that can fix a broader range of system glitches. Here’s how to use SFC scan first:
SFC Scan
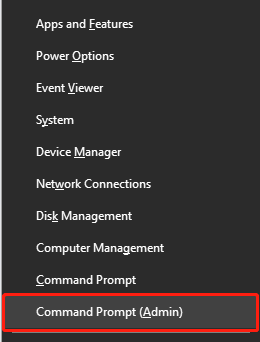
Step 1: Press the Windows + X keys together and select Command Prompt(Admin).
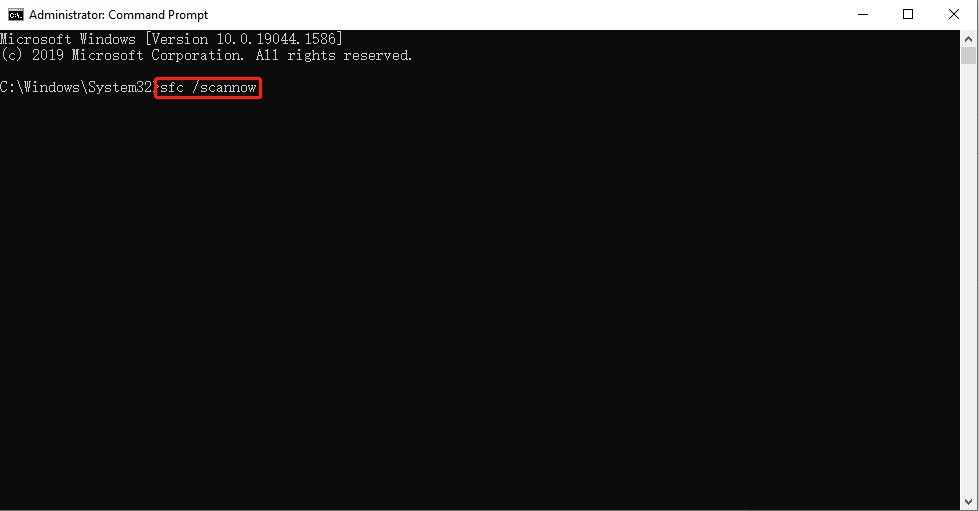
Step 2: Type in this command in the window: “SFC/ scannow.” Then, Hit “Enter.”
Step 3: The SFC will scan for corrupted system files and repair them. Once it finishes, restart the computer to check whether the error is gone or not.
DISM Scan
If the SFC scan doesn’t resolve the video scheduler internal error, move on to the DISM scan. Here’s what to do:
Step 1: Open Command Prompt on your Windows 10/11 PC. Run it as administrator.
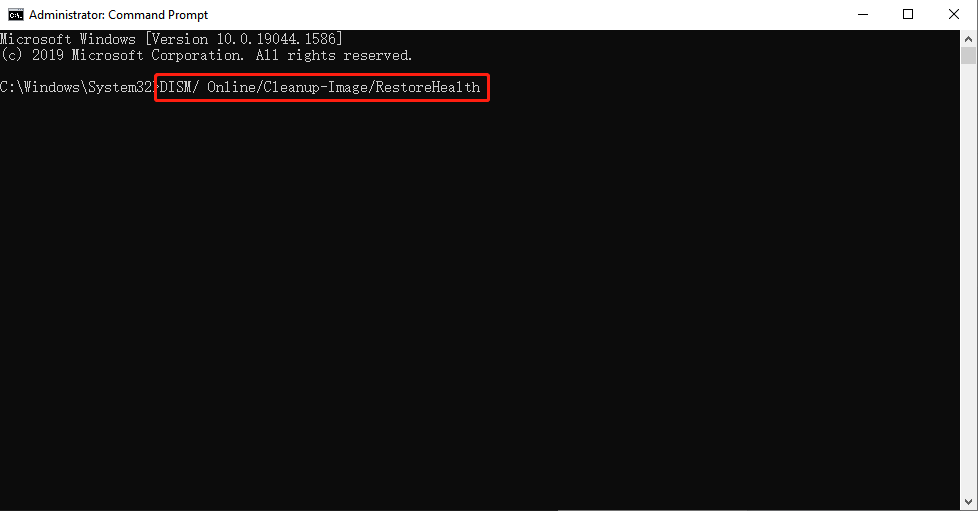
Step 2: Type in this command in the window: “DISM/ Online/Cleanup-Image/RestoreHealth.” Hit “Enter.”
Step 3: The DISM will scan and restore your installed OS image to repair the error. Restart the computer, but update your graphics card drivers if the error is still there.
Solution 2: Update Graphic Card Drivers
The video scheduler internal error in Windows 11/10 could be due to outdated or corrupted graphic card drivers. So, updating them could potentially fix the problem. Here’s how to update them through the Device Manager:
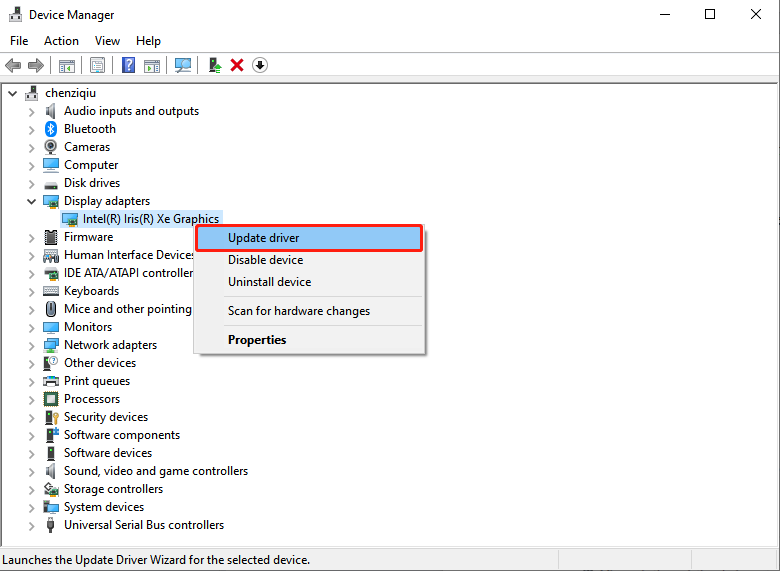
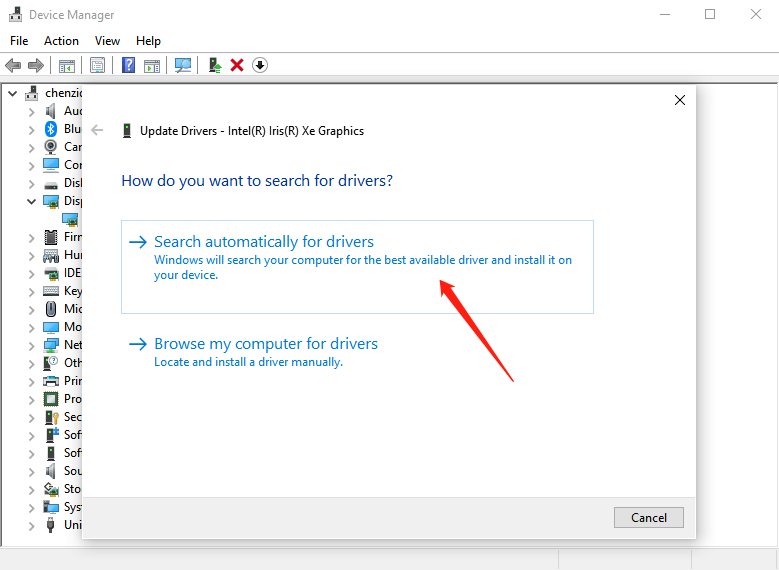
Step 1: Go to the “Start” menu. Search for “Device Manager” and click on it, and next, double-click “Display adapters” to open it up.
Step 2: Right-click on your graphics card and choose ”Update driver.” A new window will pop up.
Step 3: From there, you can either let Windows automatically search for drivers or manually install them by clicking “Browse my computer for drivers.”
Solution 3: Update Your Windows
If updating your graphics card drivers doesn’t resolve the video scheduler internal error Windows 10/11, your system files might be the culprit. Not updating your Windows for a long time can cause this issue, as updates contain critical patches for security and potential issues. In such a case, updating your Windows might solve the problem. Here’s what to do:
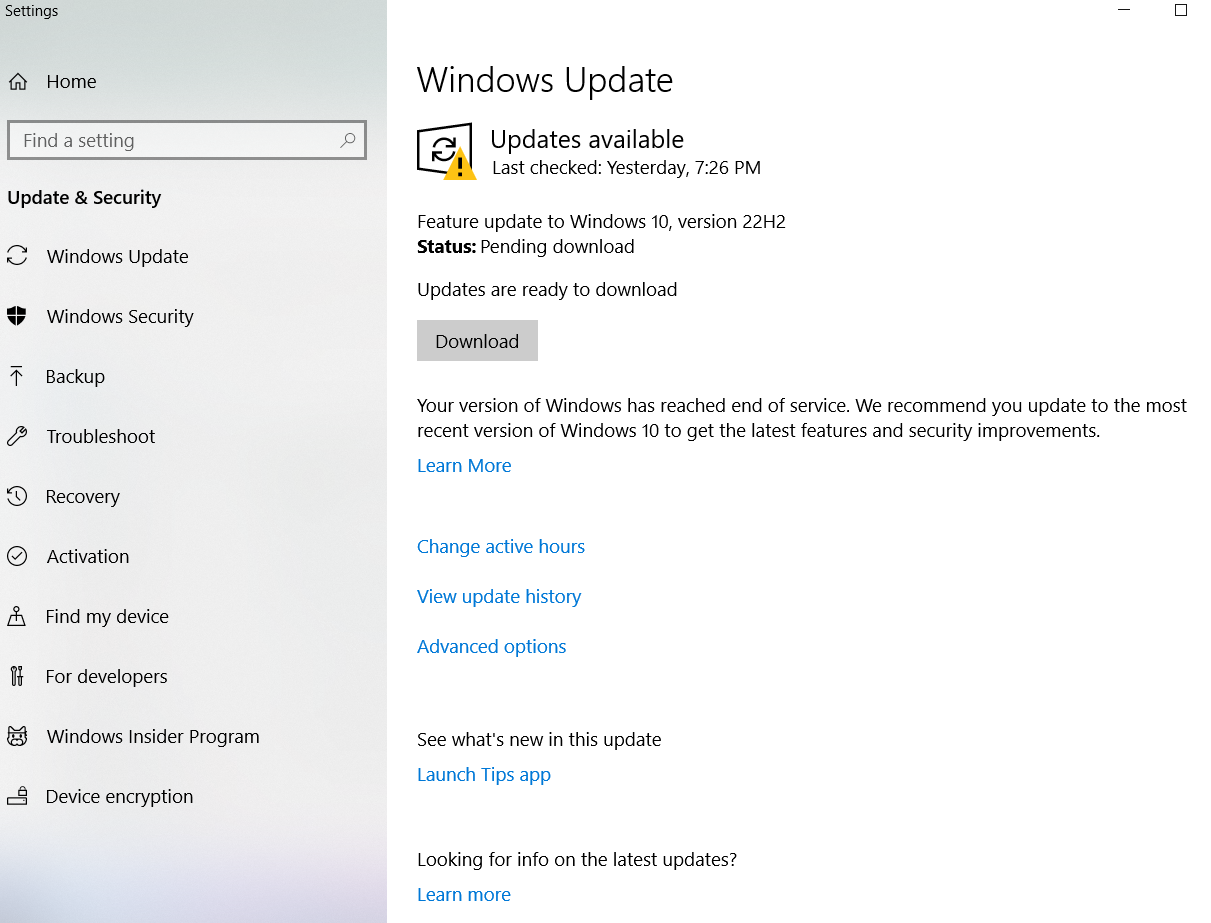
Step 1: Press the Windows + S keys and type “Check for updates” into the search bar. Then, click “Open.”
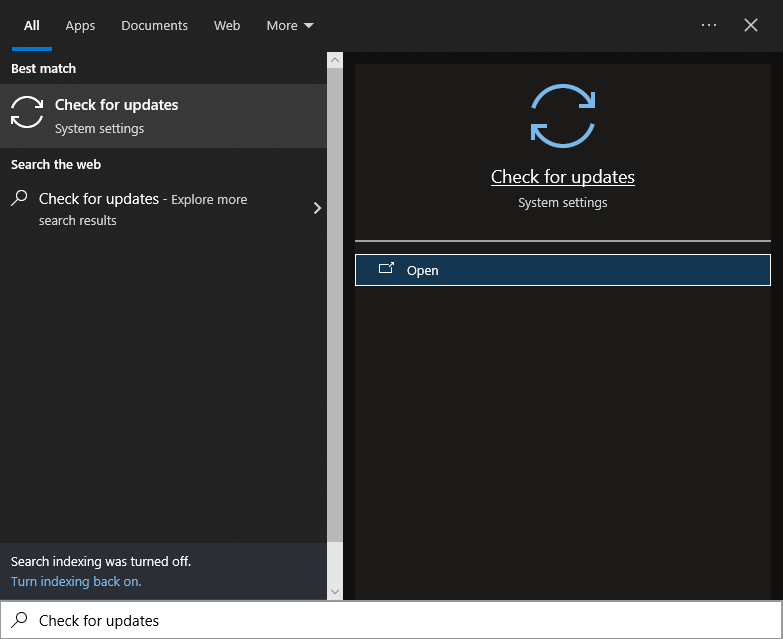
Step 2: On the right side, click “Check for updates” or hit “Download” to get updates. After each update, restart your computer to check if the stop code video_scheduler_internal_error persists.
Solution 4: Uninstall a Recent Update
Sometimes, the latest Windows update you’ve installed can also cause the blue screen video scheduler internal error. That’s because the update could conflict with your software or hardware, or it might have corrupted because something went wrong during the Windows Update. Therefore, to reinstall the update, follow the instructions below:
Step 1: Use the previous method to open the Windows Update window.
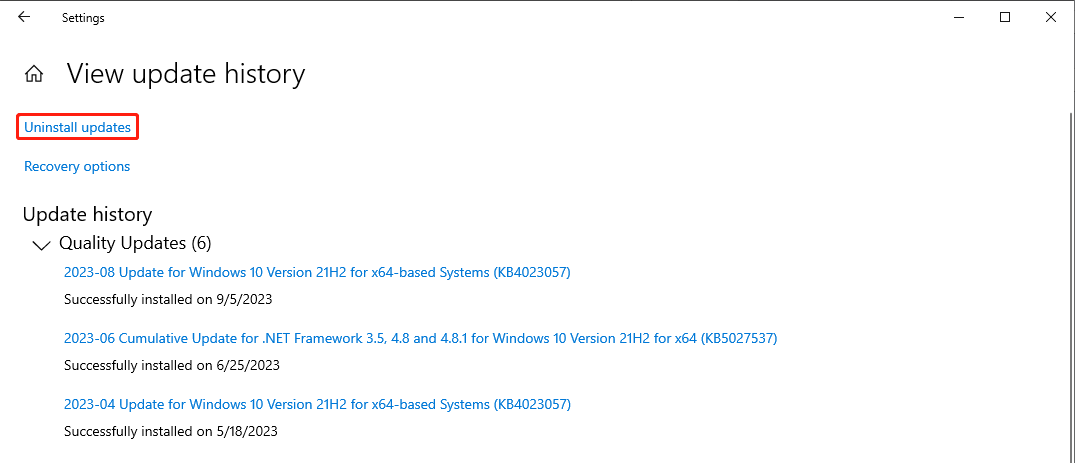
Step 2:Scroll down and click on the “Update history” button.
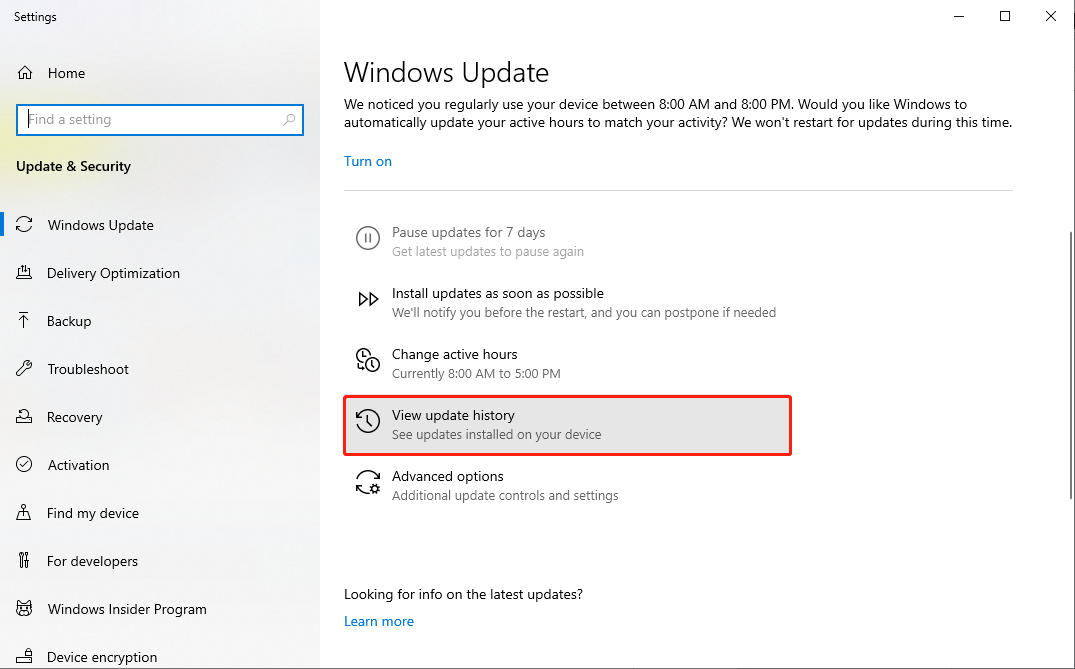
Step 3: Now, select “Uninstall updates,” and you’ll see all the recent updates with timestamps. Click “Uninstall” on the most recent one.
Step 4: Confirm by clicking “Uninstall” in the pop-up window and restart your Windows PC.

Solution 5: Revert to System Restore Point
If you have created a system restore point previously, you can easily revert to it instead. System Restore will move you back to the point where there was no stop code video_scheduler_internal_error. Here’s what to do:
Step 1: Press Windows + R keys and input “rstrui.exe.” Then, hit “Enter” to launch System Restore.

Step 2: Click “Next” in the new window. Then, pick the desired restore point from the list and click “Next.”
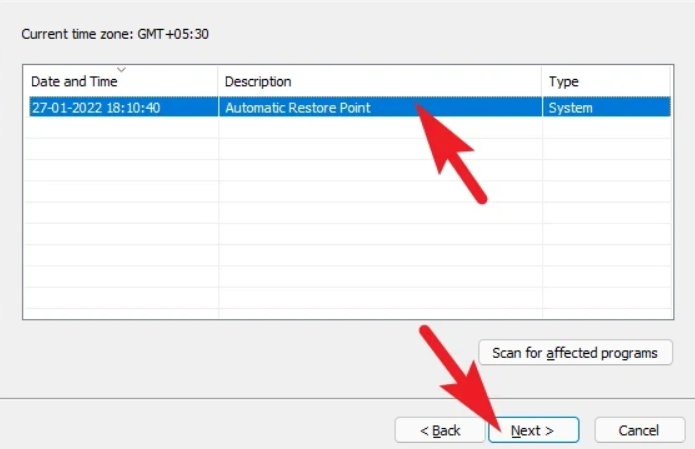
Step 3: Review the affected drives, timestamps, and programs. Click “Finish” to revert to an error-free system.
Solution 6: Reset Your Computer
If not, a single solution fixes the video_scheduler_internal_error; as a last resort, you can reset your computer. It won’t delete your personal data but will wipe out your installed programs and reset settings to default. So, only use this solution as a last gamble. Here’s how to reset your computer to its original configuration:
Step 1: Press the Windows + I keys simultaneously and pick “System.”
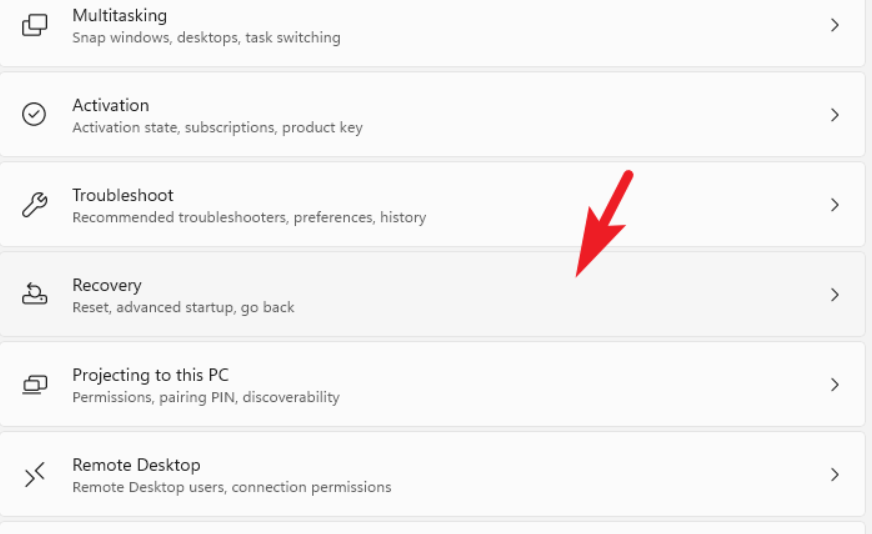
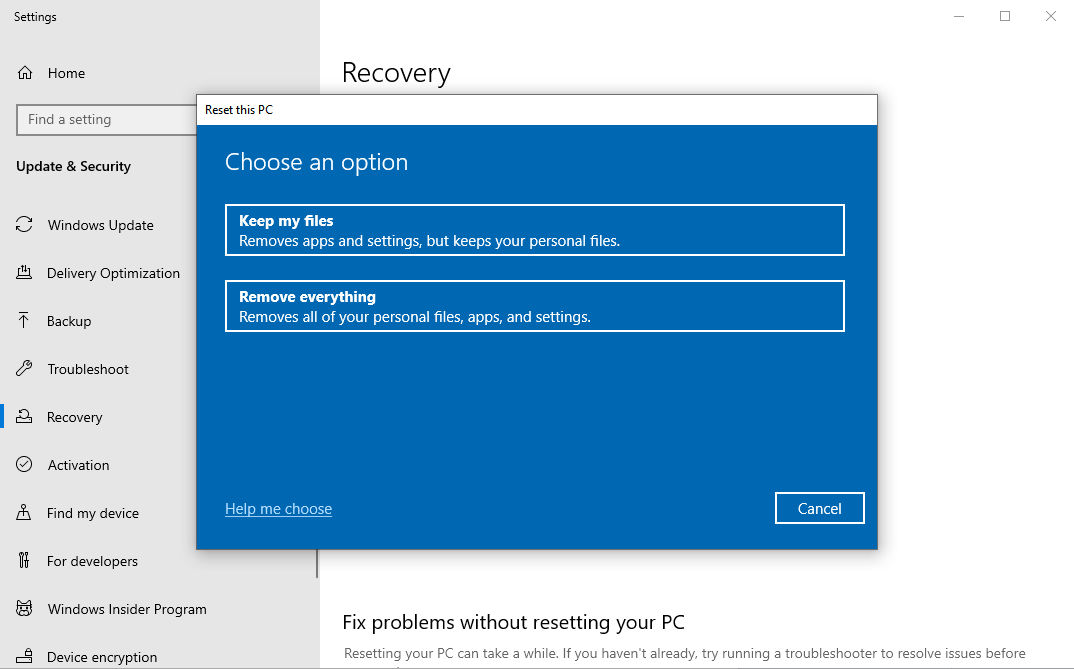
Step 2: Select “Recovery” and click “Get started” under the “Reset this PC” section.
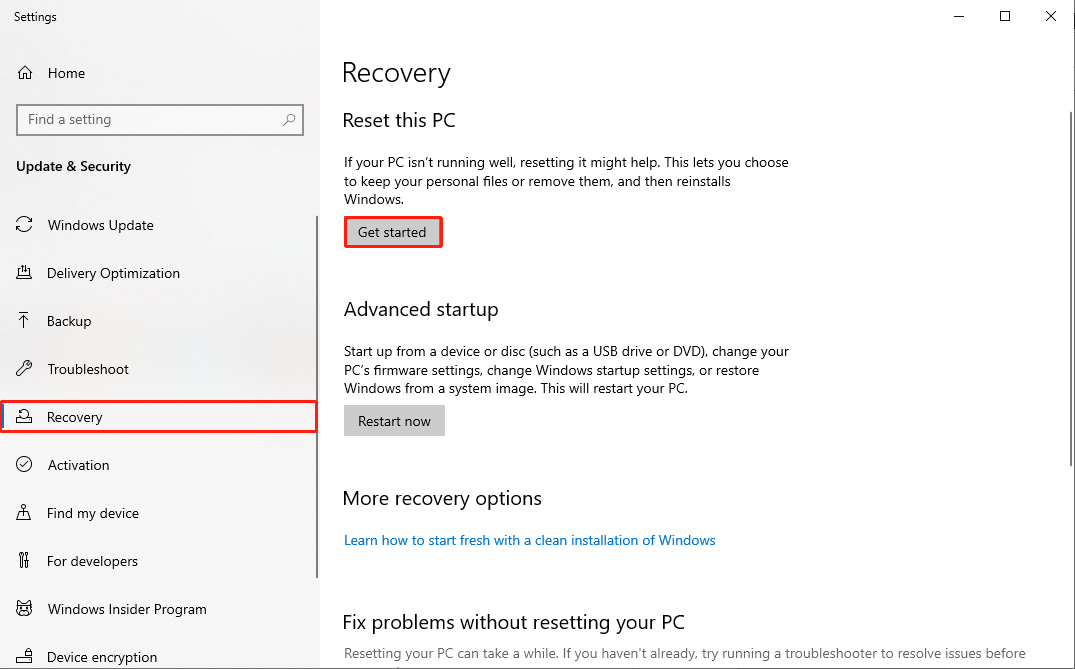
Step 3: In the new window, select “Keep my files” or “Remove everything” if you want to start fresh and delete everything.
Step 4: Follow the on-screen instructions. Your PC will restart a few times. Once done, set up Windows again.
Final Words About Video_Scheduler_Internal_Error
So, there you have it—tackling the video scheduler internal error can be a real headache. However, give each solution a shot, which we’ve mentioned in this article. If all else fails, don’t hesitate to reset your computer as a last resort.
Just remember to safeguard your data before trying any fix to avoid unwanted data loss. For reliable data recovery, turn to 4DDiG Windows Data Recovery. It is your go-to ally for safely and successfully retrieving data, even from the trickiest scenarios like system crashes, critical corruption, deletions, or formatting.
Related FAQs
Q1: What causes a corrupted graphics driver?
Corrupted graphics drivers can be caused by various factors. Here are some common reasons:
- Incorrect driver installation or interrupted installation.
- Corruption of critical system files.
- Incompatibility with other software or OS updates.
- Upgrading or replacing graphics hardware.
Q2: Can RAM cause video scheduler internal error?
Yes, RAM (Random Access Memory) issues can potentially cause a Video Scheduler Internal Error in some cases. While this error is often associated with graphics card or driver problems, faulty RAM can indirectly contribute to system instability, including graphics-related errors. To determine if faulty RAM is the cause of this error, you can perform a memory test.
Q3: What does video scheduler internal error mean when installing drivers?
When you encounter this error while installing drivers, it suggests that there might be a problem with the graphics driver installation process or that the newly installed drivers are incompatible with your system.