Urethane casting, also known as polyurethane casting or vacuum casting, is a widely recognized technique used for economically producing a small number of plastic parts with high precision and great surface finish. This method is commonly used for rapid prototyping, functional testing, and low-volume production, particularly in industries where cost and time-to-market are of the utmost importance. This guide will provide a comprehensive understanding of the urethane casting process, including key concepts, steps, material choices, and applications.
What is Urethane Casting?
Urethane casting is a procedure characterized by forming parts using PU resin poured into a mold made of silicone. Generally, the procedure starts with the making of a master prototype (usually from CNC machining or 3D printing), and that is used to produce flexible silicone mold. The parts will then be cast in a vacuum chamber to ensure that no air bubbles are trapped in the resin cavity of the mold, which provides high-quality and detailed cast parts.
It is a great alternative to injection molding, particularly when low runs or prototypes are desired with a heavy detail and good surface finish. The casting process is capable of using many different materials with different properties- rigid, flexible, clear, or even colored polyurethane.
Advantages of Urethane Casting
Low-cost proposition and no tooling investment. There is no need for a really expensive injection mold in this process, which makes it ideal for low-production runs or prototypes. Silicone molds are easy and cheap to make, and they can be reused many times.
Faster production. The process can produce parts in less than 10 days varied by the level of complexity and volumes. It’s faster than producing parts with injection molding, which is generally cumbersome and entails high costs.
Availability of various materials. It provides a variety of options regarding the materials to use. Polyurethane resins can be either rigid or flexible and you can have clear, opaque, or colored versions too. In addition, special formulations can be provided, for example with high impact resistance or temperature resistance (to 120 °C) or even heat resistance (e.g. UL94-V0 rated materials).
High surface quality. The surface finish is superior compared to 3D printing. The process can reproduce the textures, give either smooth finishes, or even have optical clarity without subsequent surface finishes.
Precision and accuracy. It is capable of achieving tolerances from ±0.05mm, making it appropriate for parts needing tight tolerance. The molds can reproduce intricate details like ribs, undercuts, and fine surface textures.
Step-by-Step Urethane Casting Process
The urethane casting process involves 3 major steps: prototyping, mold making, and casting. We shall now explore the steps in detail.
Prototype Preparation
This is the first step and needs to be of high quality. The prototype is the master model, which will be used to create the silicone mold.
Process: CNC machining is used for producing a master model for parts that need great precision, 3D printing can also be opted for some parts.
Surface finish: To get the necessary surface texture (matte, glossy, or textured finish), the master model undergoes additional treatments such as spraying or sanding.
Silicone Molding
After the prototype is done, the silicone mold is made. Silicone has good flexibility, chemical stability, and easy release from mold. The mold is made under vacuum conditions to avoid air pockets to guarantee a clean and delicate mold. The major steps to make the silicone mold include:
Preparing the prototype: The prototype is placed in a mold box and sealed with tape to create the separation plane.
Mixing the silicone: Liquid silicone rubber is mixed and then air is evacuated to avoid air bubbles. The silicone is then poured around the prototype inside the mold box.
Curing: The mold is cured by heating it on a hot plate for 8-16 hours, at about 40°C depending upon the size of the mold. This process makes the silicone to harden and be ready for the actual part production.
Demolding: After curing, the silicone mold is taken off, leaving a negative impression of the original prototype in the silicone.
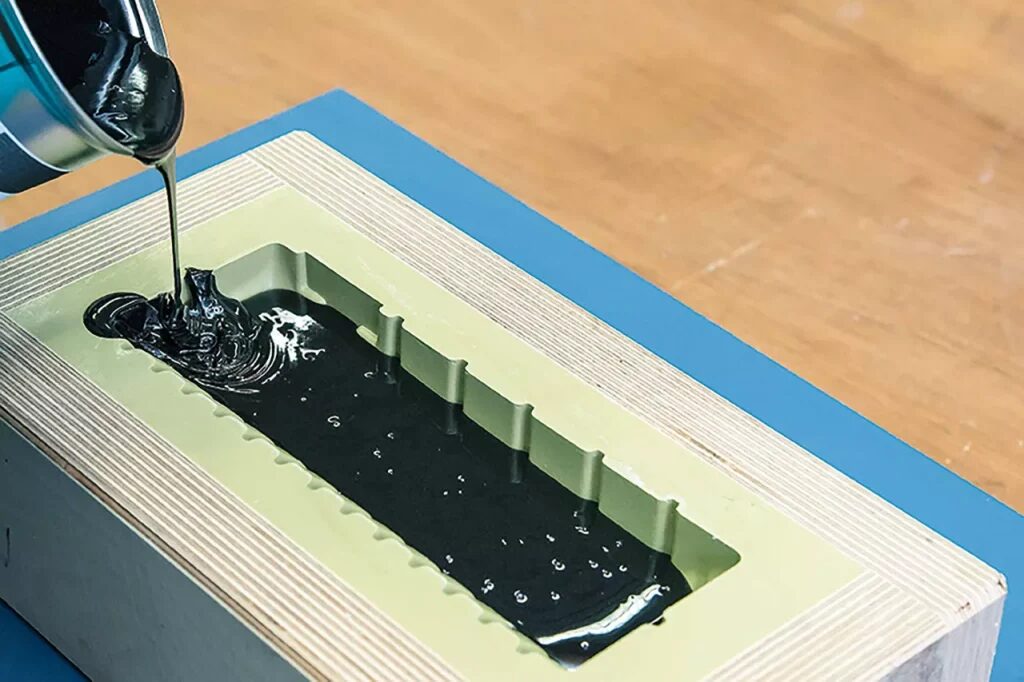
Casting Process
With the silicone mold prepared, the next step is casting. This process mixes the polyurethane resin and pour it into the mold box. The general steps of the casting process includes:
Preparation: The silicone mold is preheated in the oven for 60-70°C, just before pouring the resin. This is recommended to reduce shrinkage and assist in the flow of resin.
Mixing the resin: Polyurethane resin is mixed at certain ratios. Some resins would require preheating to about 40°C before mixing. Carefully mix the resin with any additives, pigments, or fillers.
Degassing: The mixed resin goes under vacuum for about 50-60 seconds to draw out any trapped air to guarantee a bubble-free finish surface on the final parts.
Curing: The curing process is done in an oven with a temperature of 60-70°C. The curing times vary with the size and complexity of the part, typically ranging from 1 to 6 hours. Once cured, the cast parts are removed from the molds with care.
Polyurethane Resins
Material selection is a key step. The exact properties of the resin chosen will determine mechanical properties such as stiffness, flexibility, strength of the resulting cast part. The resins used are varied and indeed numerous. Some of the more frequently met types include the following:
Rigid resins: Resins that emulate engineering plastic properties such as ABS, PMMA, and PC, having high strength and durability for parts requiring structural integrity.
Flexible resins: Resins that emulate rubber or rubber-like materials, used for parts needing flexibility.
Clear resins: For parts requiring optical clarity, such as lenses, covers, or windows.
Colorful and Custom Resins: Any resins can be colored or blended to match a specific design requirement.
Applications of Urethane Casting
The major industries benefit from urethane casting processes, mainly due to their flexibility, and cost-effective benefits. It would be good to clarify some of the common applications:
Rapid prototyping: The process is primarily used for functional prototypes. It allows one to exhibit one’s designs and provides an avenue to quickly test and validate the initial concepts before the capital is spent on expensive injection molding toolings.
Low-volume production: Small-batch production such as parts for consumer electronics, automotive testing, or medical-device parts, is done quickly and easily with the urethane casting process.
Functional testing: It is mostly involved in creating parts for engineering validation or performance testing. This might suit them very well for fit, function, and form testing, as casting may produce parts with special mechanical properties.
Aesthetic models: It is widely used in product design for creating aesthetically accurate models. With an ability to replicate textures, colors, and finishes, it is commonly resorted to for visual presentations, marketing displays, and consumer testing.
Prototyping products: It creates realistic product prototypes for marketing or focus-group testing in industries from electronics, and toys to appliances.
Conclusion
Urethane casting is a highly valuable technique for a manufacturer when looking to produce high-quality, low-volume parts quickly and cost-effectively. With a general understanding of the process and material options in the casting world, manufacturers can explore the complete potential of this amazing process to meet their design and production needs.