Absolutely, Yes. When the bills go up, and the temperature stays down, you likely have hidden
heat leaks. A thermal imaging camera is the best tool for the job—it “sees” the warmth leaving
your home and shows you exactly where to add insulation or sealing, saving you time and
money.
Why Winter is the Best Time to Use a Thermal Imager?
Thermal imaging thrives on temperature contrast. Winter provides the perfect “Delta-T” (the
difference between indoor and outdoor temperatures). When it’s freezing outside and cozy
inside, heat leaks “glow” on a thermal screen. This high contrast makes it incredibly easy to spot
even the tiniest drafts or insulation gaps that would be impossible to find during milder seasons.
4 Common Areas Where Your Home is Losing Heat
When you start scanning, keep a close eye on these four hotspots—this is where most homes
lose the majority of their warmth:
- 1. Windows & Doors: Most people focus on the glass, but the real leaks usually hide in
the edges. Point your camera at the seams where the frame meets the wall. If you see
thin “streaks” of blue, it means the caulking has likely cracked, or the weather stripping
has worn out, allowing icy air to cut right through the seals. - 2. Electrical Outlets & Switches: It’s often a surprise to see cold air “bleeding” out of an
interior outlet. Since these are essentially holes in your drywall, they can pull frigid air
directly from the wall cavities. If you see dark, feather-like plumes on the screen, a
simple foam gasket behind the cover plate is usually the quickest fix. - 3. The Attic Hatch: Because heat naturally rises (known as the “stack effect”), a leaky attic
door acts like a chimney for your warm air. Check the perimeter of the hatch; if the edges
glow dark purple, your expensive heat is being sucked straight into the rafters, forcing
your furnace to work much harder than it should. - 4. Wall Insulation: Look for large, irregular blue patches on your exterior walls that look
like cold shadows. These are clear thermal signatures of “dead spots”—areas where
insulation has settled over the years, was missed during construction, or has been
flattened by hidden moisture.
How to Use a Thermal Imager for Detection?
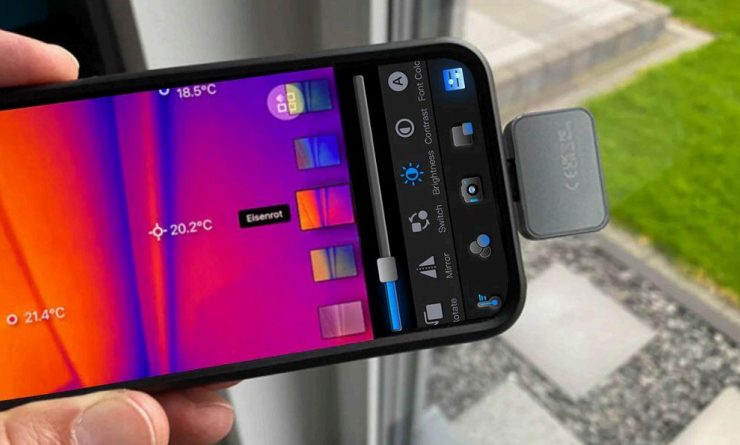
Whether you are plugging a thermal camera into your Android phone or using a handheld
device like the Thor, the process is straightforward. To get the most accurate results, follow
these three steps:
Create Contrast
For the clearest images, turn up your heater 30 minutes before scanning. A temperature
difference of at least 15°F between inside and outside (the “Delta-T”) makes cold leaks “pop” on
the screen in bright blue or purple.
The Strategic Walkthrough
Move slowly from room to room, scanning from floor to ceiling. If you’re using a smartphone
plugin, keep your phone steady. If you’re using a handheld device like the Thor, use its
ergonomic grip to scan those hard-to-reach corners. Focus specifically on “junctions”—where
walls meet floors or ceilings.
Capture Evidence
Snap photos or record short videos of every leak you find. Most devices allow you to save these
images directly to your gallery. Having this visual record helps you remember exactly where to apply caulk or insulation once the audit is finished.
Which Thermal Imaging Camera best detects winter heat
loss?
- Not everyone needs the same tool to fight the winter chill. Depending on your home and where
you’re scanning, here’s how the Thermal Master lineup fits: - The Pocket-Sized Pro: If you want to find obvious drafts around windows or doors
without spending a fortune, the P1 is your best bet. It’s tiny, plugs into your phone, and
the 25Hz frame rate means the image won’t lag while you’re hunting for cold air leaks. - The Deep-Dive Expert: For those seeking clearer images to detect tiny, hidden
“pinhole” leaks, the P3 is an excellent choice. With its 512×384 infrared resolution and
high sensitivity (NETD < 40mk), it can “see” insulation defects or dampness issues
hidden deep within walls. - The Outdoor Rugged: If you’re heading outside to check the roof or exterior walls in
freezing wind, you’ll want the Thor. It’s a sturdy, all-in-one handheld that you can operate
with gloves on.
Conclusion: Winter-Proof Your Home and Save
Finding heat loss is the first step toward a more comfortable home and lower utility bills.
Whether you choose the ultra-portable P1 or the high-precision P3, you’re no longer guessing
where your money is going. Invest in a thermal camera today to winter-proof your home and
keep the warmth exactly where it belongs.