Welcome to the world of 3D printing, where imagination becomes tangible! Whether you’re a hobbyist or an aspiring inventor, owning and operating a 3D printer unlocks endless possibilities. But let’s face it, diving into this revolutionary technology can feel overwhelming at first. Fear not, because today we are breaking down the entire process for you, step by step. From choosing the right materials to perfecting your designs to finally unleashing your creations into reality, get ready to embark on an exhilarating journey that will push the boundaries of innovation. So grab your favorite hot beverage, buckle up, and let’s unravel the secrets behind operating a 3D printer like a pro!
Introduction to 3D Printing
3D printing technology has been around for decades, but it has only recently become more accessible to consumers and small businesses. Also known as additive manufacturing, 3D printing is the process of creating three-dimensional objects from a digital file. The object is built up layer by layer, which makes it possible to create complex shapes that would be difficult or impossible to create with traditional manufacturing techniques.
There are a variety of different 3D printing technologies, but the most common type used by consumers and small businesses is called fused deposition modeling (FDM). FDM printers heat and extrude plastic filament to build up the object layer by layer. Other popular 3D printing technologies include stereolithography (SLA) and selective laser sintering (SLS).
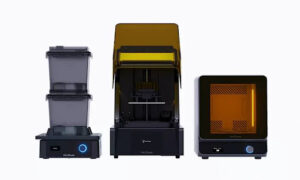
If you’re interested in learning how to operate a 3D printer, the first step is to choose the right printer for your needs. There are many different types and models of 3D printers on the market, so it’s important to do your research before making a purchase. Once you’ve selected a printer, the next step is to learn how to use it. Most manufacturers provide detailed instructions and tutorials on their websites.
Once you have your printer set up and know how to use it, you’ll need to find or create a 3D model file of the object you want to print. Files can be created from scratch using CAD software or downloaded from online repositories such as Thingiverse. Once you have your file
What You Need to Get Started with 3D Printing
If you’re thinking about getting into 3D printing, you’ll need to gather some basic supplies and equipment before you can get started. Here’s a quick rundown of what you’ll need:
a 3D printer. Obviously, this is the most important piece of equipment you’ll need. There are a variety of different types and models of 3D printers available on the market, so do your research to find the one that best suits your needs and budget.
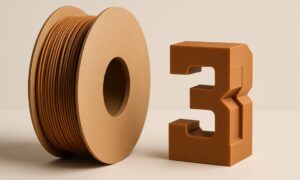
3D printing filament. This is the material that your 3D printer will use to create objects. Filament comes in a variety of colors, materials (such as ABS plastic or biodegradable PLA), and thicknesses (also known as “filament diameter”). Again, do your research to find the type of filament that best suits your needs.
a computer with 3D modeling software installed. You’ll need this software to create the digital models of the objects you want to print. There are many different software programs available, both paid and free. Find one that suits your skill level and needs.
A 3D file format converter This software is used to convert files from one 3D file format to another, which may be necessary if your modeling software doesn’t output files in a format that’s compatible with your printer.
With these basic supplies and equipment, you should be able to get started with 3D printing!
Step-by-Step Instructions for Operating a 3D Printer
Assuming you have a fully assembled 3D printer, the following are detailed instructions on how to operate it:
1) Plug in your 3D printer to an outlet and turn it on using the power switch.
2) Load the filament spool onto the filament holder (if applicable).
3) Load your 3D model file onto your computer. If you do not have a 3D model file, there are many online repositories where you can download one for free (e.g., Thingiverse).
4) Use slicing software to generate G-code from your 3D model file. G-code is the language that tells your 3D printer what movements to make in order to print your object. There are many different slicing software programs available, such as Cura or Slic3r.
5) Once you have generated the G-code file, save it onto an SD card. Most 3D printers have an SD card slot that allows you to insert the SD card directly into the machine.
6) Insert the SD card into your 3D printer and select the “print” command. Your 3D printer will now start printing your object!
Preparing the Printer
Assuming you have a D printer that uses filaments, the first thing you need to do is load the filament. Check your printer’s manual to see how this is done, as it can vary between models.
Next, you need to prep the build plate. This is typically done by applying a thin layer of adhesive to the plate. Once again, consult your printer’s manual for specific instructions.
Now it’s time to connect your computer to the printer. Most printers will use USB, but some newer models may utilize WiFi or Bluetooth. Once your computer is connected, you can start the slicing process.
Slicing is essentially taking your 3D model and breaking it down into 2D layers that the printer can understand. There are a few different software options available for this, but we recommend Cura as it’s free and relatively easy to use.
Once your model is sliced, you’re ready to start printing!
Preparing the STL File
Assuming you have a 3D model ready, the first thing you need to do is prepare the STL file. STL files are the standard file type used by 3D printers, and most modeling software can export to this format. If your file is not in STL format, there are many online converters that can convert common 3D formats (OBJ, STEP, SKP, etc.) into STL.
Once you have your STL file, you need to check it for errors. Most modeling software will automatically generate watertight models, but it’s always good to check just in case. There are many free online STL viewers and editors that can help you check for errors. Simply upload your STL file and look for any areas that are not completely closed off. These areas will show up as holes in the model and will need to be fixed before printing.
Once your model is error-free, it’s time to slice it. Slicing is the process of converting a 3D model into a set of 2D layers that can be printed by a 3D printer. This is typically done with special slicing software, which takes your STL file and generates a G-code file containing instructions for the printer. There are many slicing programs available, both free and paid. We recommend using Cura or Simplify3D for best results.
Once your model is sliced, you’re ready to start printing!
Loading the Filament
Before you can start printing with your 3D printer, you need to load filament into the extruder. This process is usually pretty simple, but it can vary depending on the type of printer you have. Check your printer’s manual for specific instructions. In general, though, you’ll need to:
1. Heat up the extruder. This step is important! If the extruder isn’t hot enough, the filament won’t melt, and it won’t be able to be fed through the nozzle.
2. Load the filament into the loading tube. Make sure that the filament is going in straight and is not getting tangled up.
3. Push the filament through until it comes out of the nozzle. You may need to use a bit of force to get it started, but once it starts flowing, it should go smoothly.
4. If your printer has a built-in cutting tool, use it to cut off the end of the filament so that there’s no excess hanging out. Otherwise, you can just use a pair of scissors to snip it off once it’s been fed all the way through.
And that’s it! Your 3D printer is now ready to start printing objects.
Setting Up the Print Parameters
Assuming you have a 3D model ready to go, the first thing you’ll need to do is set up the print parameters in your slicing software. The specific software and printer you’re using will dictate the exact steps you need to take, but there are some general settings that are worth considering for any print.
The three main parameters you’ll need to set are:
1. Layer height: This is probably the most important setting, as it will directly affect the quality of your print. A smaller layer height means each layer will be thinner, resulting in a smoother surface finish. However, it also means that each print will take longer to complete. For most prints, a layer height of 0.2–0.3 mm is a good starting point.
2. Infill: This setting determines how solid your object will be. A lower infill percentage means there will be more empty space inside your object, making it lighter and less sturdy. For functional objects or parts that need to be strong, a higher infill percentage is usually necessary. 20–30% is a good starting point for most prints.
3. Shell thickness: This setting controls the thickness of the outer walls of your object. A thicker shell will make your object stronger and more resistant to damage, but it will also increase the weight and printing time. 2-3mm is a good starting point for most prints.
Initiating the Print
1. Initiating the print
Now that you have your design ready, it’s time to start printing! The first thing you’ll need to do is load your filament of choice into the printer. Once the filament is loaded, you’ll need to select the print settings that are appropriate for your design and material. Once you have your settings finalized, you can hit the “print” button and watch your printer do its magic!
Post-Printing Care and Maintenance
Assuming your D printer is already assembled and calibrated, you are now ready to start printing! But before you can start churning out prints, it is important to understand the basics of how to operate your machine. This guide will walk you through the process of setting up your D printer, from loading filament to post-printing care and maintenance.
To get started, you will need to load filament into your printer. Most D printers use 1.75 mm PLA or ABS filament, although some use 3 mm filament. Check your printer’s manual to find out what size and type of filament it uses. Once you have the correct filament, insert it into the top of the extruder assembly. Make sure that the filament is feeding smoothly and is not getting tangled. If everything looks good, you are ready to start printing!
Now that your printer is loaded with filament, it’s time to choose a model to print. There are many places to find 3D models online, such as Thingiverse or MyMiniFactory. Once you have found a model that you want to print, download it and save it to an SD card. Insert the SD card into your printer and select the model file that you want to print. The printer will then start heating up the build plate and extruder assembly so that they are ready to start printing.
Once the build plate and extruder assembly have reached the correct temperatures (this will vary depending on what type of filament you are using), the printer will start printing your model. Depending on the size and complexity of the model, it may take several hours for a single print to finish. If you want to check on the status of your print, some printers have a webcam that can be used to monitor the progress remotely.
Once your model is finished printing, remove it from the build plate and let it cool down before touching it. Now that your 3D-printed object is complete, there are still a few things you need to do to ensure that it lasts a long time. To protect the surface of your prints, use a spray sealant such as XTC-3D or Brush-on Clear Coat. This will help prevent scratches and give your prints an extra glossy finish.
Finally, make sure to keep your D printer clean and well-maintained. Every few months, take apart the extruder assembly and check for any blockages or worn parts that need replacing. Also, keep an eye on the filament spool and make sure that it is always full so that you don’t run out mid-print. With regular maintenance and care, your D printer should last for many years!
Conclusion
3D printing has quickly become a popular tool for creating unique and intricate objects. With the right steps, operating a 3D printer is relatively simple and can be done with relative ease. We have provided step-by-step instructions on how to get started with your 3D printer so that you can begin making great projects in no time. Whether you’re just getting started or if you’re experienced in the world of 3D printing, we hope our guide has given you some helpful tips to help make your next project run smoothly. Good luck!