The process of creating an AWS Free Tier Account and getting started with Amazon Web Services (AWS) for free is simple and straightforward. By following a few easy steps, users can access the AWS Free Tier and begin exploring the various services and features available on the platform.
Understanding The Aws Free Tier
Are you looking to explore the powerful features of Amazon Web Services (AWS) without dipping into your wallet? Look no further than the AWS Free Tier. This incredible offering allows you to get started with AWS for free, providing access to a range of services and resources to help you experiment, build applications, and learn more about cloud computing. In this blog post, we’ll delve into the world of the AWS Free Tier, explore its benefits, and discuss the different services and resources that are available under this fantastic program. you can also read the blog on how to buy AWS accounts
Explanation Of The Aws Free Tier
The AWS Free Tier is a program designed to give users free access to certain AWS services and resources. With this program, you can enjoy the benefits of the AWS cloud without any upfront costs. Whether you’re a beginner looking to learn or an experienced developer wanting to try out new services, the AWS Free Tier is the perfect opportunity to get hands-on experience with AWS.
It is important to note that the AWS Free Tier is not a limited-time trial. Rather, it is an ongoing offer that allows you to use certain services within specific usage limits. These limits vary depending on the service and are typically available for the first 12 months after signing up for an AWS account. This means that you can explore and experiment with AWS at your own pace without worrying about unexpected charges.
Benefits Of Using The Aws Free Tier
The AWS Free Tier offers several benefits that make it an attractive option for individuals and businesses alike:
- No upfront costs: With the AWS Free Tier, you don’t have to worry about any upfront costs or commitments. You can start using AWS services without spending a dime, making it an excellent choice for those with tight budgets.
- Hands-on experience: The AWS Free Tier provides an opportunity to gain practical experience with AWS services. By getting hands-on with AWS, you can familiarize yourself with different tools, practices, and infrastructure, enhancing your skills and making you a more competent developer or IT professional.
- Scalable solutions: With the AWS Free Tier, you can explore and test AWS’s highly scalable infrastructure. This allows you to understand how AWS can help you build robust and scalable applications that can handle varying levels of traffic and demand.
- Cost optimization: By using the AWS Free Tier, you can learn to optimize cloud costs by understanding AWS pricing models and choosing the most cost-effective services for your specific needs. This knowledge can be incredibly valuable when you expand your usage beyond the free tier.
- Flexibility: The AWS Free Tier offers a wide range of services, allowing you to experiment with different tools and technologies. This flexibility enables you to explore various AWS offerings and find the best solutions for your specific use cases.
Different Services And Resources Available Under The Aws Free Tier
The AWS Free Tier encompasses numerous services and resources to meet your needs as you explore and experiment with AWS. Some of the services included in the free tier are:
| Category | Services |
| Compute | Amazon EC2 (Elastic Compute Cloud) |
| Storage | Amazon S3 (Simple Storage Service) |
| Database | Amazon RDS (Relational Database Service), Amazon DynamoDB |
| Serverless | AWS Lambda |
| Network | Amazon VPC (Virtual Private Cloud) |
These are just a few examples, and there are many more services available under the AWS Free Tier. Each service has its own specific usage limits, which you can find more information about on the AWS website.
With the AWS Free Tier, you can take advantage of these services and resources to build and deploy applications, learn new skills, and explore the capabilities of the AWS cloud without incurring any charges.
Now that you have a better understanding of the AWS Free Tier, its benefits, and the services and resources available, you can create your free AWS account and dive into the world of cloud computing with confidence.
Creating An Aws Free Tier Account
Welcome to the world of Amazon Web Services! Whether you’re a beginner or an experienced developer, setting up an AWS Free Tier account is the first step towards exploring the vast array of cloud services offered by Amazon. In this step-by-step guide, we will walk you through the process of creating an AWS Free Tier account, ensuring you have all the necessary information, requirements, and security measures in place. Let’s get started!
Step-by-step Guide To Creating An Aws Free Tier Account
Creating an AWS Free Tier account is a straightforward process that can be completed in just a few simple steps. Let’s look at each step in detail:
- Visit the AWS homepage at AWS. amazon. Com and click on the “Create an AWS Account” button.
- You will be redirected to the AWS account creation page. Fill in the necessary information, including your email address, password, and account name. Make sure to choose a strong password and select a unique account name.
- Next, you’ll need to provide your contact information, including your name, address, and phone number. This information is used for account verification and billing purposes. Ensure the accuracy of your details to avoid any complications later on.
- After providing your contact information, you’ll be asked to enter your credit card details. Don’t worry! Although a credit card is required for account verification, you won’t be charged until you exceed the free tier limits. Rest assured that AWS takes data security seriously and employs industry-standard encryption to protect your sensitive information.
- Review your account details and agree to the AWS Customer Agreement and the AWS Service Terms. It’s important to familiarize yourself with these terms as they outline the usage and billing policies for your AWS account.
- Finally, click on the “Create Account and Continue” button. You will receive a verification email at the email address provided during registration.
Registration Process And Requirements
During the registration process, you’ll need to provide accurate information and meet certain requirements to successfully create an AWS Free Tier account. Here’s a summary of the registration process and the requirements:
| Step | Information Required | Requirement |
| Step 1 | Email address, password, account name | Create a unique account name and choose a strong password to secure your account. |
| Step 2 | Contact information (name, address, phone number) | Provide accurate contact information for account verification and billing purposes. |
| Step 3 | Credit card details | A valid credit card is required for account verification, but you won’t be billed unless you exceed the free tier limits. |
| Step 4 | Review and acceptance of AWS Customer Agreement and AWS Service Terms | Familiarize yourself with the terms and agree to the AWS policies for account usage and billing. |
Setting Up Account Security And Authentication
Now that you’ve created your AWS Free Tier account, it’s essential to set up account security and authentication measures to protect your account and maintain control over your resources. Follow these steps to enhance the security of your AWS account:
- Enable multi-factor authentication (MFA) to add an extra layer of security to your account. MFA requires an additional verification method (e.g., a mobile app or hardware device) along with your password.
- Create strong and unique access keys to securely access your AWS resources programmatically.
- Regularly review and update your account permissions and user access controls to ensure only authorized individuals have appropriate privileges.
- Implement strong password policies and avoid sharing your account credentials with anyone.
- Regularly monitor your account activity and enable AWS CloudTrail to capture and track API calls made within your account.
By ensuring these security measures are in place, you can confidently leverage the power of AWS services while keeping your account and resources protected.
Navigating The Aws Management Console
The AWS Management Console is a user-friendly web interface that allows you to access and manage all the services and features offered by Amazon Web Services (AWS). In this section, we will provide an overview of the AWS Management Console, introduce you to the different services and features available, and walk you through the basic navigation and interface.
Overview Of The Aws Management Console
The AWS Management Console serves as your central hub for managing your AWS resources. It provides a unified view of all your services, making it easy to provision, configure, and monitor your resources without the need for complex command-line tools or programming knowledge.
With the AWS Management Console, you can easily create and manage instances, databases, storage, networking, security, and more. It offers a visually intuitive interface that simplifies the process of working with AWS, allowing you to focus on building and deploying your applications.
Introduction To The Different Services And Features Available
One of the key advantages of AWS is its extensive collection of services and features, which are designed to meet a wide range of IT needs. The AWS Management Console gives you access to these services and features, making it easy to scale your infrastructure, store and analyze data, enhance security, deploy applications, and much more.
Some of the popular services available through the AWS Management Console are:
| Service | Description |
| Amazon EC2 | Elastic Compute Cloud provides resizable compute capacity in the cloud. |
| Amazon S3 | Simple Storage Service offers scalable object storage for storing and retrieving any amount of data. |
| Amazon RDS | Relational Database Service offers managed database instances for popular database engines. |
| Amazon CloudFront | A content delivery network that delivers data, videos, applications, and APIs globally with low latency. |
| AWS Lambda | A serverless compute service that runs your code without provisioning or managing servers. |
These are just a few examples of the wide range of services available through the AWS Management Console. Whether you need computing power, storage, databases, network capabilities, analytics tools, or AI services, AWS has you covered.
Basic Navigation And Interface Walkthrough
Now that you have an overview of the AWS Management Console and the services it provides, let’s go through the basic navigation and interface.
- Sign in to the AWS Management Console: Visit the AWS homepage and click on the “Sign In to the Console” button. Enter your AWS account credentials to access the console.
- Dashboard: Once logged in, you will be greeted with the AWS Management Console dashboard. This customizable dashboard provides you with an overview of your resources, services, and recent activities.
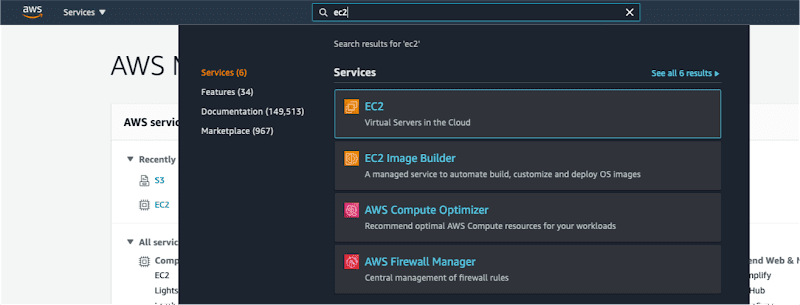
- Services Menu: The services menu, located at the top of the console, allows you to access all the available AWS services. Hover over a category to view the list of services, and click on a service to access its specific console.
- Navigation Pane: The navigation pane, located on the left side of the console, provides quick access to different AWS services and resources. Use the search bar to find specific services or navigate through the available options.
- Resource Management Actions: Depending on the service or resource you are working with, you will find various management actions available in the interface. These actions allow you to create, modify, delete, or perform other operations on your resources.
- Notifications and Support: The top right corner of the AWS Management Console displays notifications, alerts, and support options. You can find useful information, documentation, and access to AWS resources and support channels.
By mastering the basics of navigating the AWS Management Console, you will be well-equipped to leverage the vast array of services and features offered by AWS. Whether you are a developer, IT professional, or business owner, the AWS Management Console provides the tools you need to build, deploy, and scale your applications with ease.
Activating And Utilizing Free Tier Resources
When it comes to getting started with Amazon Web Services (AWS), the Free Tier account is an excellent option for individuals and businesses alike. Activating this account allows you to access a wide range of AWS services and resources at no cost, making it an ideal choice for testing and experimenting with AWS capabilities. In this blog post, we will explore how to activate and utilize the Free Tier resources, as well as provide optimization tips and best practices to help you make the most of your AWS experience.
Activating Free Services And Resources Within The Aws Management Console
To activate free services and resources within the AWS Management Console, simply follow these steps:
- Sign in to your AWS account or create a new one if you haven’t already done so.
- Navigate to the AWS Management Console.
- Click on the “Services” dropdown menu and select the desired service you want to activate.
- Once you have selected the service, you will be prompted to provide any necessary information and configurations.
- After completing the setup, you can start using the service and explore its features and capabilities, all within the free tier limits.
By following these simple steps, you can easily activate and utilize a variety of free services and resources within the AWS Management Console.
Managing And Monitoring Resource Usage
As you begin to leverage the free tier resources, it’s essential to effectively manage and monitor your resource usage to avoid unexpected costs. AWS provides comprehensive tools and services to help you stay on top of your resource utilization. Here are some tips to help you manage and monitor your resource usage:
- Regularly review your AWS billing dashboard to keep track of your resource usage and costs.
- Set up billing alerts to receive notifications when your usage exceeds specific thresholds.
- Use AWS CloudWatch to monitor resource utilization, set alarms, and gain insights into performance metrics.
- Leverage AWS Trusted Advisor, a service that provides recommendations for optimizing your resource usage, cost, and security.
By implementing these practices, you can effectively manage and monitor your resource usage, ensuring that you stay within the free tier limits and avoid any unexpected costs.
Optimization Tips And Best Practices
Optimizing your AWS resources not only helps you stay within the free tier limits but also enhances performance and efficiency. Here are some optimization tips and best practices to consider:
- Right-size your instances and choose the appropriate instance types for your workload.
- Utilize auto-scaling to automatically adjust resources based on demand, optimizing cost and performance.
- Configure Amazon S3 lifecycle policies to automatically transition objects to lower-cost storage classes.
- Leverage Amazon CloudFront to improve content delivery performance and reduce latency.
- Implement security best practices to safeguard your resources and data.
By following these optimization tips and best practices, you can ensure efficient resource utilization and maximize the benefits of the AWS Free Tier account.
Upgrading And Expanding Beyond The Free Tier
Discover how to get started with Amazon Web Services for free by creating an AWS Free Tier account. Upgrade and expand beyond the free tier to unlock more advanced features and capabilities. Transition seamlessly into a paid plan when the time is right for your business.
Understanding The Limitations Of The Aws Free Tier
Before diving into upgrading and expanding your AWS account, it’s important to understand the limitations of the AWS Free Tier. While the Free Tier is a great way to get started with Amazon Web Services at no cost, there are certain restrictions you need to be aware of. By understanding these limitations, you can make informed decisions when it comes to upgrading your account.
- Time limit: The Free Tier is available for new AWS customers for 12 months from the date of account creation. After the 12-month period, you will be billed at standard rates for the services you continue to use.
- Service-specific restrictions: Some AWS services have specific limitations within the Free Tier. For example, with Amazon EC2, you can only use a limited number of instances per month without incurring charges. It’s recommended to review the documentation for each service to understand its limitations.
- Data transfer limits: The Free Tier provides a certain amount of data transfer per month. If you exceed these limits, you will be charged for the additional data transfer.
Steps To Upgrade And Expand Your Aws Account
Once you’re ready to move beyond the Free Tier and take advantage of the full capabilities of Amazon Web Services, upgrading your AWS account is a straightforward process. Here are the steps to get you started:
- Create a billing account: In order to upgrade your AWS account, you’ll need to create a billing account. This involves providing payment information and setting up a payment method for your AWS usage.
- Verify your identity: Once you’ve created a billing account, you’ll need to verify your identity to comply with AWS security measures.
- Choose a support plan: AWS offers different support plans to meet your specific needs. You can select a basic plan or opt for more advanced support options depending on your requirements.
- Upgrade your AWS account: After completing the above steps, you can proceed to upgrade your AWS account. This will give you access to the full range of AWS services and remove the limitations of the Free Tier.
Overview Of Pricing And Billing Options
When upgrading your AWS account, it’s essential to understand the pricing and billing options available. AWS offers various pricing models to cater to different usage patterns and budgets. Here’s a brief overview of the main pricing options:
| Option | Description |
| Pay-As-You-Go | This option allows you to pay for AWS services on an hourly or per usage basis. You only pay for what you use, with no upfront costs or long-term commitments. |
| Savings Plans | With Savings Plans, you can commit to a specific usage amount (measured in dollars per hour) for a term of one or three years. This can result in significant cost savings compared to the Pay-As-You-Go model. |
| Reserved Instances | Reserved Instances provide a discounted pricing option for long-term commitments. You can reserve capacity for one or three years, which can lead to substantial cost savings if you have predictable workloads. |
By familiarizing yourself with these pricing and billing options, you can choose the most cost-effective model for your AWS usage. It’s important to regularly review your account and optimize your resources to ensure you’re getting the best value for your investment.
Frequently Asked Questions On Aws Free Tier Account Creation: How To Get Started With Amazon Web Services For Free
Which Details Are Required When Creating An Aws Free Tier Account?
To create an AWS free tier account, you need to provide simple details such as your name, email address, and a valid credit card.
How Do I Only Use Free Tier Aws?
To use only the free tier of AWS, ensure you select the eligible services, monitor usage closely, and manage cost awareness. Avoid exceeding free tier limits, use cost-control measures, and regularly review your resources. Stick to the free tier offers to avoid unexpected charges and optimize your AWS experience.
Can I Practice Aws For Free?
Yes, you can practice AWS for free. AWS offers a Free Tier with limited usage that allows you to explore and learn their services. This includes various services like EC2, S3, RDS, and more. It’s a great way to get hands-on experience without incurring any costs.
Can You Use Aws Free Tier Without Credit Card?
Yes, you can use the AWS free tier without a credit card.
Conclusion
To sum up, creating an AWS Free Tier Account is a great way to explore the world of Amazon Web Services without incurring any costs. By following the simple steps mentioned in this guide, you can get started with AWS for free and unlock a wide range of powerful cloud-based services.
Whether you’re a developer, a business owner, or an enthusiast, the AWS Free Tier is a valuable resource that allows you to experiment, learn, and innovate without breaking the bank. So, don’t wait any longer – sign up for your AWS Free Tier Account today and embark on your journey towards cloud computing excellence.