When done right, shipping can give your business a competitive edge that sets your online store apart from the rest while providing customers with an upbeat shopping experience.
A smooth and efficient shipping process ensures that your products are delivered promptly and in good condition, which can help build trust and loyalty with your customers. It can also help reduce the number of returns and exchanges and increase the likelihood of positive reviews and word-of-mouth referrals. A dependable and secure shipping experience can drastically reduce customer backlash, lost sales, and damage to your brand reputation.
WooCommerce is an incredibly powerful and user-friendly eCommerce platform that is the perfect choice for small business owners looking to build a professional online store. As per experts doing SEO services in Orlando, WooCommerce sites are well-optimized for search engine visibility and extremely SEO-friendly.
WooCommerce offers a wide range of shipping options and integrations. They integrate with popular shipping carriers to help provide a coherent and efficient shipping experience for your customers. With the help of experienced WooCommerce developers, you can customize your shipping settings to meet your business’s unique needs and choose from various shipping methods and carriers to offer your customers.
By setting up shipping zones, methods, and rates, you can ascertain that your customers receive accurate shipping costs and various shipping options that suit their needs. With features like order tracking and shipping labels, you can streamline the shipping process and save time on order fulfillment. By providing a smooth and reliable shipping experience, you can build customer loyalty, increase sales, and grow your business.
In this blog, we shall discuss setting up WooCommerce shipping in detail.
Common WooCommerce Shipping Methods
Here are some of the most common shipping methods available in WooCommerce:
- Flat Rate Shipping: This method allows you to charge a fixed rate for all orders or each shipping zone. You can set rates based on order total, weight, or the number of items.
- Free Shipping: You can offer free shipping to customers who meet specific criteria, such as a minimum order amount or purchasing particular products.
- Local Pickup: This method allows customers to pick up their orders directly from your store or a designated location.
- International Shipping: You can offer to ship to customers outside your country using various carriers such as UPS, FedEx, or USPS.
- Table Rate Shipping: This method allows you to set up complex shipping rules based on a variety of factors, including weight, destination, and shipping class.
- DHL Shipping: Integrate DHL into your WooCommerce store to provide real-time shipping rates to customers.
- UPS Shipping: You can incorporate your WooCommerce store with UPS and offer real-time shipping rates to customers.
- FedEx Shipping: Furnish real-time shipping rates to customers by collaborating your WooCommerce store with FedEx.
- Flat Rate Box Shipping: This method allows you to charge a fixed rate for shipping products in specific box sizes, such as small, medium, or large.
- Per Item Shipping: You can charge a shipping fee for each item in the order.
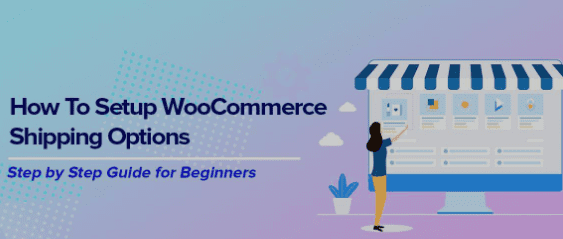
Steps to Implement a WooCommerce Shipping Strategy
Step 1: Install the WooCommerce Shipping Plugin
The first step is to install the WooCommerce Shipping plugin, which is essential for setting up shipping in your online store.
- Log in to your WordPress >Plugins > Add New
- Search for “WooCommerce Shipping” and click on “Install Now”
- Once you finish installing the plugin, click “Activate.”
Step 2: Set Up Shipping Zones
Setting up shipping zones is critical in configuring your WooCommerce store’s shipping options. Shipping zones define the geographic areas to which you offer shipping and allow you to customize the available shipping methods and rates for each zone.
To set up shipping zones in WooCommerce, start by navigating to WooCommerce > Settings > Shipping > Shipping Zones in your WordPress dashboard.
Next, you’ll need to name your new shipping zone and select the geographic region to which it applies. You can also create multiple shipping zones for a single area, such as different zones for different states or countries. Shipping methods determine how you will ship your products to customers in that zone and how much it will cost. You can choose from various shipping methods, including flat rate shipping, free shipping, and live rate shipping, which calculates shipping costs in real-time based on the carrier, destination, and other factors. Additionally, by configuring your shipping settings correctly, you can save time and money by automating the shipping process and avoiding pricey errors.
Step 3: Add Shipping Methods
After setting up shipping zones in WooCommerce, the next step is to add shipping methods. Shipping methods determine how you want to ship your products and how much you want to charge for the service.
To add a new shipping method in WooCommerce, you’ll first need to navigate to WooCommerce > Settings > Shipping > Shipping Zones and click on the shipping zone where you want to add the new method.
Once you’ve selected the shipping method, you’ll need to enter the details for the technique, such as the shipping cost and the title displayed to customers during checkout. The specific information required will depend on the shipping method you’ve chosen.
For example, if you’ve chosen flat-rate shipping, you’ll need to enter the flat-rate shipping cost and the specific title displayed to customers during checkout. You can also choose to add additional costs, such as handling fees, if applicable.
If you’ve chosen free shipping, you’ll simply need to enter the title of the shipping method, as there is no cost associated with this method.
By configuring your shipping methods in WooCommerce, you can offer your customers a range of shipping options and ensure that your shipping costs are accurate and transparent.
Step 4: Configure Shipping Rates
It is possible to establish distinct shipping fees for each shipping method by taking into account factors such as weight, order total, or item quantity. To configure these fees, select the shipping method and click on the “Edit” button. You will then have the option to create varying rates based on specific rules you establish.
Step 5: Enable Shipping Debug Mode
Debug mode allows you to see more information about how shipping rates are calculated and can help troubleshoot any issues that may arise. To enable debug mode, go to WooCommerce > Settings > Shipping > Shipping Options and select “Enable shipping to debug mode.”
Step 6: Set Up Shipping Classes
Shipping classes in WooCommerce allow you to group your products based on their shipping requirements, such as size, weight, or shipping method. By assigning shipping classes to your products, you can ensure that the correct shipping rates are applied during checkout based on the product’s shipping class. To set up a Shipping Class in WooCommerce, you can add a shipping class under Products. You can also provide a detailed description. If the shipping class applies to all products in that class, you can set a cost for the shipping class. It will get added to the shipping rate during checkout and can be done by going to the product edit screen for the product in question and selecting the appropriate shipping class from the dropdown menu in the “Shipping” section.
By using shipping classes in WooCommerce, you can ensure that your customers are charged accurate shipping rates based on the specific requirements of the products they are purchasing.
Step 7: Assign Shipping Classes to Products
Once you have created shipping classes in WooCommerce, you’ll need to assign them to your products so that the appropriate shipping rates are applied during checkout.
To assign a shipping class to a product, you’ll need to navigate to the product edit screen for the product in question. Go to Products > All Products in your WordPress dashboard, and then click on the product you want to edit.
Once you’re on the product edit screen, scroll down to the “Shipping” section, where you’ll see a dropdown menu labeled “Shipping class.” From this menu, select the appropriate shipping class for the product.
If you have not yet created any shipping classes, the dropdown menu will stand empty. In this case, you’ll need to first create the shipping classes by going to WooCommerce > Settings > Shipping > Shipping Classes.
Step 8: Test Your Shipping Settings
Once you’ve set up your shipping zones, methods, and classes, it’s crucial to test your shipping settings to ensure they are working correctly.
To test your shipping settings:
- Add a product to your cart and proceed to checkout.
- Enter a shipping address that matches one of your shipping zones and select a shipping method.
- Ensure the shipping cost is calculated correctly and the correct shipping method is displayed.
Additional Plugins for WooCommerce Shipping
WooCommerce offers built-in shipping functionality, but additional plugins can enhance your shipping capabilities and improve customer experience. Additional plugins can help you deliver a more exhaustive and efficient shipping experience for your customers, leading to higher sales and better customer satisfaction.
Here are five benefits of using additional plugins to set up shipping in WooCommerce:
- More Shipping Options: Additional plugins can offer more shipping options, such as local pickup, scheduled delivery, or carrier-calculated rates, that may not be available in the core WooCommerce platform.
- Better Shipping Rates: Plugins can offer more flexibility in setting up shipping rates based on weight, size, and destination, allowing you to offer more accurate and competitive rates to your customers.
- More Features and Options: Plugins can offer additional features and options for managing shipping, such as batch printing of shipping labels, order tracking, and address validation, which can streamline your shipping process and improve accuracy.
- Easy Updates and Compliance: Plugins can make it easier to stay up-to-date with shipping regulations and carrier requirements, such as adding new shipping carriers or updating shipping labels, to ensure compliance and avoid shipping errors.
- Better Customer Service: Plugins can offer better customer service options, such as real-time tracking, automated shipping notifications, and customer support, which can enhance your customer experience and build loyalty.
Wrapping Up
Setting up shipping in WooCommerce is essential to running an online store. Following the steps outlined in this guide, you can set up shipping zones, methods, and rates that work for your business and your customers. Remember to regularly review and update your shipping setup to ensure that it meets your customer needs and business objectives. Consider using third-party shipping tools and integrations to streamline your shipping process further and improve your shipping capabilities.
By prioritizing shipping and providing a great shipping experience for your customers, you can stand out from your competition, drive more sales, and take your eCommerce business to the next level.