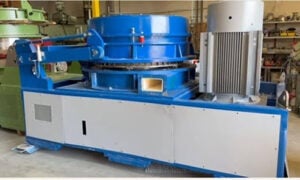
Plastic tool and molding projects or plastic injection molding is a precise manufacturing process where molten resins are injected into a predesigned mold. This process is used in several industries, such as automotive and manufacturing because it is ideal for manufacturing high volumes of plastic products.
Now that you’ve got an idea of what plastic tool and molding manufacturing is, let’s look at the ins and outs of the tools involved in the manufacturing process.
What is Injection Mold?
An injection mold is a custom-machined tool used in the plastic injection molding process to shape molten plastic into finished items. These molds are created by manufacturers for specialized plastic goods.
A two-plate injection mold is the most frequent. Injection molds come in a variety of shapes and sizes. The injection mold (A Plate) and the ejector mold are the two primary components of the two-plate tool (B Plate). These plates are clamped together after being fastened to platens. The parting line is a natural separation or split that occurs when these plates come together to form the injection mold.
Injection Mold (A Plate)
Molten plastic is transported from the injection unit to the injection mold through the injection mold (A Plate). The sprue bushing is the aperture or entry of the injection mold (A Plate). The sprue bushing is connected to the sprue, which serves as a conduit for molten plastic to reach the runners. Runners are tunnels or tubes that connect the sprue to the cavity image’s gates or openings. The molten plastic is guided to the cavity image by runners.
Cavity Image
The cavity image is an empty area within the injection mold that produces the desired plastic product’s shape. Single or numerous cavities can be found in injection molds.
A single impression cavity mold is an injection mold tool with only one cavity image. Multiple impression cavity molds are those that have two or more cavity images. Over a hundred and twenty-eight cavity pictures may be found in certain molds.
The Ejector Mold (B Plate)
The exit point through which the plastic product is expelled from the injection mold is the ejector mold (B Plate). When the plastic product is finished, the clamping unit opens the injection mold by sliding the ejector mold (B Plate) away from the injection mold (A Plate). Circular pins called ejector pins force the plastic product out of the injection mold when the mold opens. Injection molds, of course, leave imprints on the plastic objects they create.
The ejector mold’s (B Plate) walls are tapered to allow the plastic product to eject properly. This is referred to as the draft angle. The plastic product will scrape against the walls of the ejector mold (B Plate) and have difficulty ejecting if there is no draft angle and the walls are 90 degrees. This might harm the mold as well as the molded plastic. The molded plastic is readily evacuated when the walls do not make contact, allowing air to rush in and breach the vacuum seal.
The 3 Step Tooling Process
Plastic tool and molding manufacturing has three distinct system processes that turn molten plastic into the plastic parts you see today.
Process 1: Distribution System
Initially, a shot of molten plastic is injected into the injection unit. The clamping mechanism firmly closes and holds the two parts of the mold together before injection. Only air is contained within the injection mold.
The molten plastic is delivered from the injection unit into the injection mold via a distribution system in the mold. The shot volume, injection pressure, and injection power may all be used to estimate the time required for this system.
The injection unit forces molten plastic down the sprue bushing, down the sprue, through the runners, through the gate, and into the cavity image by applying pressure. The air is driven out of the mold through small vents as the molten plastic fills the hollow picture.
If the trapped air is not released, it will be forced into the cavity image’s corners, causing faults in the plastic product. It can even catch fire and burn the plastic. The viscous molten plastic cannot escape through the air vents.
Because of its tiny size, the gate is the first to harden, preventing molten plastic from flowing into the hollow image.
Process 2: Cooling System
A cooling system is included in the mold to help the plastic solidify faster. The thermodynamic parameters of the plastic, as well as its maximum wall thickness, may be used to predict the time required for this system.
Just below the inner view of the chamber, there are tunnels bored. Hoses are inserted into the tunnels and filled with coolant, usually water, from an external pump. As it passes through the pipes, the coolant absorbs heat from the molten plastic. This maintains the ideal temperature in the mold for the most effective hardening process.
The molten plastic solidifies into its final shape as it cools. Simultaneously, the molten plastic shrinks and adheres firmly to the ejector mold (B Plate). The entire chilling process takes less than a minute.
The molten plastic may bend and break, or it may not eject correctly if it shrinks too much. When constructing an injection mold, shrinkage must be considered, and it is dependent on the amount of plastic utilized.
Process 3: Ejection System
Finally, the injection mold features an ejection mechanism that allows the final plastic object to be removed. The time it takes the injection mold to open, extract the plastic product, and close may be used to determine the time required for this technology.
When the molten plastic has solidified, slowly open the mold to let air in and break the vacuum seal. After that, the ejector mold (B Plate) slips away from the injection mold (A Plate) and ejects the final plastic product with ejector pins. The injection mold leaves permanent imprints on the plastic product. The injection mold is then closed, and the process begins again.
Key Takeaway
The manufacturing of plastic parts and plastic tooling requires a high level of precision to meet the performance and appearance requirements of the end-user. That said, plastic tool and molding projects are an efficient way of producing components at a large scale with minimal labor requirements.
While melting plastic pellets and injecting them into a mold cavity may appear to be a straightforward procedure, there are many crucial parts of the design, tooling, and production processes that will need working with an injection molder that understands how to satisfy your unique requirements.