Managing a studio, gym, or school means juggling classes, instructors, and students. A messy or confusing schedule can lead to missed bookings and frustrated clients. What if you could display a beautiful, interactive, and always-up-to-date timetable on your WordPress site with just a few clicks?
This guide will show you how to do exactly that using the MindFusion Timetable Plugin for WordPress. It’s a powerful tool that integrates directly into the block editor, making schedule management effortless.
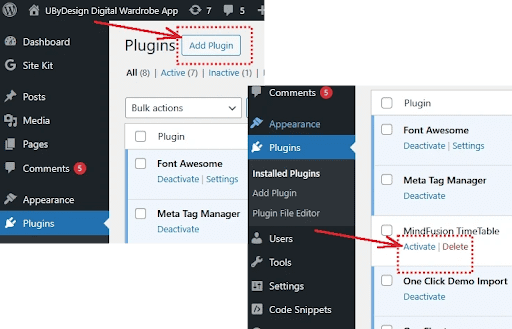
Step 1: Install the Plugin
First, you need to get the plugin.
- Download the free plugin from the official Timetable Plugin page.
- In your WordPress dashboard, go to Plugins -> Add New -> Upload Plugin.
- Choose the downloaded zip file and click Install Now.
- Once installed, click Activate.
Step 2: Add a Timetable to Your Page
Now, navigate to the page where you want to display your schedule (e.g., “Our Classes”).
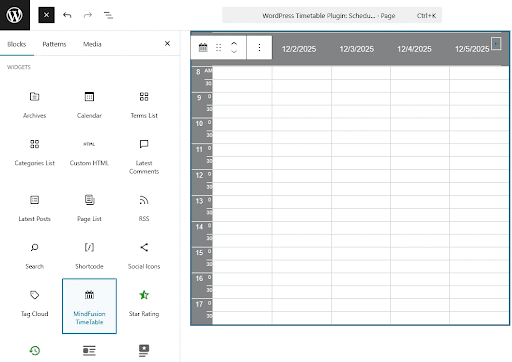
- Click the + icon to add a new block.
- Search for “MindFusion Timetable” and click to add it.
- An empty timetable will appear, ready for your events.
Step 3: Customize Your Schedule’s Look and Feel
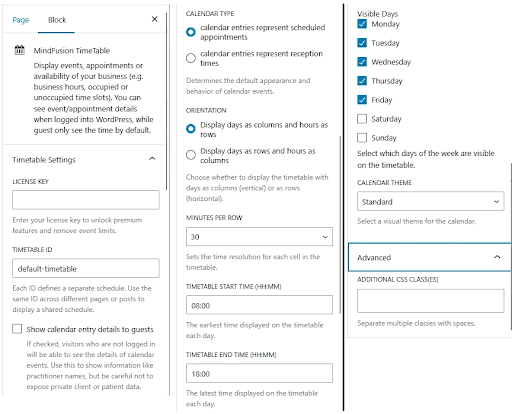
With the timetable block selected, look at the settings panel on the right. Here, you can tailor the schedule to fit your business hours and brand.
* Time Slots: Adjust the intervals to 15, 30, or 60 minutes.
* Visible Days: Only open on weekdays? Hide Saturday and Sunday.
* Themes: Choose from 10 predefined color themes.
Step 4: Draw Your Classes Interactively
Adding classes is refreshingly simple. Once the schedule is on your page, view the live site. As a logged-in user, you’ll see an interactive version of the timetable. To schedule a new event or class, just click and drag your mouse over the desired time block, exactly like you would in Google Calendar or Microsoft Outlook. A popup will appear, letting you fill in the details like contact or event name.
Visitors to your site who are not logged in will see a read-only version of the schedule.

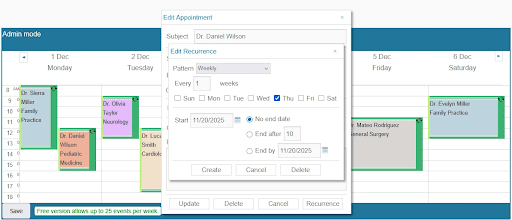
Step 5: Set Up Weekly and Daily Recurrences
For event or classes that happen regularly, you don’t need to add them one by one. When you create an event, the details form gives you powerful recurrence options. While events are for a specific date by default, you can easily set them to repeat daily, weekly, or on custom patterns. Schedule your ‘Vinyasa Flow Yoga’ class once, set it to repeat every Tuesday, and you’re done.
Curious to see the plugin in action? You can explore a variety of live examples on the Timetable Plugin WP page.
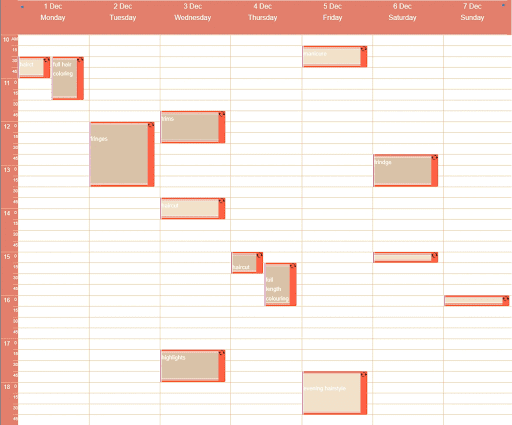
The Result: A Professional, Clear Schedule
In just a few minutes, you’ve transformed a blank page into a dynamic and professional class schedule. Your students can now easily see what’s on, when, and with whom, without any confusion.
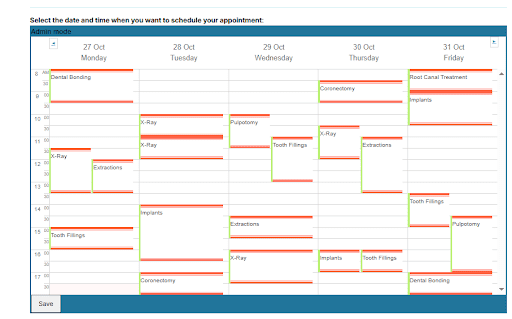
The free version supports up to 25 events per week. If your schedule grows, the Pro version offers unlimited events, removes the watermark, and gives you access to premium support.
By embedding a clear and attractive schedule, you not only improve your website’s functionality but also enhance your clients’ experience, making it easier than ever for them to engage with your business.