For cat owners seeking a more hands-off approach to litter box maintenance, automatic self-cleaning litter box units promise a revolutionary solution. While these technological marvels significantly reduce the daily burden of cat care, many owners discover that “self-cleaning” doesn’t mean “maintenance-free.” The good news? With the right approach, maintaining your automatic litter box can be surprisingly effortless. Whether you’re a busy professional, managing multiple cats, or simply looking to optimize your pet care routine, understanding how to properly maintain your automated system is crucial. This guide will walk you through a streamlined maintenance framework that maximizes your unit’s efficiency while minimizing your time investment. By following these strategic practices, you’ll ensure your automatic litter box continues to deliver the convenience you invested in, keeping both you and your feline friend happy.
Understanding Your Self-Cleaning Litter Box Mechanics
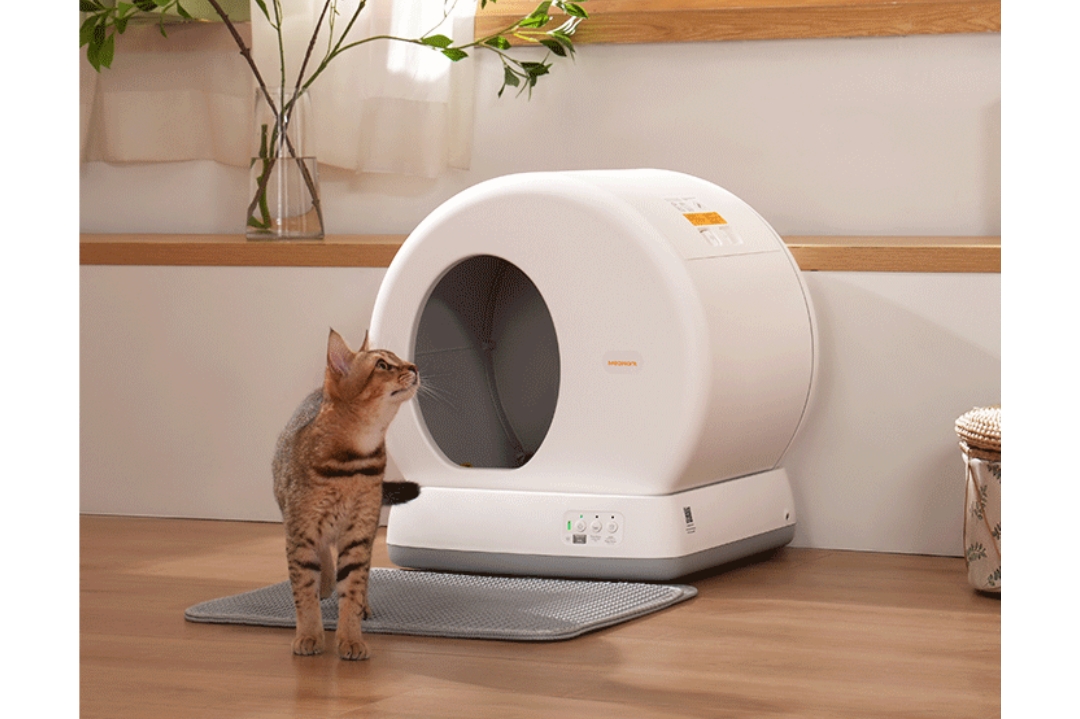
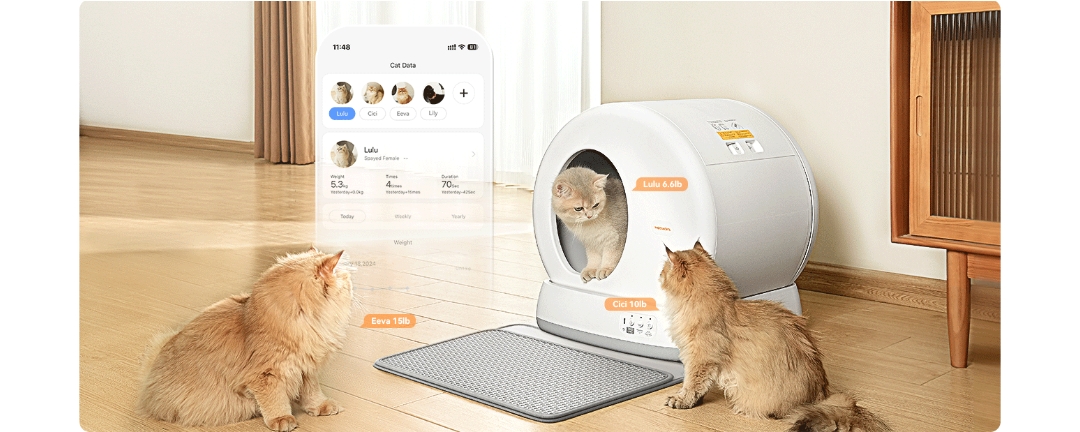
At the heart of every automatic litter box lies a sophisticated system designed to revolutionize pet care. The primary components work in harmony: motion sensors detect your cat’s presence and usage patterns, while precision-engineered rake mechanisms activate after each visit to separate waste from clean litter. The waste compartment, typically equipped with odor-control features, safely stores removed clumps until disposal. Most units, like the Meowant Smart-Clean series, incorporate safety sensors that prevent operation while your cat is present and monitor mechanical resistance during cleaning cycles.
Success with your unit starts with using the right litter type. While traditional boxes accommodate any litter, automatic systems require specific formulations. Most automatic boxes work best with premium clumping litter that forms solid, quick-forming clumps. Some specialized models use crystal litter designed to absorb moisture and control odors more effectively. Using incompatible litter can lead to mechanical issues, sensor malfunctions, and reduced cleaning efficiency.
Essential Daily Habits for Hassle-Free Operation
Quick-Check Routine (30 Seconds)
Start each day with a swift visual inspection of your automatic litter box’s waste drawer capacity. A quick glance helps prevent overflow situations and maintains optimal performance. Use a microfiber cloth to gently wipe down exposed sensors, ensuring reliable cat detection and cycle activation. Verify that litter levels remain within the marked fill lines – this simple check prevents rake strain and ensures proper waste separation. Finally, sweep or vacuum around the unit’s perimeter to capture any scattered litter, maintaining a clean environment that encourages consistent use by your cat.
Optimal Litter Management
When replenishing litter, pour slowly from a consistent height to prevent dust clouds and ensure even distribution. Aim for the manufacturer’s recommended depth, typically marked inside the box, as proper depth directly impacts clump formation and waste removal efficiency. Monitor the quality of waste clumps during the first few cycles after adding fresh litter – they should be firm and well-formed, not crumbly or sticky. If clumps aren’t forming properly, consider switching to a premium clumping litter specifically rated for automatic systems. Different brands offer varying clumping speeds and strength, so experiment within your manufacturer’s approved list to find the optimal match for your unit and climate conditions.
Deep Cleaning Protocols: Weekly & Monthly
Weekly Reset Process
Begin your weekly maintenance by completely emptying the waste compartment, ensuring all corners are clear. Spray the compartment with a pet-safe enzymatic cleaner, letting it sit for 5 minutes to break down residual waste particles. Wipe thoroughly with disposable towels, paying special attention to corners and seams where debris accumulates. Replace the waste compartment liner if your model uses them, ensuring proper positioning to prevent leaks. Check and clean or replace activated carbon filters according to your unit’s schedule – most need monthly replacement for optimal odor control.
Monthly Overhaul Checklist
Once monthly, perform a thorough deep clean by first disconnecting power and completely disassembling your unit according to manufacturer guidelines. Remove the rake mechanism and soak in warm water with mild dish soap for 15 minutes. Use a soft brush to remove any built-up residue, paying special attention to rake tines and pivot points. Clean the base unit with pet-safe disinfectant, avoiding electrical components. Inspect gears and moving parts for wear, applying food-grade lubricant to mechanical components if recommended by your manufacturer. Allow all parts to air dry completely before reassembly – moisture can compromise sensor function and promote bacterial growth. This monthly ritual not only extends your unit’s lifespan but also ensures consistently efficient operation.
Troubleshooting Common Automatic Litter Box Issues
When your automatic litter box shows signs of trouble, quick identification and resolution keep maintenance effortless. For sensor errors, start by cleaning the sensor areas with a dry microfiber cloth – accumulated dust often triggers false readings. If problems persist, check for litter dust buildup inside sensor housings and carefully clean with compressed air. When mechanical jams occur, never force the rake mechanism. Instead, power down the unit, carefully remove excess litter, and inspect for hardened clumps or foreign objects blocking the rake path.
Accessory Optimization: Mats and Liners
Cat Litter Mat Strategies
Position your litter mat to extend at least 12 inches beyond the box exit, creating a natural transition zone that captures scattered litter. Dual-layer mesh mats outperform single-layer options by trapping particles in their honeycomb structure while remaining gentle on sensitive paws. For maximum effectiveness, place larger mats perpendicular to your cat’s typical exit path. When cleaning, simply fold the mat inward to funnel trapped litter back into the box, then vacuum or shake outdoors weekly. Consider waterproof backing to protect flooring from any moisture seepage.
Litter Liners Mastery
Select heavy-duty liners specifically designed for automatic units, ensuring they’re thick enough to resist punctures from mechanical rakes. Install by pressing the liner firmly into corners and securing it under the rim without blocking sensors or moving parts. For added protection, overlap multiple liners so you can quickly remove the top one during weekly maintenance. While manufacturer-branded liners offer guaranteed compatibility, many users find success with high-quality generic alternatives rated for mechanical systems. To prevent tears, maintain proper litter levels and avoid overfilling, which can strain the liner during rake cycles. Consider installing drawer-style liner frames for easier changes if your model permits such modifications.
Maximizing Your Automatic Litter Box Investment
Maintaining an automatic litter box doesn’t have to be a complex endeavor. By implementing the structured maintenance framework outlined above, you can maximize your unit’s efficiency while minimizing your time investment. Remember that success lies in consistency – those quick 30-second daily checks prevent most major issues before they develop. The weekly and monthly routines, while more involved, protect your investment and ensure reliable operation. When problems do arise, you now have the knowledge to quickly diagnose and resolve them, avoiding costly service calls or replacements. Most importantly, you’ve learned how to work smarter, not harder, in maintaining your automatic litter box. Start implementing these practices today, and enjoy the time-saving benefits of a well-maintained automated system that truly delivers on its promise of convenience. Your cats will appreciate the consistently clean environment, and you’ll appreciate the freedom from constant litter box maintenance.