Introduction: Understanding the Urgency of Storm Damage Cleanup
Storms can unleash devastating effects on homes and businesses, leaving behind destruction that ranges from broken windows and roof leaks to downed power lines and flooding. Storm Damage Cleanup is not just a matter of tidying up—it’s a critical recovery process that ensures safety, prevents further damage, and restores normalcy.
This guide provides a comprehensive step-by-step plan for navigating the aftermath of severe weather. We emphasize safety, structural assessment, and effective cleanup, while embedding links to trusted sources for deeper understanding.
Step 1 – Ensure Immediate Safety Before Starting Cleanup
Check for Immediate Hazards
After a storm, your first priority should be personal safety. Assess for:
- Downed power lines
- Gas leaks
- Standing water near electrical outlets
- Structural instability
If any of these are present, evacuate and contact emergency services or your utility provider immediately.
Important: Always assume downed power lines are live. Keep at least 35 feet away and alert your local authorities (source).
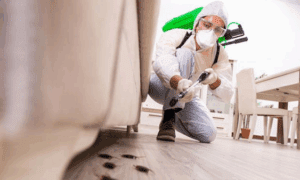
Wear Protective Gear
Before entering the premises, equip yourself with:
- Heavy-duty gloves
- Sturdy boots
- Safety goggles
- N95 respirator (in mold-prone areas)
Step 2 – Document Damage for Insurance Claims
Take Clear Photos and Videos
Documentation is essential before moving or removing anything. Capture:
- Water damage
- Broken furniture or fixtures
- Roof and wall cracks
- Debris inside and outside the home
Contact Your Insurance Provider
File a claim promptly and submit evidence with timestamps. Consider consulting your policy provider’s checklist, such as State Farm’s Storm Recovery Guide.
Step 3 – Secure the Property to Prevent Further Damage
Board Up and Tarp Damaged Areas
Prevent secondary damage by covering broken windows and compromised roofs. Use:
- Plywood sheets
- Weatherproof tarps
- Industrial tape
This temporary measure protects against further rainfall and trespassers.
Shut Off Utilities If Necessary
Turn off:
- Electricity (if standing water is present)
- Gas (if you smell gas)
- Water (to prevent leaks)
Consult your utility company or a licensed contractor if unsure.
Step 4 – Begin Debris Removal and Water Extraction
Remove Hazardous Debris First
Dispose of sharp objects, shattered glass, and fallen tree limbs. Use professional services for large-scale removal. The American Red Cross recommends extreme caution in debris-heavy zones.
Pump Out Standing Water
Use a wet/dry vacuum, sump pump, or call a professional. Mold can begin growing within 24–48 hours, so act fast. Internal damage caused by flooding requires prompt and strategic drying.
Pro Tip: Open windows, use industrial fans and dehumidifiers to accelerate the drying process.
Step 5 – Assess Structural Integrity and Indoor Air Quality
Hire a Certified Building Inspector
If you suspect major structural issues, hire a licensed inspector to evaluate:
- Foundation cracks
- Wall or ceiling sagging
- Roof integrity
For homeowners, websites like HomeAdvisor can help locate trusted professionals.
Test for Mold and Contaminants
Stormwater may contain harmful bacteria or mold spores. Testing air quality and visible surfaces ensures a safe environment.
According to CDC guidelines, discard porous items like drywall or carpets if they’ve been wet for over 48 hours.
Step 6 – Clean and Disinfect Affected Areas
Use EPA-Approved Disinfectants
Clean surfaces thoroughly with bleach-based or antimicrobial solutions. Focus on:
- Floors and baseboards
- Bathrooms and kitchens
- Walls and furniture
Follow EPA recommendations for choosing the right disinfectant.
Salvage or Discard Damaged Items
Sort belongings into:
- Salvageable with cleaning
- Irreparable/dangerous
- Donate or recycle options
Step 7 – Begin Repairs and Long-Term Restoration
Hire Licensed Contractors for Structural Work
Tasks like roofing, plumbing, and electrical repairs must be handled by licensed professionals. Verify credentials via Better Business Bureau.
Internal repairs should not begin until the building is fully dry to avoid trapping moisture in walls or flooring.
Apply for Disaster Assistance
If insurance doesn’t cover all costs, apply for FEMA assistance or local disaster relief programs. Visit DisasterAssistance.gov for more information.
Step 8 – Prevent Future Storm Damage
Invest in Weatherproofing Upgrades
Consider:
- Installing storm shutters
- Elevating utilities above flood level
- Reinforcing garage doors
These upgrades significantly reduce vulnerability to future storms.
Create a Storm Preparedness Plan
Maintain an emergency kit and evacuation plan. Refer to resources such as Ready.gov for detailed guides.
Conclusion: Turning Chaos into Control with a Recovery Plan
Storm damage doesn’t have to mean long-term disruption. With the right step-by-step plan, homeowners can clean up safely, restore order, and rebuild stronger than before. From initial safety checks to final repairs, every action plays a critical role in recovery.
Taking prompt action and using credible resources ensures efficient recovery while minimizing long-term costs. For best results, consult with professionals and leverage platforms offering storm damage cleanup support.