You won’t BELIEVE what’s lurking under the spacebar – Expert cleaner Clare reveals the tricks you’re forgetting
YOUR COMPUTER KEYBOARD IS FILTHIER THAN YOUR TOILET SEAT.
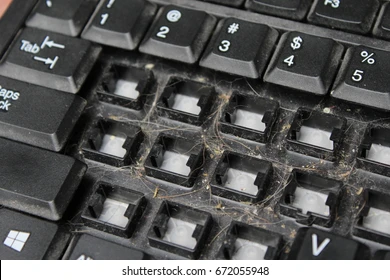
And we’re not just talking about a bit of dust.
Crumbs, hair, grease, and bacteria love to party in the tiny gaps between your keys – and if you haven’t cleaned yours in a while (or ever), now’s the time.
“People tap away on these all day long and never think to clean them,” says Clare, a cleaning expert from UK-based cleaners Bust The Dust.
“But keyboards are one of the grimiest spots in your home – especially if you snack while you work!”
So, what’s the best way to give your keyboard a proper deep clean without wrecking it?
Clare spills her pro tips below – and you don’t need fancy tools.
STEP 1: UNPLUG IT AND SHAKE OUT THE CRUMBS
First thing’s first – turn it off and disconnect it.
If it’s a laptop, shut it down completely.
“You’d be shocked at what falls out just by tipping it upside down,” Clare says.
“I’ve seen everything from toast crumbs to fingernails under there – no joke.”
Gently flip your keyboard over a bin and give it a good shake.
Tap the back lightly and watch the debris rain out.
STEP 2: GRAB A BRUSH – MAKEUP OR PAINT WORKS A TREAT
You don’t need a fancy ‘keyboard vacuum’ – just nick a clean makeup brush or small paintbrush.
“The bristles get right into the edges,” Clare explains.
“Work around each key, sweeping the dust outwards. A soft brush won’t damage anything – just don’t poke!”
A dry, clean toothbrush will also do the job in a pinch.
“I’VE SEEN EVERYTHING FROM TOAST CRUMBS TO FINGERNAILS UNDER THERE.”
— Clare, Bust The Dust
STEP 3: COTTON BUDS FOR THE GRIMY BITS
Once the big stuff’s out, it’s time for the detail work.
“Dip a cotton bud in a little rubbing alcohol – not water – and run it around the edges of each key,” Clare advises.
“It’ll cut through grease and kill off bacteria too.”
Rubbing alcohol dries quickly, so it won’t seep under the keys and damage anything.
STEP 4: WIPE THE TOPS – NOT JUST THE GAPS
Don’t forget the actual keycaps – they’re probably covered in finger grease.
Clare recommends using a microfibre cloth with a spritz of diluted white vinegar or a gentle all-purpose cleaner.
“Never spray directly on the keyboard – always onto the cloth,” she warns.
Wipe gently but firmly, and you’ll be amazed how much muck comes off.
STEP 5: STUBBORN DIRT? USE A BLU-TACK HACK
Got gunk in awkward corners?
“Blu-Tack is brilliant for this,” Clare says.
Roll it into a sticky ball and press it lightly onto the keyboard – it’ll lift out crumbs, hairs, and dust without leaving residue.
“It’s one of my favourite hacks – especially for laptop keys,” she adds.
STEP 6: DEEP CLEAN ONCE A MONTH
Clare recommends giving your keyboard a mini-clean weekly and a proper deep clean at least once a month.
If you’re up for it and know how, you can even pop the keycaps off (on desktop keyboards only!) for a thorough scrub.
“Just be sure to take a photo before you start – putting them back in the wrong order is a nightmare,” Clare laughs.