Have you ever looked at your Phoenix home’s water-stained, crumbling drywall and felt it becomes a bodily manifestation of the damage performed to your sanctuary? The pristine walls, now marred by nature’s relentless forces, may be frightening. But fear now not; with the proper approach and elbow grease, you could breathe new existence into your home’s drywall and reclaim its former glory.
Identifying the Source of Water Damage
Before you can effectively repair water-damaged drywall for your Phoenix home, you must know the foundation’s reason for the problem. Water damage can stem from numerous assets, which include leaky pipes, inadequate air flow, or even natural screw-ups. Addressing the underlying trouble can save you in addition to deterioration and ensure a long-lasting solution.
Evaluating the Extent of the Problem
The extent of the water damage to your Phoenix drywall will decide the technique you’ll need to take. Minor stains and discoloration may require easy patching and portraying procedures, while more excessive damage may necessitate the alternative of entire sections of drywall. Carefully inspect the affected regions and record the volume of the damage to guide your repair method.

Protecting Yourself and Your Home
Safety has to be your top priority while tackling water-damaged drywall. Wear an appropriate personal protective device, including goggles, gloves, and a respirator, to shield yourself from hazards. Additionally, it protects the encompassing regions from dust and debris, ensuring smooth and controlled work surroundings.
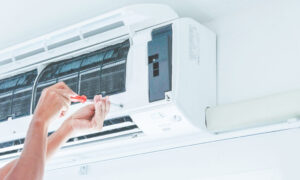
Step-by-Step Phoenix Drywall Repair: Restoring Your Phoenix Home
- Step 1: Assess the Damage
First, a light should be used to inspect the damaged area. Find out the extent of the problems: if they are relatively small, just holes, or about the water. They know what type of damage and repair is needed, thus helping plan the repair method and materials involved.
- Step 2: Gather Materials and Tools
Subsequently, the components and instruments are needed to make the repair work. The mentioned may include joint compound, perforated tape, sandpaper, putty knife, utility knife, and sanding block. Make sure that you draft out a checklist that contains every single repair part and note them down before you start.
- Step 3: Prepare the Area
Before patting the old Phoenix drywall, the rest of the area should be cleared out of dust or old drywall tape falling apart. Firstly, the lousy portion should be free of any dirt and debris. This is crucial to bond the repair materials with the damaged spot properly.
- Step 4: Patch Small Holes and Cracks
For small gaps and fissures, apply a thin layer of paste-like Soapy Surfacing Material using a putty knife to cover the interior. Smooth out all the lumps evenly to ensure the compound is at a level when thoroughly dried. When dry, sand and rub the patched section until it is smoothly leveled with the neighboring wall.
- Step 5: Reinforce Larger Holes
Large holes in drywall are repaired by cutting slightly larger mesh tape than around the damaged area. Place the mesh tape over the hole and cover it with the layer of drywall compound; apply the tape to the area thoroughly. Level off the freeform by patterning it and letting it get dried up completely. After sanding, the patched area should be even with the rest of the wall’s surface.
- Step 6: Apply Multiple Layers if Necessary
It depends on the level of damage. You may apply more than one coat of drywall compound to repair, making it a smooth and level repair overall. Wait until the drying process of each coat is finished before administering the subsequent jacket, and remember to sand the patched area between coats to have an impeccable result.
- Step 7: Prime and Paint
After the patched area has been dried and evened out, prime the patched spot so the paint adheres properly to it. Now that the primer has dried paint the repaired area to match the rest of the wall, and then blend the repair with the rest.
- Step 8: Clean Up
Eventually, clean up and remove any dust or debris from the repair job and put away the excess materials in a safe way. Admire your job and live the restored beauty of your Phoenix home!
Real-World Examples: Successful Drywall Repair in Phoenix
- The Smith Residence
The Smith family in Phoenix, AZ, had a continual plumbing problem that led to widespread water harm in their finished basement. They contacted Professional Home Repair by searching for a drywall repair phoenix in the region to evaluate the damage and develop a restoration plan. The group at Professional Home Repair meticulously eliminated the affected drywall, addressed the underlying plumbing problem, and installed new drywall panels. The result was a remarkably restored basement with no visible signs and symptoms of the previous water damage.
- The Garcia Household
After a severe monsoon storm in Phoenix, the Garcia household experienced significant water intrusion through a damaged roof. The family reached out to Professional Home Repair for assistance. The home repair contractor team near me promptly inspected the damage, repaired the ceiling, and carefully addressed the water-damaged drywall throughout the home. By following a comprehensive repair process, the Professional Home Repair team restored the Garcias’ home to its former condition, preserving the integrity and value of its property.
Conclusion
Restoring water-broken drywall to your Phoenix home is a challenging task. Still, with the correct method and the know-how of home repair contractors, like Professional Home Repair, you may remodel your walls and reclaim the consolation and splendor of your dwelling areas. By addressing the root reason, following a meticulous repair method, and ensuring seamless integration with the prevailing structure, you could bid farewell to the ugly scars and welcome the beautiful, durable walls that define your Phoenix home.