
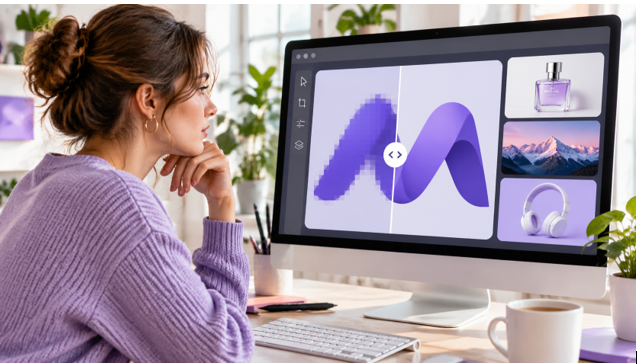
You may have a well-designed logo, banner, or marketing graphic that looks crisp at its original size. But when you resize it for a website, ad, or social media post, the edges can turn blocky and fine details may disappear. Recreating the design from scratch takes time, especially when you are working with a collection of existing assets.
If you need to improve a pixelated graphic, try UniConverter AI Unpixelate Image. For more image and video editing tools on your computer, explore UniConverter and its wider set of features.
Why Digital Graphics Become Pixelated
Pixelation usually appears when an image is used at a size or quality its original file cannot support. Instead of smooth lines and clear textures, you start to see square blocks, jagged edges, or rough details. Common causes include:
- Resizing a small image: enlarging a low-resolution graphic makes its existing pixels more visible.
- Heavy compression: reducing file size for faster loading or sharing can remove fine visual information.
- Repeated editing and saving: exporting, downloading, and re-editing compressed files can gradually reduce quality.
- Low-resolution source files: thumbnails, screenshots, and older downloaded assets may not contain enough detail for a larger layout.
Why Simply Enlarging an Image Doesn’t Fix Pixelation
Increasing an image’s dimensions only spreads the existing pixels across a larger area. It does not restore details that are no longer present in the file. That is why a logo may still look jagged, a product image may appear rough, and small text may remain difficult to read after ordinary resizing.
To improve the result, you need more than a larger canvas. AI depixelation analyzes the visible image structure and can reconstruct plausible details, smooth rough edges, and improve texture. The result depends on the source image, so always check important text, logos, and product features before publishing.
What Should a Good Unpixelation Result Look Like?
A useful result should make the graphic easier to use without changing what it represents. When you review an enhanced image, look for:
- Fewer visible pixel blocks around edges and flat-color areas.
- Smoother outlines without halos or overly soft boundaries.
- Clearer textures and shapes that still match the original design.
- Consistent colors and layout, especially around brand marks, packaging, and text.
AI reconstruction is an estimate, not a recovery of the exact pixels that were lost. If the image contains small legal copy, a logo, a product label, or other details that must remain exact, compare those elements with the original source before you publish.
Unpixelate Images with UniConverter AI Image Enhancer
UniConverter’s Image Enhancer provides an AI-powered desktop workflow for improving image clarity. In the current interface, you can turn on Quality Enhancer and choose Detail (GenAI) for a stronger detail-reconstruction pass, or use Gentle when you want a lighter enhancement. The workspace also includes options such as Face Enhancer and Image Upscaler for other image needs.
For this example, you will use Detail (GenAI) to test a visibly pixelated portrait. The same workflow can help you assess other graphics, but results will vary with the source image and the details it contains.
How to Unpixelate Images with UniConverter
Follow these three steps in the UniConverter desktop app to upload, enhance, and review your image.
Step 1: Open Image Enhancer and Upload Your Image
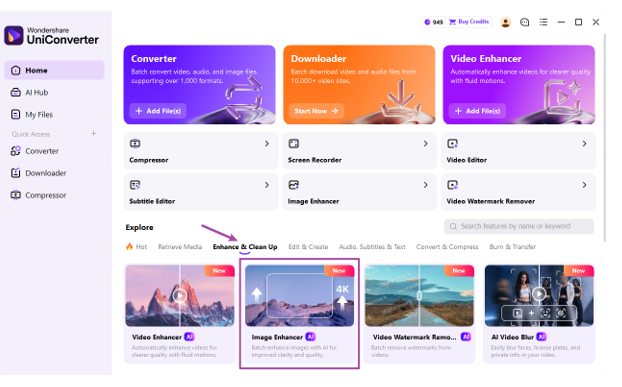
Open UniConverter on your computer. Go to Explore > Enhance & Clean Up > Image Enhancer. In the workspace, click Add Image or drag your file into the upload area. The interface shown here supports JPG, PNG, JPEG, WEBP, and BMP, and allows you to add up to 200 images for batch processing.
Step 2: Choose an AI Enhancement Mode
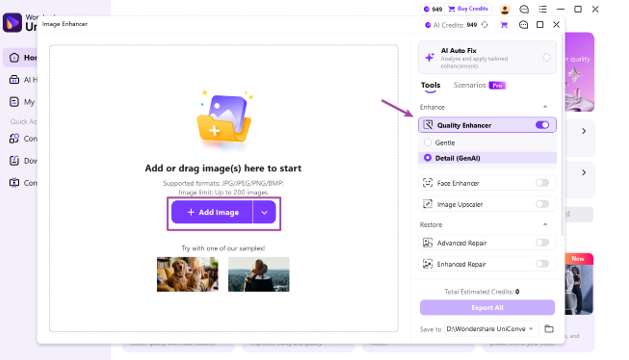
Under Tools > Enhance, switch on Quality Enhancer and select Detail (GenAI) for an image with noticeable pixelation or weakened details. If the graphic only needs a lighter adjustment, try Gentle first. You can also enable Face Enhancer or Image Upscaler when the image needs those specific treatments; they are separate options, not required steps for every unpixelation task.
For logos, banners, and product graphics, pay attention to fine lines, lettering, and edges. A stronger reconstruction may improve the overall appearance, but it can also interpret small details differently from the source.
Step 3: Compare the Result and Export
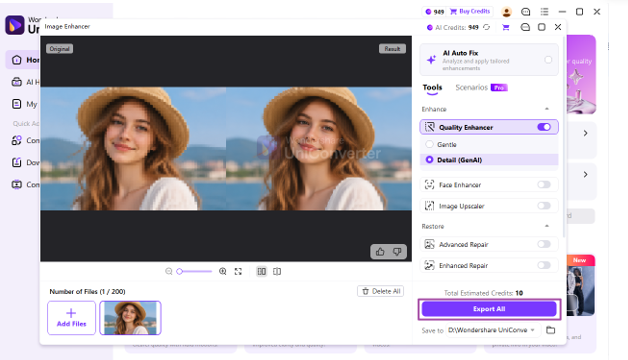
Use the Original and Result views to compare the enhanced image with your source. Check whether blocky edges look smoother and whether colors, shapes, and important details remain consistent. If the result is suitable for your intended use, click Export All to save the enhanced image or batch of images.
Where Clearer Graphics Make a Difference
Pixelation can affect more than photos. It can also make the graphics you use for a brand, store, or campaign look unfinished. These are a few situations where improving image clarity can help.
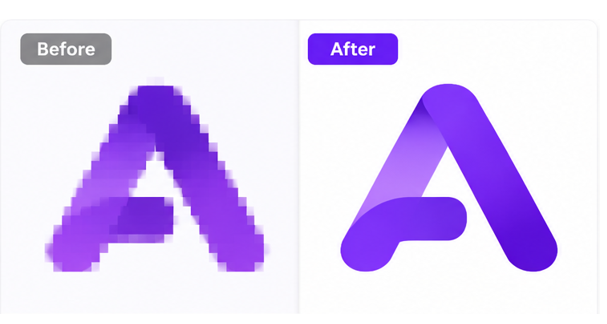
1. Logos and Brand Assets
A small logo may look acceptable in a profile icon but turn jagged when you place it in a larger header, presentation, or printed layout. An AI enhancement pass can help smooth visible edges, but you should compare the result with the original brand artwork to make sure the shape and proportions have not changed.
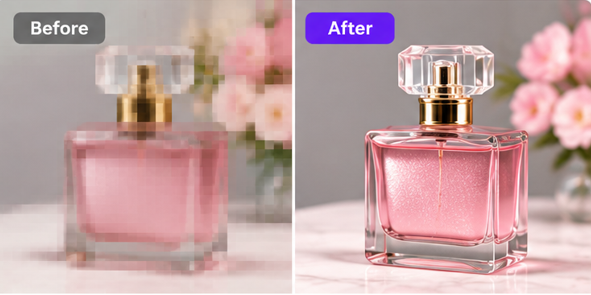
2. E-commerce Product Images
When you reuse a small product image in a larger listing or campaign, packaging edges and material textures may look rough. Improving the image can make the product presentation clearer, but inspect labels, logos, and product details closely. Do not rely on AI-reconstructed text as an exact product specification.
3. Digital Ads and Campaign Banners
Campaign graphics are often resized for different placements, from website banners to social ads. If the source file is too small, text edges, icons, and decorative shapes can become blocky. Use a sufficiently large master file whenever possible, and treat AI enhancement as a way to improve an existing asset—not a substitute for checking the final dimensions and copy.

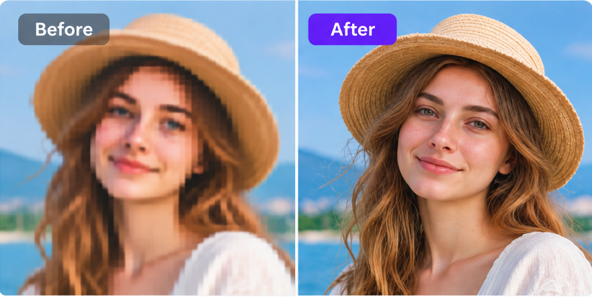
4. Social Media and Reused Content
Images downloaded from older posts, messaging apps, or shared folders may have been compressed more than once. If you want to reuse them in a new post or content package, check faces, hair, and background details after enhancement. The goal is to make the asset more usable while keeping the subject recognizable.
When You Need to Process More Than One Image
If you manage a product catalog or a library of campaign assets, editing each image separately can slow down your workflow. The UniConverter desktop workspace shown in the screenshots supports adding up to 200 images at once. You can apply an enhancement workflow to a group of files and use Export All to save the results together. Review a few representative outputs first, especially when the batch contains different image types or brand assets.
Tips for Better Unpixelation Results
- Start with the best source available. A larger original file gives the AI more visual information to work with.
- Avoid repeated compression. Keep a master copy and export a new working file instead of repeatedly saving over the same compressed image.
- Choose the mode for the problem. Try Gentle for a lighter touch and Detail (GenAI) when the image needs stronger reconstruction.
- Check text and brand details. AI-generated detail may not reproduce tiny lettering or logos exactly.
- Review at the final display size. Check how the image looks in the banner, listing, slide, or post where you plan to use it.
Final Takeaway
Pixelated graphics can weaken an otherwise strong design, especially when you resize or reuse a small source image. Before recreating the asset, try improving its clarity with an AI workflow that can rebuild plausible details and smooth rough edges. With UniConverter Image Enhancer, you can choose Detail (GenAI), compare the result with the original, and process multiple images in the desktop app. Always check text, logos, and product details before publishing.
If you are ready to improve a pixelated graphic, try UniConverter AI Unpixelate Image and explore the desktop tools available in UniConverter.
FAQs
- Can you unpixelate an image without losing its original look?
AI can reduce visible pixelation and reconstruct plausible details, but it cannot guarantee an exact recovery of pixels that were lost. Compare the result with your source, especially around text, logos, and faces.
- Does enlarging an image remove pixelation?
No. Enlarging changes the image dimensions but does not recreate missing detail. It can make existing pixel blocks more noticeable.
- Which image formats does UniConverter support?
The V18 desktop upload interface shown here lists JPG, PNG, JPEG, WEBP, and BMP. Check the current workspace for any updated format requirements.
- Can you enhance multiple images at once?
Yes. The desktop Image Enhancer interface shown in this workflow allows you to add up to 200 images for batch processing and export.
- Is Detail (GenAI) the same as Image Upscaler?
No. Detail (GenAI) is the selected Quality Enhancer mode in this example for stronger detail reconstruction. Image Upscaler is a separate tool option for increasing output resolution.
Read More From Techbullion